How to Save Photos from Viber on iPhone [Full Guide]
Learn how to save photos from Viber to iPhone in two easy ways. Besides, to learn how to transfer photos to your PC, use FoneTool, a reliable iPhone data transfer tool.
Your Viber account may have a lot of precious photos that you want to save to your iPhone's Camera Roll for sharing on other apps. If you receive an important or memorable photo on Viber and don't know how to save it, this guide is for you. Below, we will cover two simple ways to save Viber photos on your iPhone and how to transfer photos to your computer for increased security.
How to Save Photos from Viber on iPhone Derectly
Once you have enabled the correct settings, saving Viber photos directly to Camera Roll on your iPhone is easy. Here is a full guide on how to save pictures from Viber:
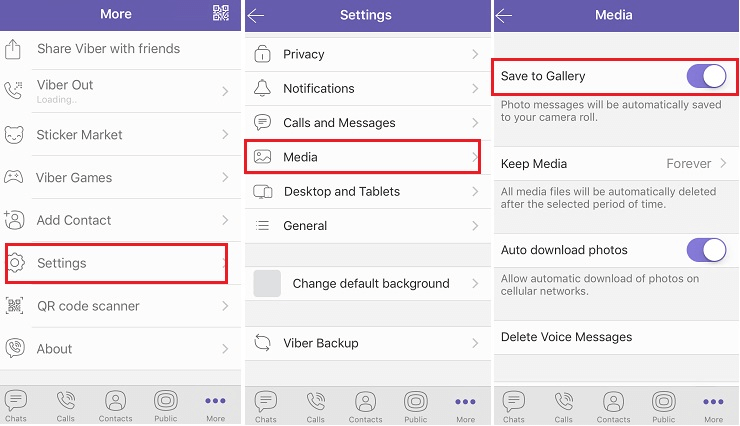
Step 1: Launch the Viber app on your iPhone > Tap the More option from the bottom menu.
Step 2: Go to Settings > Select Media and toggle on the Save to Gallery option.
Step 3: Open the Settings app on your iPhone > Tap Privacy, then Photos > Ensure that Viber has access by turning it ON.
Note: Once these settings are configured, your Viber photos will automatically download to your Camera Roll.
How to Save Photos from Viber on iPhone to PC
For added security, you can download photos from Viber to your computer. This will not only free up space on your iPhone, but it will also ensure that you have a backup in case of data loss. We recommend using FoneTool, a trustworthy iPhone data transfer tool to accomplish this task.
Selective Transfer: Only select the specific photos you want to save, avoid unnecessary data clutter and save space
High-Speed Transfer: Move files quickly without long waits.
Preservation of Quality: 100% keep the original resolution and clarity of your photos.
Backup and Restore: Easily create backups of your entire Viber photo collection and restore them when needed.
Below is how to save Viber photos and videos to PC with FoneTool:
Step 1: Download FoneTool and connect your iPhone 16 to your computer using a USB cable.
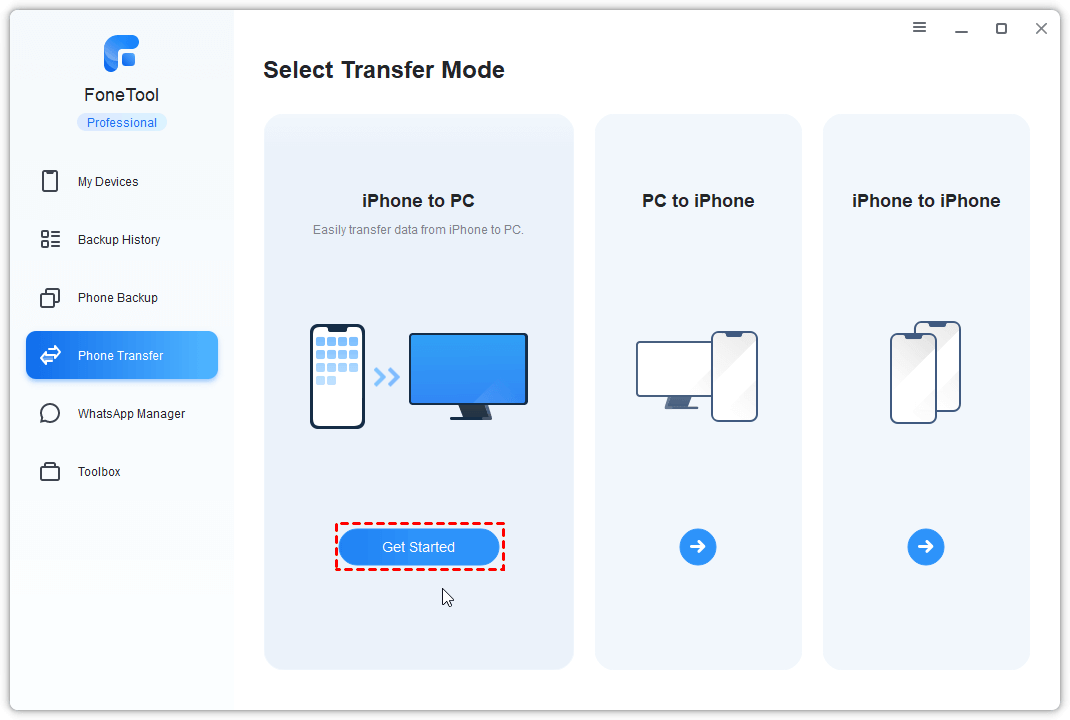
Step 2: Launch FoneTool > Navigate to the Phone Transfer section on the left pane, hover over iPhone to PC, and click Get Started.
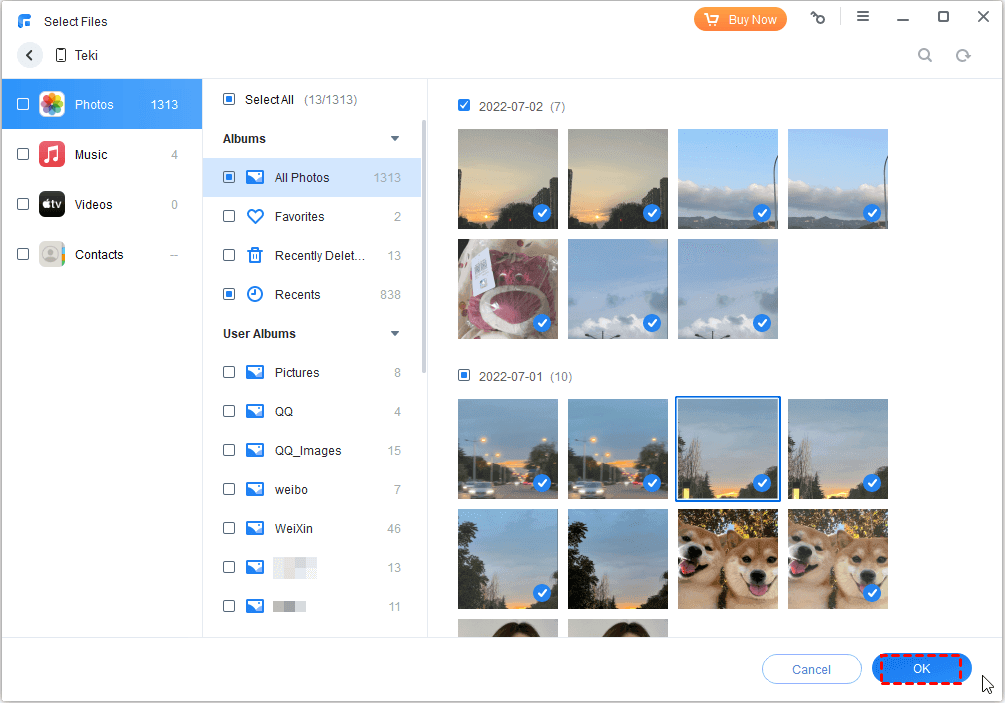
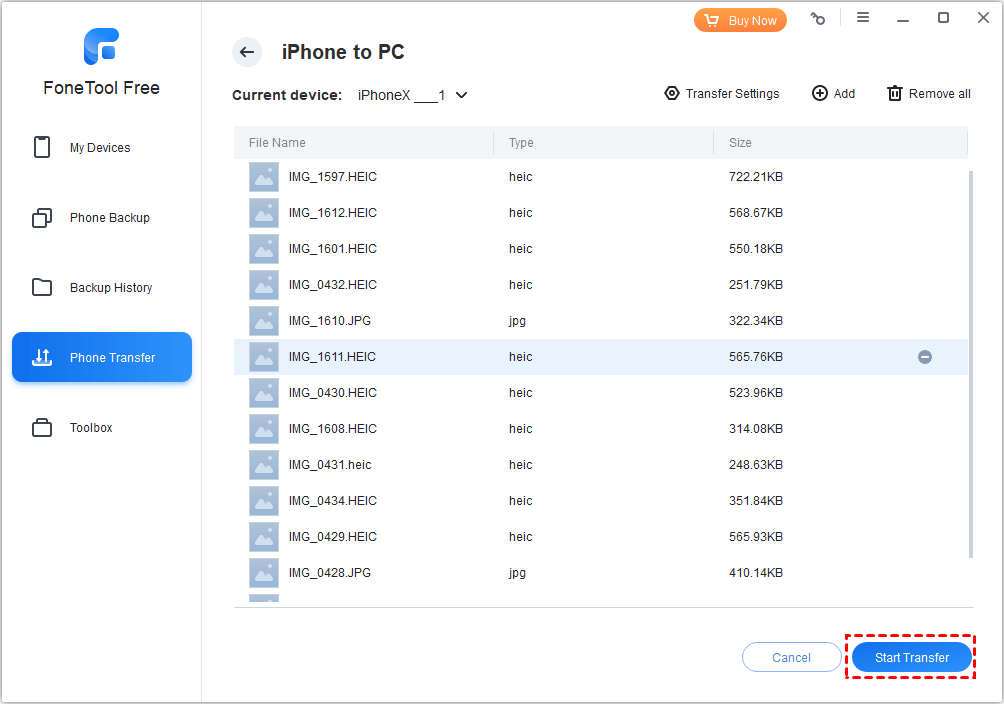
Step 3: Select the Photos or Videos icon. Preview and choose the files you want to transfer, then click OK.
Step 4: Choose the storage location in the Transfer Settings option > Click the Start Transfer button to initiate the process.
Bonus Tip: Why Are My Viber Photos No Longer Available?
If you have a hard time finding your Viber photos or videos, or you encounter a "file not found" error while trying to open them, here are some common reasons for loss:
Software Glitch: A bug in the Viber app or iOS may cause the photos to disappear.
Corrupted Files: A single corrupted file can interrupt access to the gallery, making Viber photos inaccessible.
Accidental Deletion: You or another user might have inadvertently deleted the photos.
Storage Issues: Insufficient storage space or memory card problems can lead to missing photos.
If your Viber photos are missing, recovering or repairing them might require specialized software. Luckily, FoneTool offers the iPhone Data Recovery feature to help you retrieve your lost Viber photos with ease.
The Bottom Line
Saving photos from Viber to iPhone or PC is easy with the right tools and settings. FoneTool not only simplifies the transfer process, it also ensures your data backup and security. Whether you want to make room for your iPhone or protect important memories, this guide can help you.
FAQs About How to Save Viber Photos on iPhone
Here are the answers to some common questions about how to save photos from Viber. Let’s dive in!
Q1: Can I automatically save all Viber photos to my iPhone?
Yes, go to Viber Settings > Media > Save to Gallery and toggle the switch to enable automatic saving.
Q2: Can I save multiple photos from Viber at once on my iPhone?
Viber doesn’t support bulk saving directly. You’ll need to save each photo individually or use a third-party tool.
Q3: Will saving Viber photos to my iPhone reduces their quality?
No, saving Viber photos to your iPhone does not reduce their quality.
FoneTool - All-in-one iPhone Data Manager
Transfer, backup and manage data on iPhone, iPad and iPod touch in an easy way.
-
 iOS 27 Compatible
 iPhone 17 Supported
Windows 11/10/8/8.1/7
100% Secure

May is an editor who is passionate about sharing computer tips and providing reliable solutions, specializing in iOS/Android and file backup and recovery. In her spare time, May enjoys watching movies, going shopping, or chatting with friends.
Read author info >>