How to Move Photos from iPhone to Laptop [Ultimate Guide]
This post will show you how to move photos from iPhone to laptop with USB or wirelessly. Read on to learn four useful ways to import iPhone photos to your laptop in minutes! Let’s have a look!
By May / Updated on March 7, 2024
Why Need to Transfer iPhone Photos to Laptop?
Before discovering the ways how to move photos from iPhone to laptop, there are several common reasons why you need to transfer your iPhone photos to a laptop:
1. Having your photos on your laptop makes it easy to organize, edit, and share them across various platforms and social media.
2. Moving photos to your laptop to free up space on your iPhone can boost your device’s performance and storage capacity.
3. Transferring iPhone photos to a laptop helps you create a backup of your photos, ensuring they are safe and accessible in case of device loss or damage.
How to Move Photos from iPhone to Laptop with USB
This part will show you how to transfer photos from iPhone to laptop using a USB cable. Unlike cloud-based methods, using a USB cable isn’t dependent on an internet connection and incurs additional data charges or cloud storage subscription fees.
Method 1: Transfer Photos from iPhone to Laptop with Professional Tool
One of the easiest and safest ways to move your photos from iPhone to laptop is to use a professional transfer tool such as FoneTool, which is an intuitive iOS data transfer and backup tool for Windows users. With FoneTool, you can efficiently move various file types (such as photos, videos, music, etc.) from your iPhone to a laptop with ease.
Highlights of Using FoneTool to Transfer Photos from iPhone to Laptop:
Selective Transfer: With FoneTool, you can selectively choose the specific photos that you wish to transfer, allowing for a customized and organized photo migration.
Diverse File Transfer: Beyond photos, FoneTool supports the transfer of various file types, including videos, music, songs, and more, enhancing its versatility.
Stable iPhone Connection: FoneTool ensures a smooth and secure connection between the iPhone and laptop via the USB cable, ensuring reliable data transfer.
HEIC to JPEG/PNG Conversion: HEIC Converter enables the conversion of HEIC format photos to JPEG/PNG, enabling seamless viewing on the laptop.
So, how to transfer photos from iPhone to laptop Windows 10 using FoneTool? Follow the simple steps:
Step 1: Free download and install FoneTool on your laptop > Connect your iPhone to the laptop using a USB cable > Launch FoneTool.
Step 2: Once on the Home screen, navigate to Phone Transfer > Choose iPhone to PC > Click the Start Transfer button to initiate the transfer process.
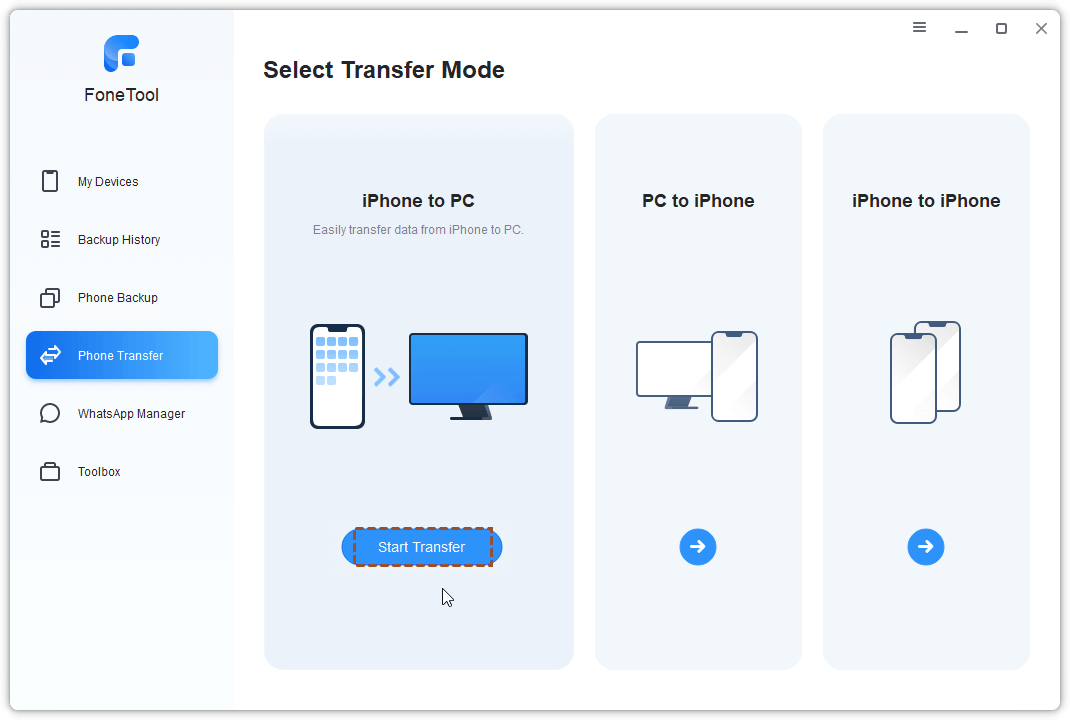
- ★Tip:
- When you need to transfer your photos from laptop to iPhone, you can choose the PC to iPhone transfer mode to make it.
Step 3: Click the "+" icon to specify the photos you wish to transfer > Click OK to confirm the selection.
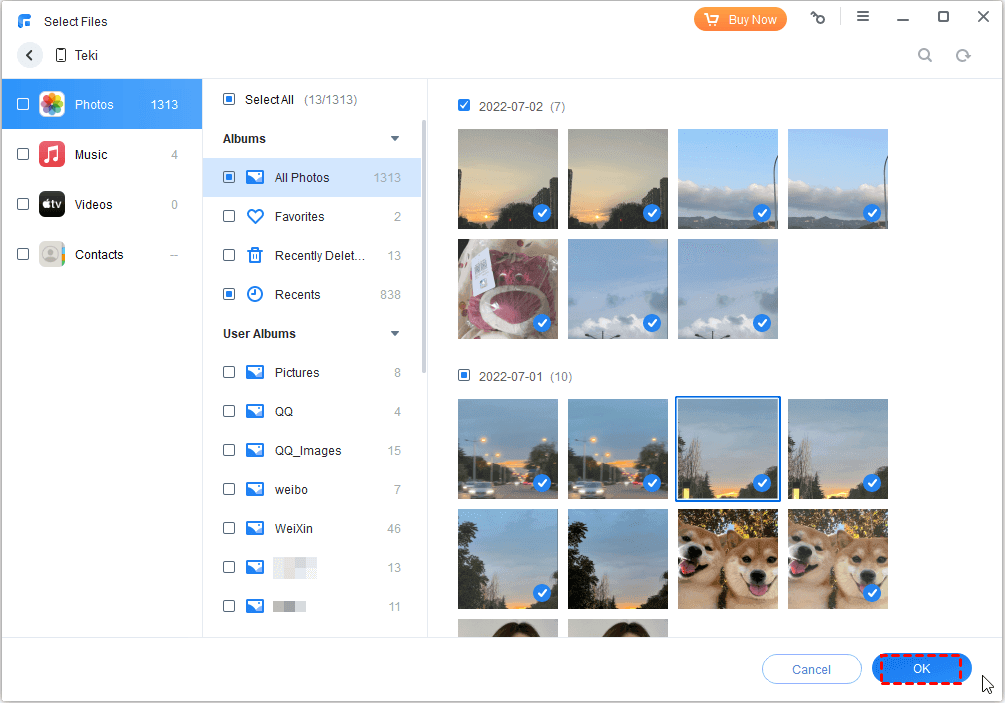
Step 4: Once the desired photos are selected, click the Start Transfer button to transfer photos from iPhone to laptop.
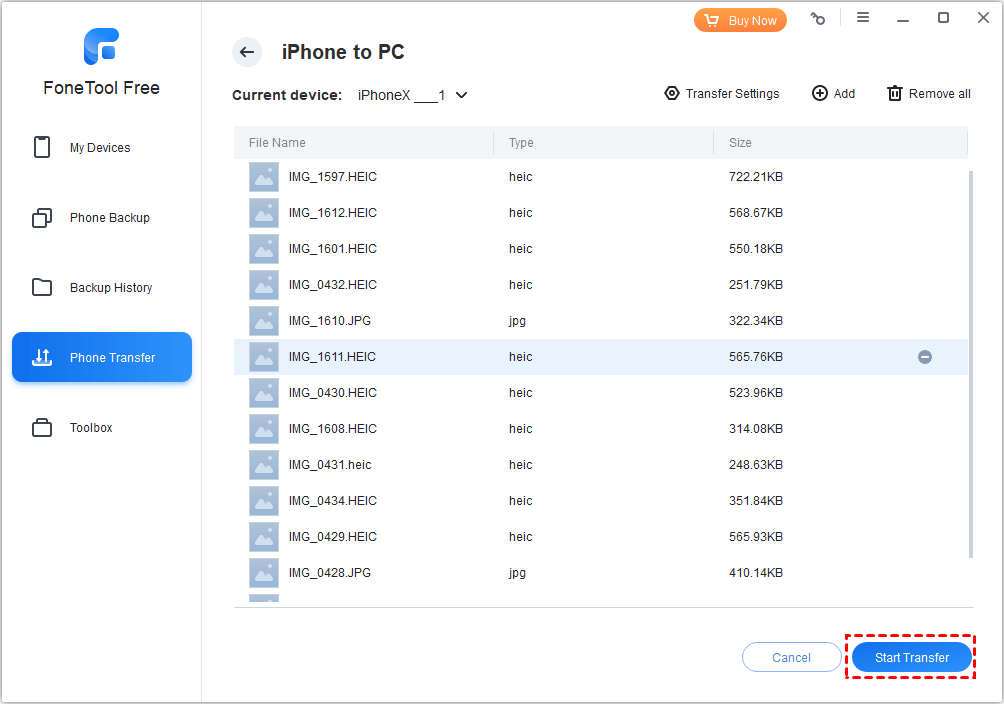
- ★Tip:
- If you want to move photos to a flash drive or external hard drive, you can click the Transfer Settings to choose a local folder to guide you on how to download pictures from iPhone to flash drive.
Once the transfer is complete, you can use FoneTool’s Photo Deduplication Tool to assist you in identifying and removing duplicate photos from both your iPhone and computer.
Method 2: Import Photos from iPhone to Laptop with Photos App
Photos app is a pre-installed photo manager for Windows 11/10/8 designed to facilitate seamless photo and video transfers from the iPhone’s camera roll album. Here is a step-by-step guide on how to transfer photos from iPhone to laptop free using the Photos app:
Step 1: Launch the Photos app on your laptop and connect your iPhone using a suitable USB cable > If prompted, tap Trust on the iPhone screen to proceed.
Step 2: In the Photos app, click the Import icon and choose From a USB device > Give the app some time to detect the photos present on your iPhone.
Step 3: Click Import Settings to configure options such as the destination folder > Select desired photos > Click Import Selected to initiate the transfer of the chosen photos.

How to Transfer Photos from iPhone to Laptop Wirelessly
If you don’t have a USB cable, you can also transfer your photos from your iPhone to the laptop wirelessly. Scroll down for more details!
Method 3: Upload iPhone Photos to Laptop with iCloud Site
iCloud is a great service for iOS users that helps you back up iPhone photos to cloud storage over Wi-Fi. You can then access and download your iPhone photos from your laptop. But it should be noted that each user will get 5GB of storage space for free, and if the space is insufficient, additional storage space can be purchased.
For users with sufficient iCloud storage, follow these simple steps:
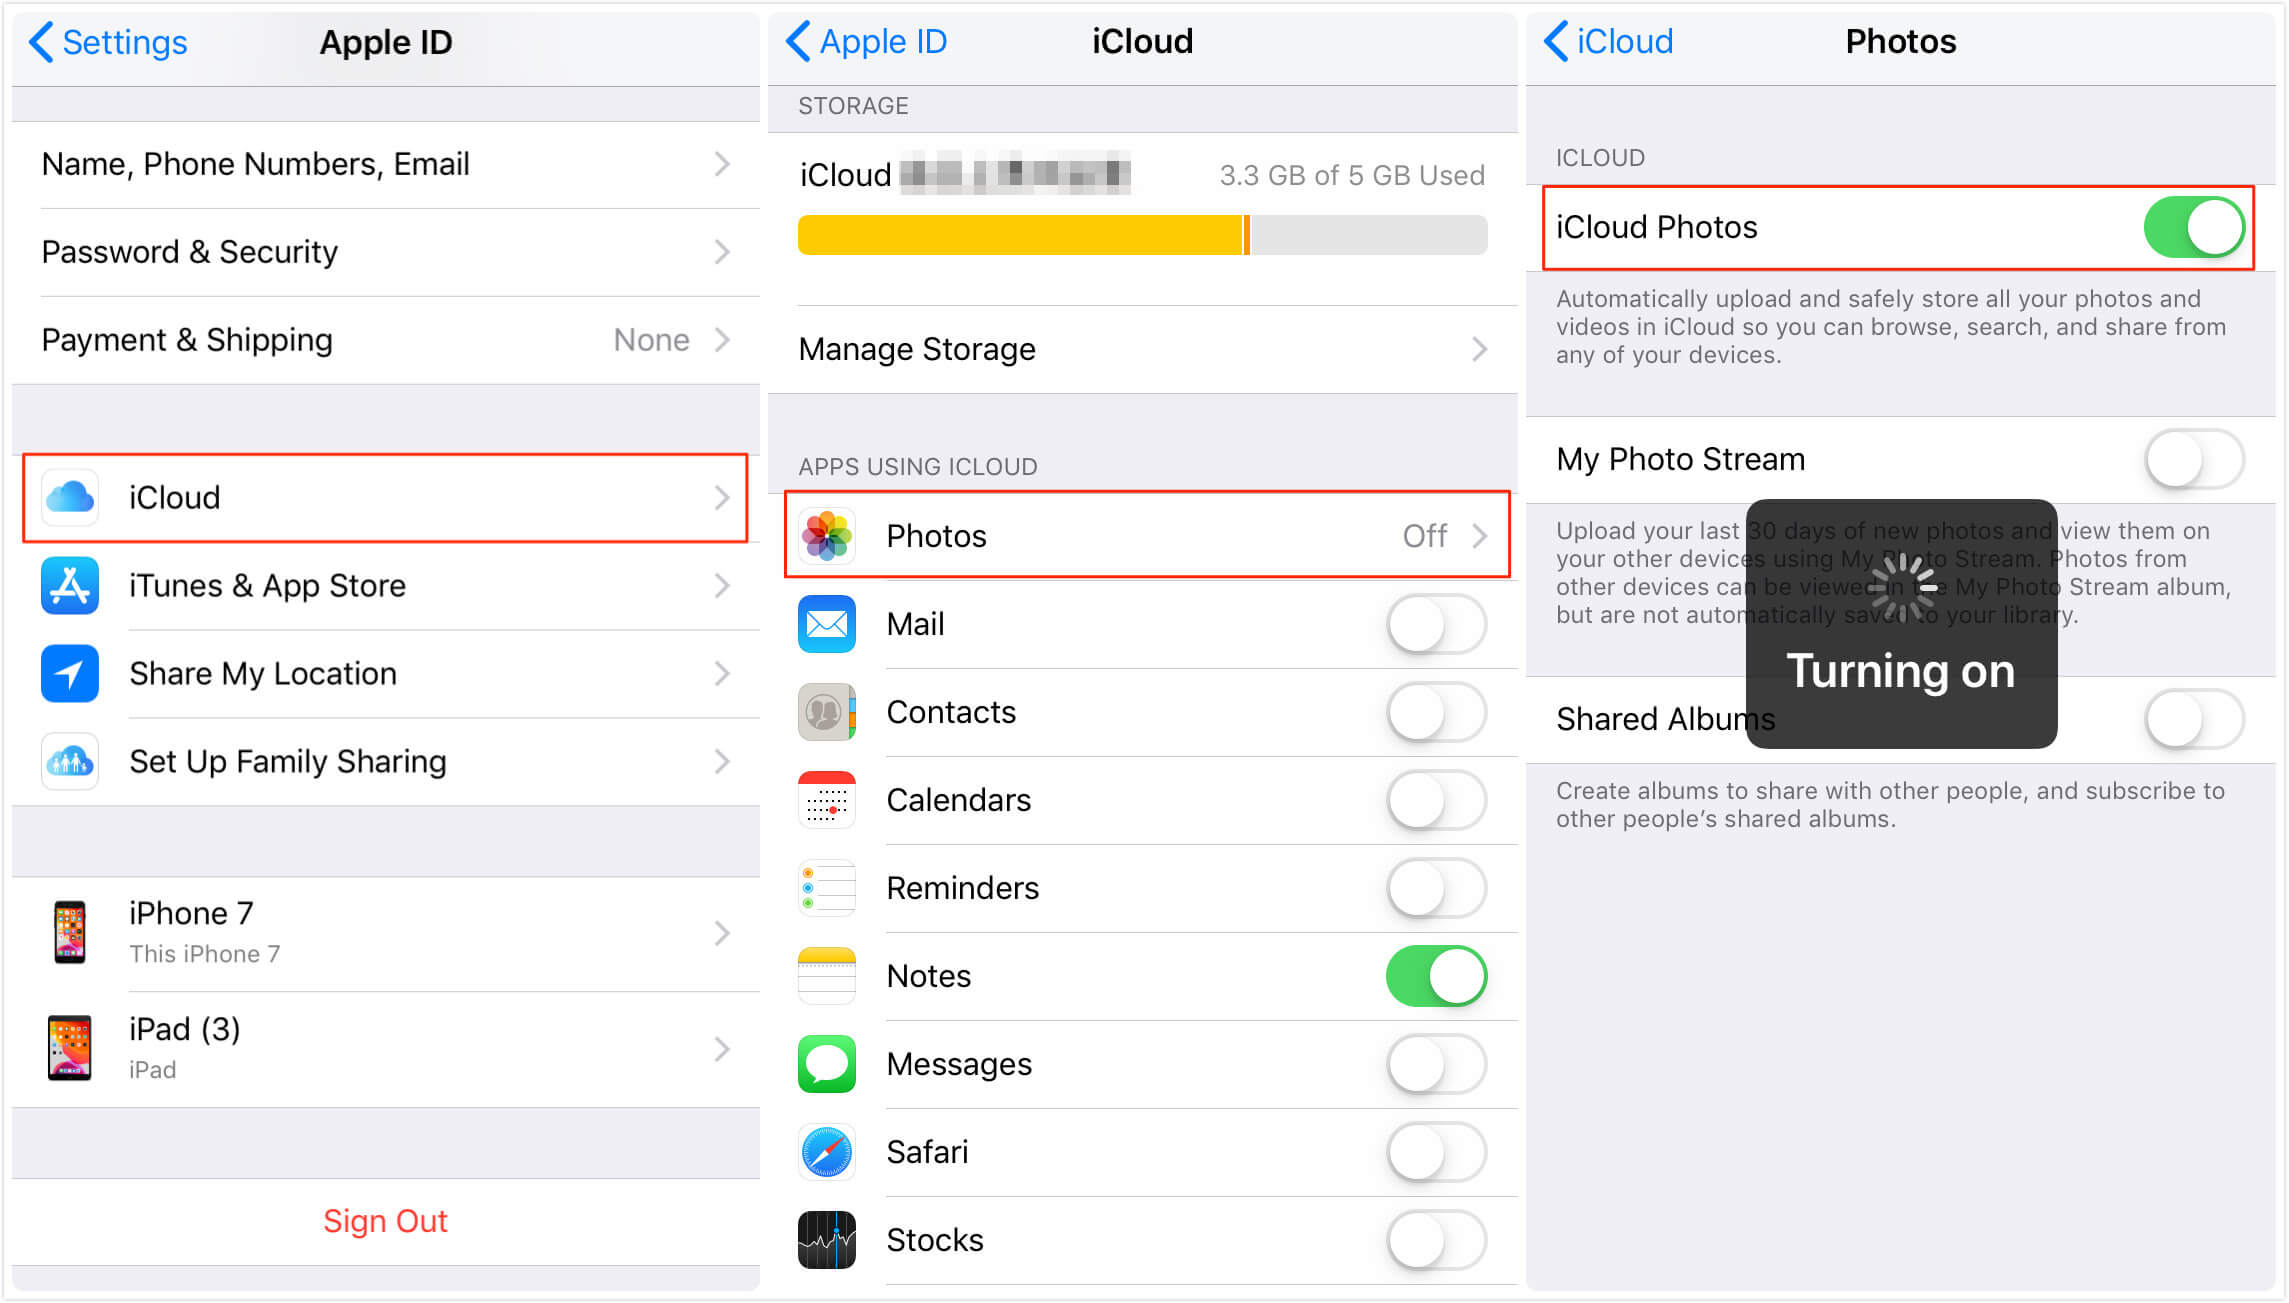
Step 1: Launch the Settings app on your iPhone, tap Apple ID > iCloud > Photos, and then enable the iCloud Photos option.
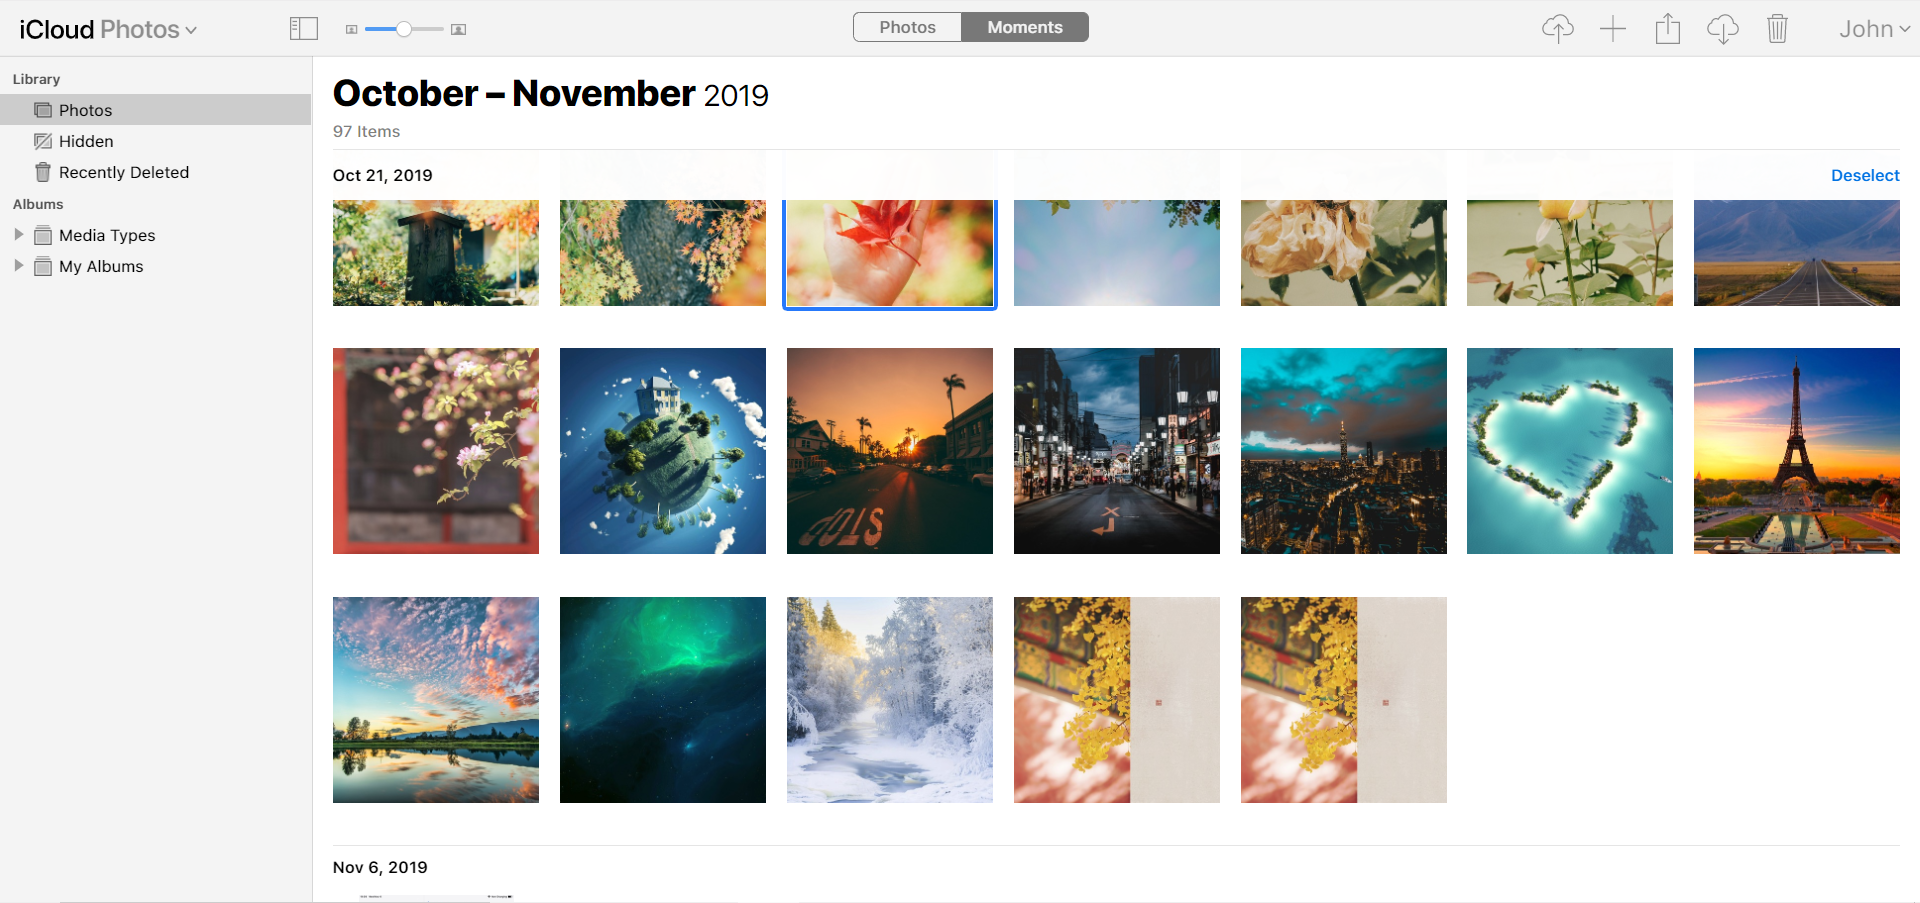
Step 2: Open the browser on your laptop > Go to the iCloud site > Sign in with your Apple ID and password > Click the Photos icon > Select desired photos and click the download button to download them to your laptop.
Method 4: Import Photos from iPhone to Laptop via Google Drive
If your iCloud storage is full, you can make use of other cloud services such as Google Drive. You can first transfer photos from your iPhone to your laptop and then download them from the cloud to your laptop. Here is a full guide on how to transfer photos from iPhone to laptop wirelessly via Google Drive:
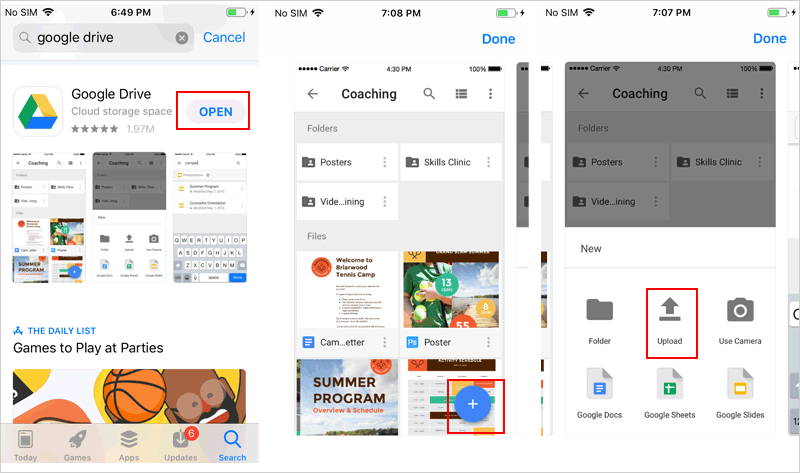
Step 1: First download Google Drive on your iPhone and log in to your Google account.
Step 2: In the Google Drive app, tap the plus icon and select Upload > Select the Photos and Videos option > Select and upload the specific pictures to your Google Drive.
Step 3: Go to the Google Drive website on your laptop > Select and download the photos to your laptop.
The Bottom Line
In conclusion, this guide explains various methods of how to move photos from iPhone to laptop. If you prefer a wireless method, iCloud and Google Drive can provide viable solutions for your photo transfer needs. If you want to transfer your iPhone photos to the laptop, using FoneTool via a USB connection is a convenient option.
FoneTool is an excellent iPhone manager for Windows, which can help you easily manage and move iPhone photos to your laptop and transfer data from one iPhone to another iPhone with one click. Try it out!