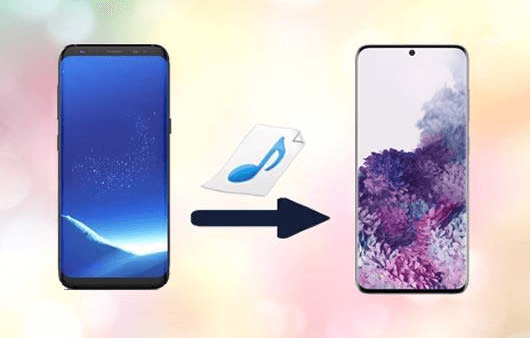
How to Transfer Music from iPad to iPod in 2024 Effortlessly
Discover the latest methods for seamlessly transferring your favorite tunes from your iPad to iPod with ease. Explore step-by-step guides and multiple approaches to ensure a hassle-free music transfer experience in 2024.
Have you ever found yourself with an extensive music library on your iPad and wished to enjoy those tracks on your iPod? Fortunately, in 2024, transferring music between these Apple devices has become more seamless than ever. In this guide, we'll walk you through various methods, each consisting of simple steps, ensuring you can easily transfer your favorite tunes from your iPad to iPod.
How to Transfer Music from iPad to iPod with 5 Methods
Method 1: iTunes Sync
Step 1: Connect your iPad and iPod to your computer using their respective USB cables.
Step 2: Launch iTunes on your computer and ensure it is the latest version.
Step 3: In iTunes, select your connected iPad. Navigate to the "Music" tab and choose the songs you want to transfer.
Step 4: Click on the "Sync" button to initiate the transfer process.
Step 5: Once the sync is complete, disconnect both devices, and your music will be on your iPod.
Method 2: iCloud Music Library
Step 1: On both your iPad and iPod, ensure iCloud Music Library is enabled in the settings.
Step 2: Connect both devices to a stable Wi-Fi network.
Step 3: Open the Music app on your iPad, select the songs you want to transfer, and click on the "Share" icon.
Step 4: Choose the option to add the songs to your iCloud Music Library.
Step 5: Wait for the sync to complete, and your selected music will be available on your iPod.
Method 3: AirDrop
Step 1: Enable Bluetooth and Wi-Fi on both your iPad and iPod.
Step 2: Open the Control Center on your iPad, long-press on the music widget, and tap the "AirDrop" icon. Select your iPod from the available devices.
Step 3: On your iPod, an alert will appear asking if you want to accept the incoming music. Confirm the transfer.
Step 4: Once the transfer is complete, you'll find the music in the designated library on your iPod.
Method 4: Third-Party Apps
Step 1: Download and install a reputable third-party transfer app from the App Store on both your iPad and iPod.
Step 2: Open the app on both devices and follow the on-screen instructions to establish a connection.
Step 3: Select the music you wish to transfer on your iPad and initiate the transfer process.
Step 4: Once the transfer is complete, open the app on your iPod to access your newly transferred music.
Method 5: Email Yourself the Music Files
Step 1: Open the Music app on your iPad and select the songs you want to transfer.
Step 2: Tap on the "Share" icon and choose the option to email the songs to yourself.
Step 3: Open the email on your iPod and download the attached music files.
Step 4: Save the downloaded files to your iPod's music library.
Bonus Tip: How to Transfer Music Between iOS Devices and PC
This cutting-edge device transcends the ordinary, unlocking a world where transferring music between your iOS devices and PC becomes a joyous affair. Imagine the freedom to effortlessly synchronize your favorite tunes, unbound by complexity. FoneTool is more than a gadget; it's the bridge to your harmonious digital symphony. Elevate your music experience – choose FoneTool, where simplicity meets sophistication.
How to Transfer Music Between iOS Devices and PC with FoneTool
Step 1: Connect FoneTool to your iOS device and PC using the provided USB cables.
Step 2: Launch the FoneTool app on your PC and select the "Music Transfer" feature.
Step 3: Choose the desired songs from your PC library or iOS device.
Step 4: Click the "Transfer" button, and FoneTool seamlessly transfers the selected music.
Step 5: Enjoy your synchronized music collection across all your iOS devices and PC effortlessly.
FAQs About How to Transfer Music from iPad to iPod
Q1: Can I transfer music directly from my iPad to iPod without a computer?
A: Yes, you can use iCloud Music Library or AirDrop to transfer music wirelessly between your iPad and iPod.
Q2: Is iTunes the only way to transfer music between Apple devices?
A: No, besides iTunes, you can use iCloud, AirDrop, third-party apps, or specialized transfer tools for a more flexible experience.
Q3: What if I want to transfer only specific songs instead of my entire music library?
A: Most methods, including iTunes and third-party apps, allow you to select specific songs for transfer, providing a customized solution.
Q4: Can I transfer purchased music between my iPad and iPod?
A: Absolutely, purchased music is linked to your Apple ID, allowing seamless transfer between your devices through iCloud or iTunes.
Q5: Are there any free apps for transferring music between iOS devices?
A: Yes, various free apps are available on the App Store, such as FoneTool, enabling convenient music transfers without additional costs.
The Bottom Line
By following these step-by-step methods, you can effortlessly transfer your favorite music from your iPad to iPod, allowing you to enjoy your personalized playlist wherever you go. Whether you prefer the traditional iTunes sync, the convenience of iCloud, the speed of AirDrop, the versatility of third-party apps, or the simplicity of email transfers, there's a method that suits your preferences. Keep your music in sync across your Apple devices and enhance your listening experience in just a few simple steps.
FoneTool - All-in-one iPhone Data Manager
Transfer, backup and manage data on iPhone, iPad and iPod touch in an easy way.
-
 iOS 26 Compatible
 iPhone 16 Supported
Windows 11/10/8/8.1/7
100% Secure

May is an editor who is passionate about sharing computer tips and providing reliable solutions, specializing in iOS/Android and file backup and recovery. In her spare time, May enjoys watching movies, going shopping, or chatting with friends.
Read author info >>