Caller ID Not Working on iPhone? Here're 5 Essential Fixes
Apple users have encountered the issue of caller ID not working on iPhone. Why does this happen? Luckily, this post will tell you the reasons and offer you useful methods to fix this issue.
Caller ID not working on iPhone after iOS 17 update?
Does anybody else notice after updating their iPhone to iOS 17 that caller ID no longer shows up correctly? I only see caller ID working in the Scam Shield app now.
- Question from Reddit
Why Is My Caller ID Not Working on My iPhone?
The caller ID not working on iPhone issue can stem from various underlying factors, ranging from internal component glitches to issues with your network provider or Apple’s software. Some possible reasons are as follows:
Carrier Configuration: Your mobile network provider (AT&T, Verizon, T-Mobile, etc.) supplies Caller ID data. Outdated or corrupted carrier settings are a top culprit.
iOS System & Settings: A software glitch after an update, an incorrect “Show My Caller ID” setting, or wrong date/time can block proper number identification.
Contact & iCloud Sync: If your contacts haven’t synced properly with iCloud, your iPhone cannot match incoming numbers to names.
Network & Caller-Side Issues: The calling party may have intentionally blocked their ID, or you might be in an area with poor network data for Caller ID lookup.
How to Fix Caller ID Not Working on iPhone - 4 Easy Methods
iOS 17 has garnered significant attention, with numerous iPhone users eager to experience its fresh features. Yet, issues (such as caller ID not loading on iPhone, iOS 17 namedrop not working, and contact poster not working iOS 17) occasionally arise during or after the installation of this latest iOS iteration. Below is a full guide on how to fix the caller ID issue on iOS 17.
Method 1: Update Your Carrier Settings
A prevalent culprit causing the issue of “caller IDgreyed out iPhone”is outdated carrier settings. To fix thisissue,it’s crucial to keep your carrier settings up to date. Often, you’ll receive notifications indicating an available update. If you’ve missed these prompts, you can manually check for updates by following these steps:
Step 1: Ensure your iPhone is connected to Wi-Fi or cellular data.
Step 2: Go to Settings > General > About.
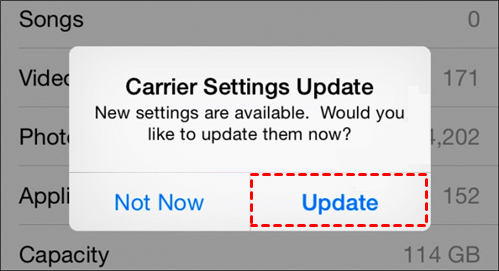
Step 3: Wait for a moment. If a carrier settings update is available, a pop-up alert will appear on this screen.
Step 4: Tap Update to install it. Your iPhone may restart.
Method 2: Perform a Force Restart
A force restart (or hard reset) is a crucial first step. It clears the device’s temporary memory (RAM) and can resolve minor software glitches that may be causing the Phone app to freeze or malfunction, without deleting any of your personal data or settings.
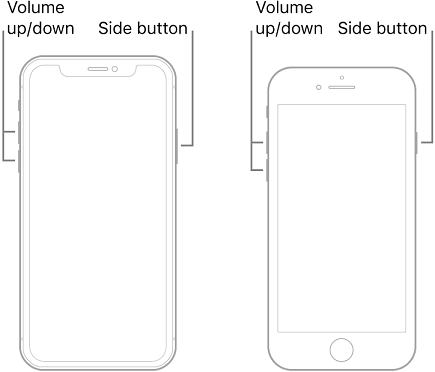
For iPhone 8, iPhone SE (2nd/3rd gen), and later (including all Face ID models):
-
Quickly press and release the Volume Up button.
-
Quickly press and release the Volume Down button.
-
Press and hold the Side button (power button) until you see the Apple logo appear, then release.
For iPhone 7 and iPhone 7 Plus:
- Press and hold both the Side button and the Volume Down button simultaneously until the Apple logo appears.
For iPhone 6s, iPhone SE (1st gen), and earlier (with a physical Home button):
-
Press and hold both the Home button and the Top (or Side) button simultaneously until the Apple logo appears.
After your iPhone restarts, try making or receiving a test call to see if the Caller ID information now displays correctly.
Method 3: Verify Caller ID & System Settings
If your iPhone’s “Show My Caller ID” feature is not operating as expected, there may be a chance that you or the caller have inadvertently blocked the number. Before taking any further steps, it’s wise to determine whether the caller has intentionally deactivated the “Show My Caller ID” feature. In this case, you can kindly guide them to re-enable it:
Step 1: Check “Show My Caller ID”: Go to Settings > Phone > Show My Caller ID. Ensure the switch is turned ON. While this primarily controls what you send, it can be linked to the calling framework.

Step 2: Verify Date & Time: Go to Settings > General > Date & Time. Ensure Set Automatically is turned ON. An incorrect time zone or date can disrupt network services.
Method 4: Reset Network Settings
When all else fails, your last resort may be to reset your iPhone’s network settings. Bear in mind that this should be considered as a final option, as it entails a complete wipe of all network configurations, including connected Bluetooth devices and stored Wi-Fi passwords, essentially restoring your iPhone to its initial state. However, it may restore regular phone functionality. To proceed with this fix:
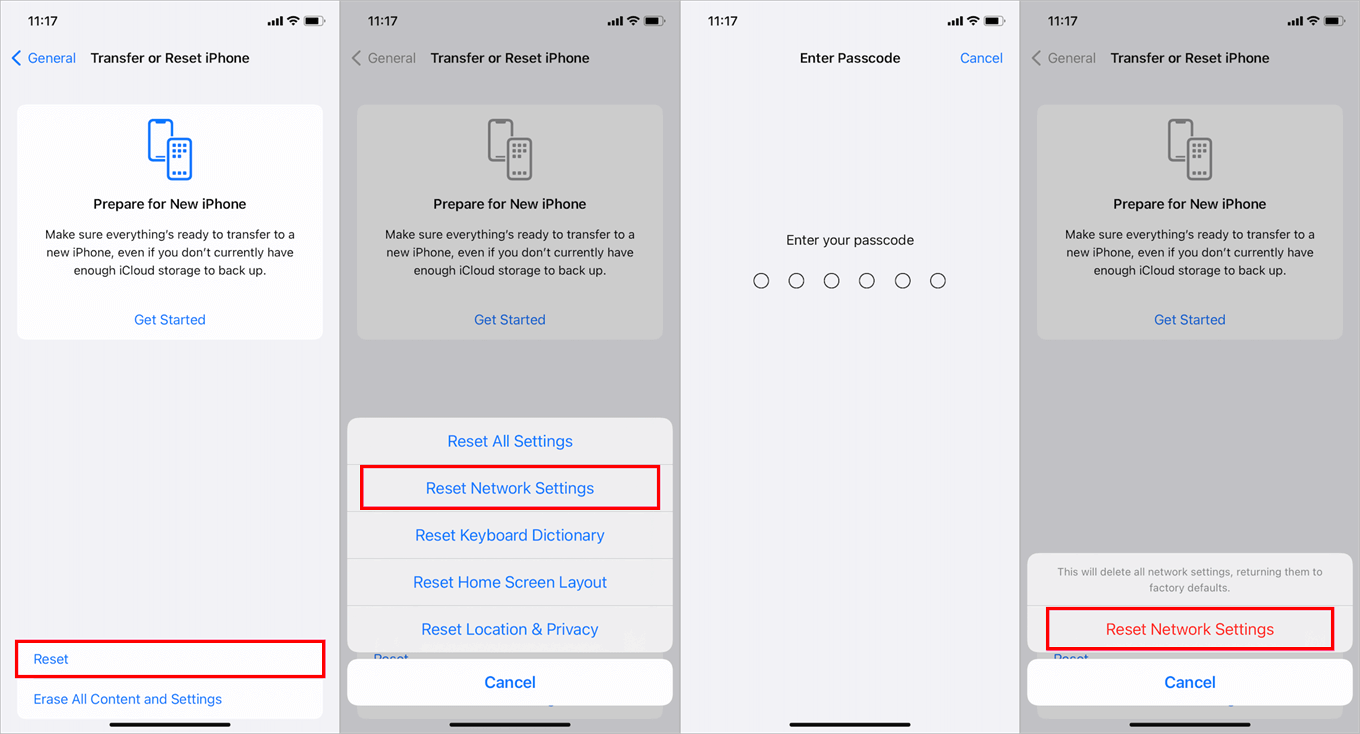
Step 1: Open the Settings app and select General > Navigate to Transfer or Reset iPhone.
Step 2: Choose the Reset option > A pop-up menu will appear; select Reset Network Settings and confirm your decision to proceed.
Method 5: Use Professional Tool to Repair Any Issue When Fixes Fails
If you have tried all the methods above and your caller ID is still not working, especially if the problem began right after a major iOS update, the issue may be deeper system corruption.
In such cases, standard resets may not be sufficient. A dedicated iOS system repair tool can be an effective next step. Software like FoneTool Repair is designed to diagnose and fix complex iOS system issues without data loss in its “Standard Repair” mode, which can resolve the type of underlying software errors that cause features like Caller ID to malfunction.
This powerful iOS system repair tool is the best way to fix iOS/iPadOS issues without data loss
Step 1: Download and install FoneTool Repair on your Windows PC or Mac. Launch the program and connect your iPhone using a USB cable.
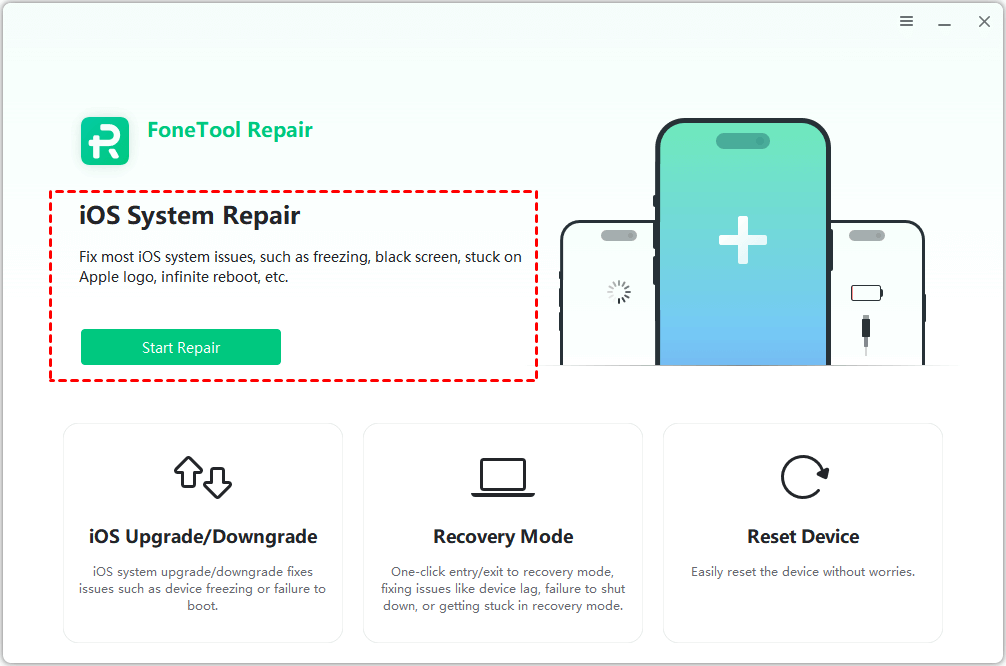
Step 2: On the main interface, select the iOS System Repair function and click Start Repair.
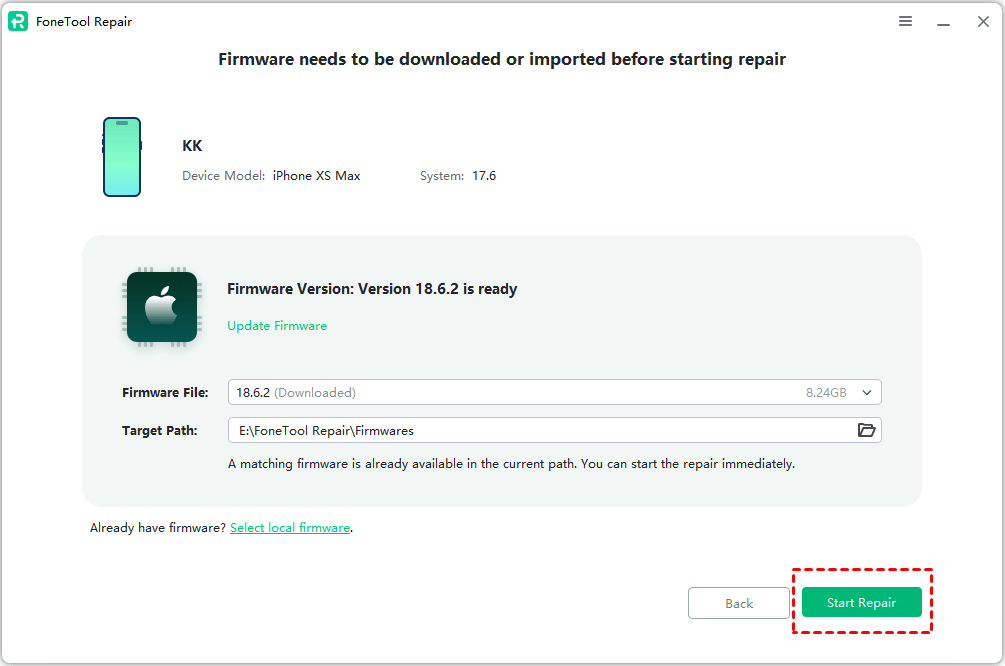
Step 3: Choose Standard Mode, and the tool will automatically detect your device model and download the appropriate firmware package. This is required for the repair.

Step 4: Once the download is complete, click Start Repair to begin the automated fixing process. Your iPhone will restart upon completion.
Bonus: Backup iPhone Before Fixing Caller ID Not Working on iPhone
It is annoying to see the caller ID not working on iPhone issue. Luckily, there are several effective methods for you to solve the problem. But before performing these methods, you’d better make a full backup of your iPhone, as it’s easy to lose your data during the fixing process.
So, how to back up your iPhone data easily and safely? Compared to traditional tools like iCloud or iTunes (which rely on a good network connection), FoneTool will be a top option for you. It is a free and safe iPhone data backup and transfer tool that allows you to preview and selectively back up your data without any network connections.
Below is how to make a full iPhone backup using FoneTool:
Step 1: Click the download button to get and install FoneTool on your PC > Connect your iPhone to your PC with a USB cable.
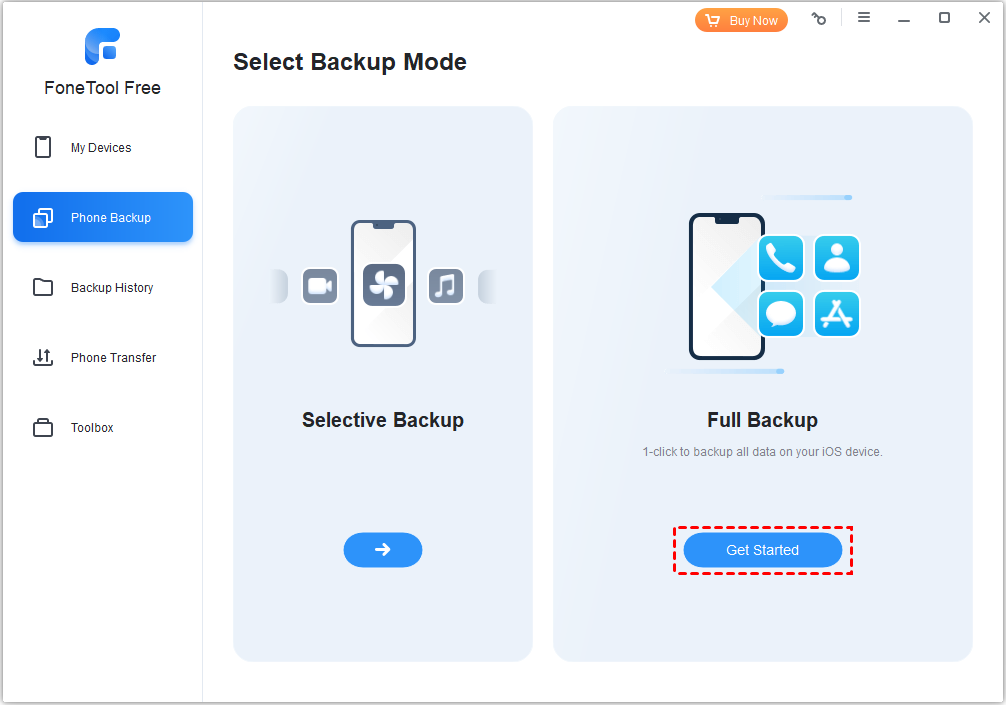
Step 2: Run FoneTool on your PC > Click the Phone Backup section on the home page > Select Full Backup and then click Get Started.
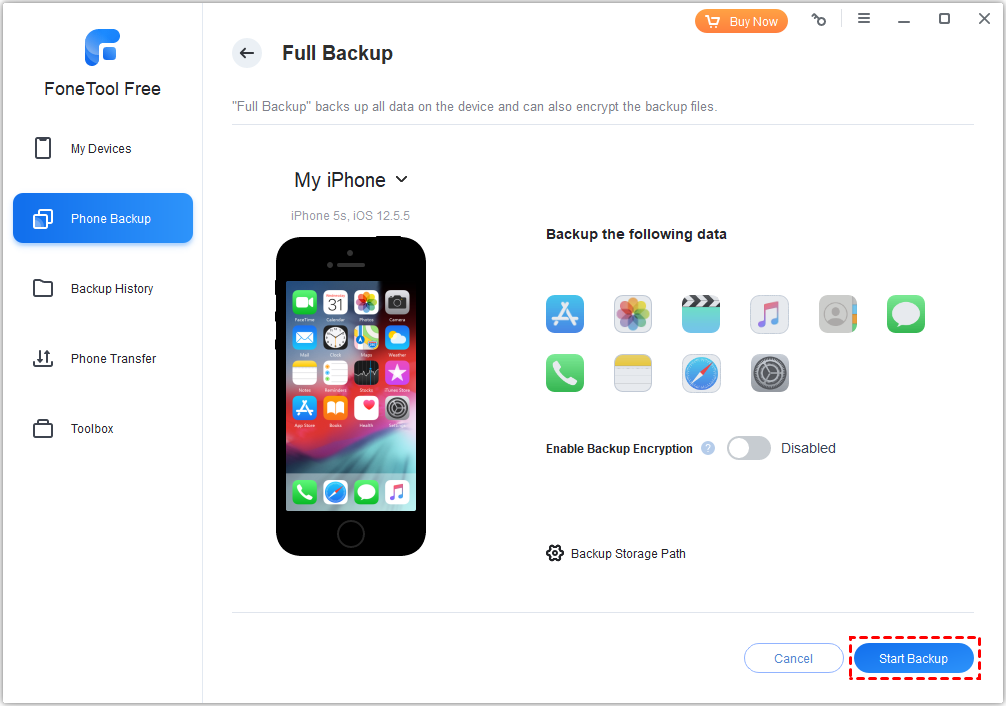
Step 3: Choose a storage location where you’d like to save the backup, and then click the Start Backup button to initiate the process.
- ★Tip:
- To ensure the protection of sensitive information like Fitness records, Health data, and Keychain, you can enable backup encryption to encrypt backup for iPhone.
The Bottom Line
To fix caller ID not working on iPhone, systematically follow these solutions: Update carrier settings first, then force restart your device. Then, verify your basic phone and time settings. If the problem persists, reset your network settings. For stubborn issues that arise after iOS updates, consider using a system repair tool to resolve core software issues. By following this structured approach, you can effectively restore your iPhone's ability to identify callers.
Fixes 160+ iOS/iPadOS issues, boot loops, crashes, failed updates, with no data loss.
-
 iOS 27 Compatible
 iPhone 17 Supported
100% Secure
Kelsey is an English editor at FoneTool, passionate about helping users solve tech issues. She specializes in iPhone data management, backup, and recovery. In her free time, she enjoys learning IT skills and spending time with loved ones.
Read author info >>