[3 Ways] How to Change App Store Country on iPhone
For some reasons, you may need to change iPhone App Store country, but how can you make it? In this guide, you will be given 3 effective methods to change App Store country on iPhone.
Want to change country on iPhone App Store?
I would like to change my country/region
After moving to Germany from South Africa a year ago, I tried updating my WhatsApp but faced a hurdle: changing my billing information to reflect my new German accounts. However, altering my country/region details within the app seems impossible. Assistance needed, please.
- Question from Apple Community
Every Apple device has an app store already installed, offering you a variety of resources. However, the apps you see depend on the country or region linked to your Apple ID. If you are moving locations, you might want to change the country or region settings on your app store. Learn how to change App Store country on iPhone using three different methods introduced in this guide.
⚠️ Precautions before changing App Store country on iPhone
Before you jump into changing your Apple ID country, there are a few important steps to take that might save you some trouble later on. Here's what you should do:
★ Cancel any subscriptions you have. Make sure to wait until they expire to avoid losing them immediately.
★ Clear any store credit you have. Use it on a purchase or contact Apple Support if you have a low balance.
★ If you've requested a store credit refund, wait for approval before proceeding.
★ Update your App Store payment method. Remember, you can only use country-specific credit cards for purchases in that country's App Store.
★ Consider making a full iPhone backup. Copying it to a computer or laptop ensures it's safe, especially since access might be limited in your new country.
Way 1. Change App Store Country from iPhone Settings App
The first method involves changing your App Store country directly from your iPhone's Settings app. Here’s how to do it.
Step 1. Go to the Settings app on your iPhone > Scroll down to locate and choose Media & Purchases.
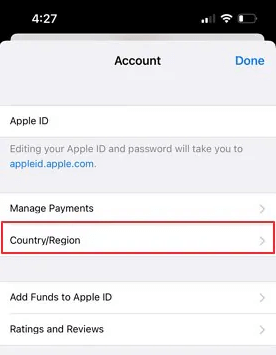
Step 2. From the next window, select View Account > When a window prompts, choose Country/Region option.
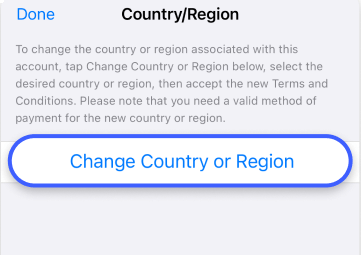
Step 3. Tap Change Country or Region and select the new country from the list > Tap Agree to agree to the terms and conditions.
Step 4. Finally, tap Agree again to confirm your operation. You need to choose your payment method and enter the payment details and billing address of your new location.
Way 2. Change iPhone App Store Country with a New Apple ID
If you aim to access free apps and resources, there's an alternative route. You can change your Apple ID country by creating a new Apple ID associated with a different country. This bypasses the need to modify or add new billing information to your Apple account. It's particularly convenient for travelers who wish to access apps in both their current location and their home country.
Note: The disadvantage of using a new Apple ID
Using a new Apple ID will make you lose the information of the previous account, all the purchases made and data will be lost linked to that account. Fret not, try a third-party iOS transfer tool to transfer purchases to new Apple ID.
Steps to change App Store country by creating a second Apple ID
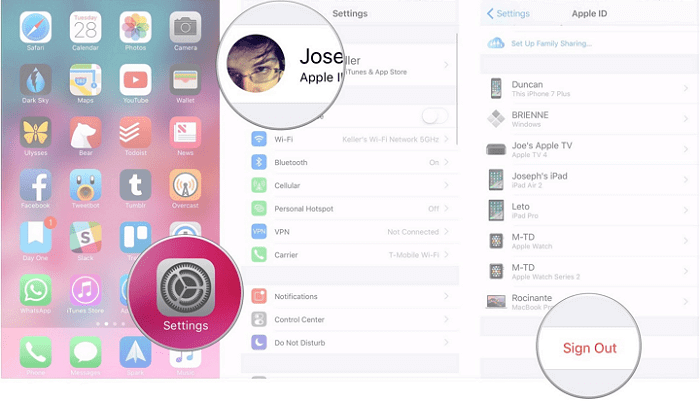
Step 1. Go to the Settings app on your iPhone > Tap your name > Scroll down to the button and tap Sign Out.
Step 2. Go to the App Store > From the top right corner, hit Account > Select Create New Apple ID.
Step 3. Fill out the form and choose your preferred country to create another account > Input your email address and password.
Note: It's important to use a unique email address since each Apple ID is linked to one email address only.
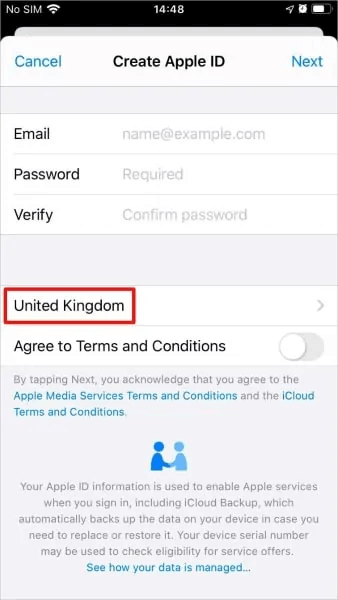
Step 4. Tap Next from the top right corner, and give all the requested information to create an Apple account. Finally, click Next again to create your second Apple account.
You can now access the content specific to the chosen country while retaining access to your original country's content by switching between accounts.
Way 3. Change iPhone App Store Country from Apple ID Web
Another method to change your App Store country involves using the Apple ID management page on the web. Not only on your iPhone, you can change App Store country on any devices on your hand. Let’s see how to change App Store country from Apple ID web.
Step 1. Go to the official website of Apple ID > Enter your Apple ID and password to sign in.
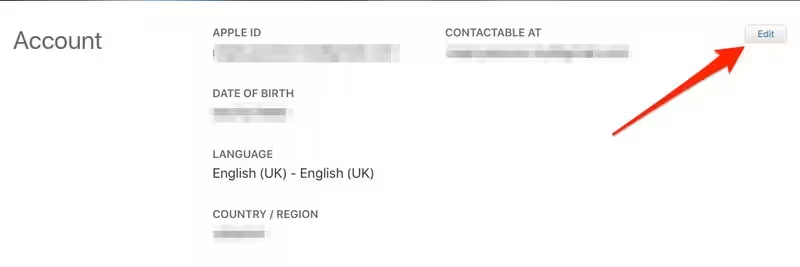
Step 2. Once signed in, head to the Account section > Tap the Edit button on the top right corner.
Step 3. From the next window, scroll down and look for COUNTRY/REGION > Click the drop-down, and select the country you prefer.
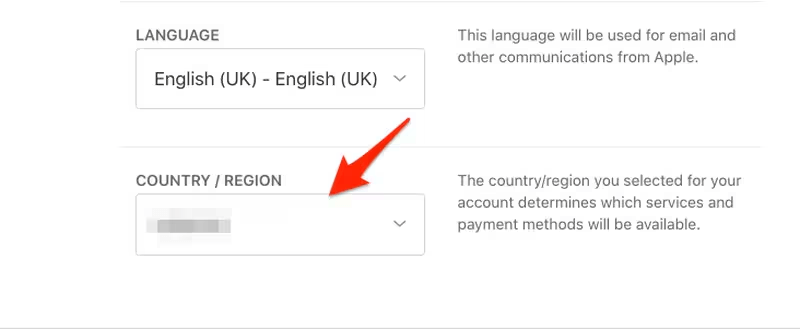
Step 4. On the pop-up, click Continue to update. You will be asked to fill in the payment details, which you can avoid, and save the settings.
Conclusion
Changing your iPhone's App Store country opens up a world of new possibilities, allowing you to access region-specific apps, music, and other content. Whether you choose to do so directly from your iPhone's Settings app, create a new Apple ID, or use the Apple ID web portal, these methods offer flexibility and convenience. By following the detailed steps outlined in this guide, you can seamlessly change your App Store country and explore the digital landscape beyond your current borders.
FoneTool - All-in-one iPhone Data Manager
Transfer, backup and manage data on iPhone, iPad and iPod touch in an easy way.
-
 iOS 26 Compatible
 iPhone 16 Supported
Windows 11/10/8/8.1/7
100% Secure

Demi is an editor of FoneTool group as well as an good advisor in the area of iOS-related issues. She does well in finding solutions to people's problems. She enjoys traveling, gardening, and watching movies. She spends most of her free time with her pet and family.
Read author info >>