No Data Loss! How to Change iCloud Account on iPhone
Want to change a new iCloud account and don’t want to lose data on your previous iCloud account? Here in this article, we’ll guide you through how to change iCloud account on iPhone without data lose.
Can you change the iCloud account on iPhone without losing everything?
Swap iCloud account on iPhone without losing apps or data
I have an iPhone that I want to change the iCloud account from the current iCloud account to a new iCloud account. I do not want to lose any of the data or installed apps. Any ideas?
- Question from Apple Community
It may seem daunting to change iCloud account on iPhone, primarily due to concerns about potential data loss. While luckily, with the right approach and tools, it's possible to seamlessly switch from one iCloud account to another without losing any valuable data.
In this article, we will explore the step-by-step process of changing your iCloud account logged on your iPhone while ensuring no data loss. Whether you prioritize speed, convenience, or the use of a third-party tool, we've got you covered. Assume that you are going to change from iCloud account A to iCloud account B, and let’s get started.
How to change iCloud account on iPhone
Switching iCloud account on iPhone involves a series of steps to ensure a smooth transition without compromising your data. Upon turning off iCloud syncing on your iPhone, you'll receive a prompt asking if you want to save data on your device.
In this situation, save all data on your iPhone first and then proceed to upload it to your new iCloud ID. Here's a comprehensive guide on how to change your iCloud account on iPhone:
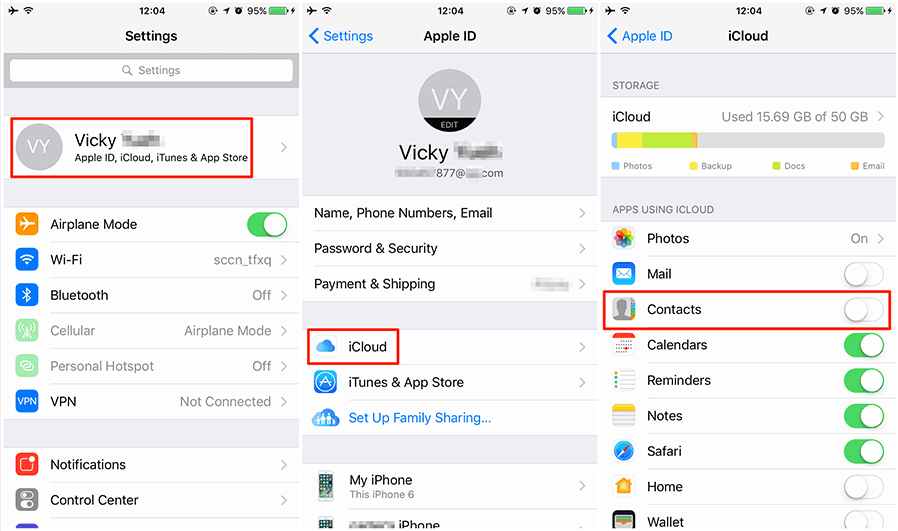
Step 1. On your iPhone, go to Settings > [your name] > Tap iCloud > Toggle off types of data you'd like to save to iCloud account B > Choose Keep on My iPhone option.
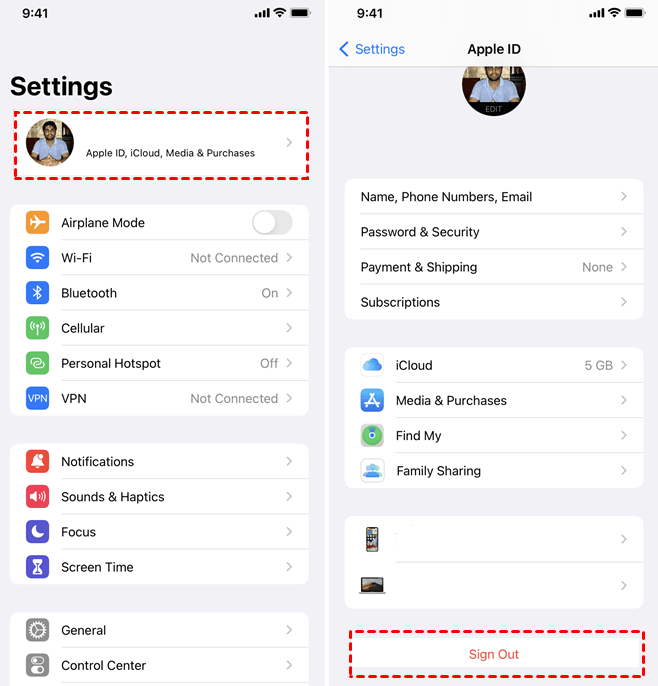
Step 2. Back to the Apple ID page > Scroll down to tap Sign Out > Enter your Apple ID password and tap Sign Out again to sign out iCloud account A.
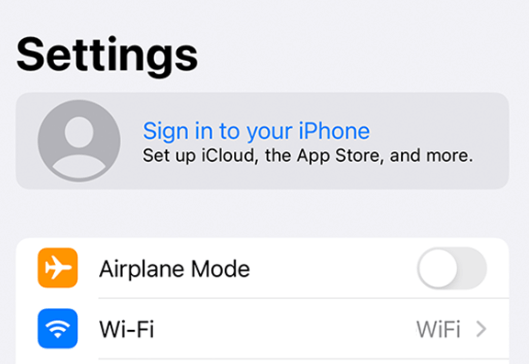
Step 3. Back to the Settings screen > Tap Sign in to your iPhone to enter the email you used to create your iCloud account B.
Step 4. You can tap Merge to merge the content on your iPhone with the iCloud account B. Otherwise, tap Don’t Merge means your content won’t be merged with the different iCloud account.

Change iCloud account on iPhone without losing data via FoneTool
FoneTool, as a professional iOS and iCloud data management tool, offers multiple functions, enabling you to change iCloud account on iPhone. Whether you’d like to sync data directly between two iCloud accounts or switch all data to new iPhone with new iCloud account, FoneTool will do you a favor.
First of all, download FoneTool by clicking the icon below, and let FoneTool assist you in changing iCloud account without data loss according to your needs.
Sync data from one iCloud account to another
FoneTool simplifies the process of syncing data between iCloud accounts, providing a reliable and efficient solution to merge iCloud account or change iCloud account without data loss. Here’s a one-click guide on how to change iCloud account without losing data via FoneTool:
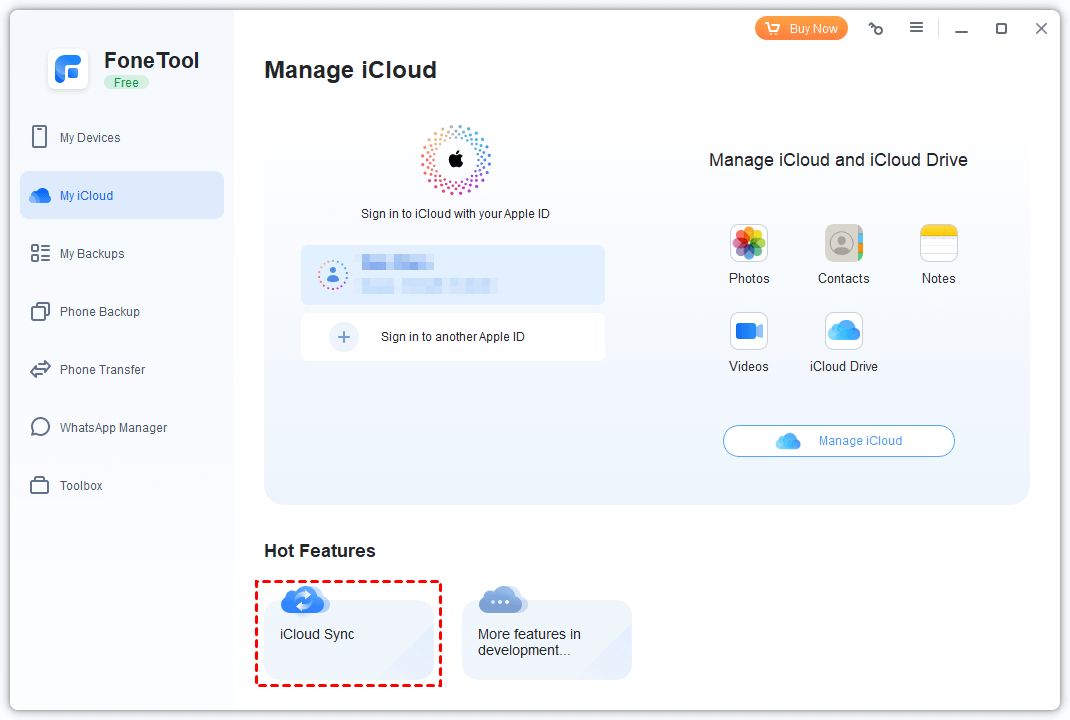
Step 1. Open FoneTool > Navigate to My iCloud on the left pane > Sign in with your iCloud account A > Choose iCloud Sync.
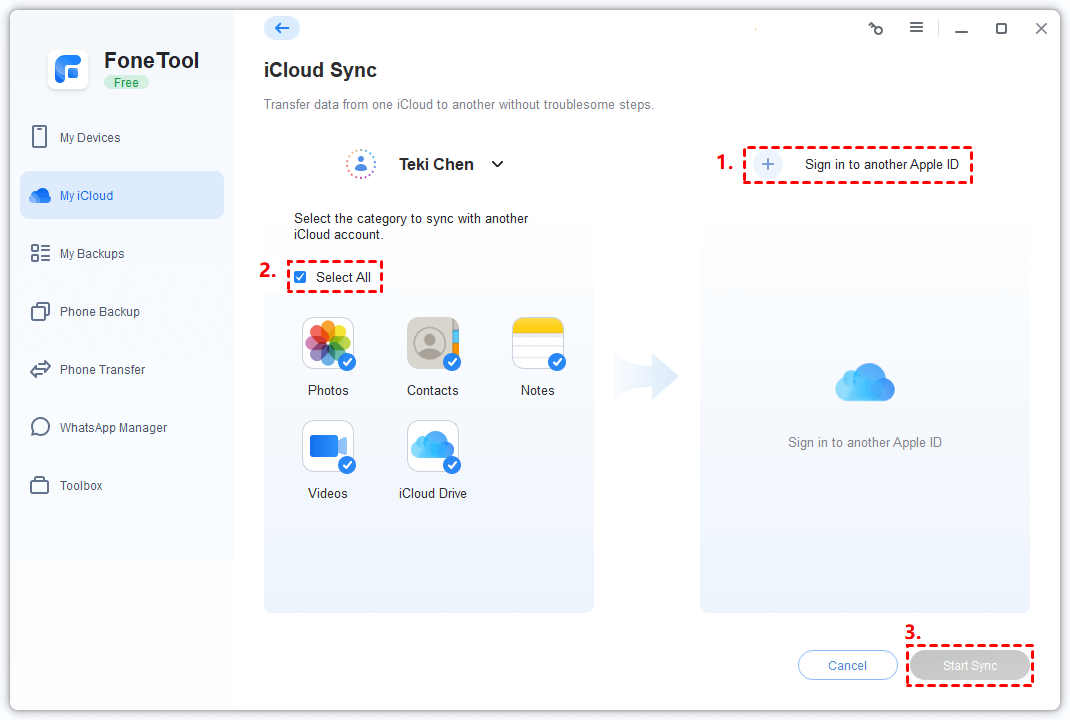
Step 2. Log to iCloud account B > Choose the file types you want to transfer to between your accounts or check Select All to transfer data with one click > Tap Start Sync to make it.
Transfer all data to new iPhone with new iCloud account
We have to admit that even if you can transfer data via iCloud when you change iCloud account on iPhone, you can just minimize the data loss. If you wonder how to change iCloud account without losing everything, FoneTool will do you a favor.
Besides, FoneTool supports iPhone to iPhone transfer without iCloud backup, so that you don’t worry whether your old iCloud account contains all data or not.
Make sure you’ve signed in the iCloud ID A in the source iOS device and the iCloud ID B in the target iOS device, and follow the steps below.
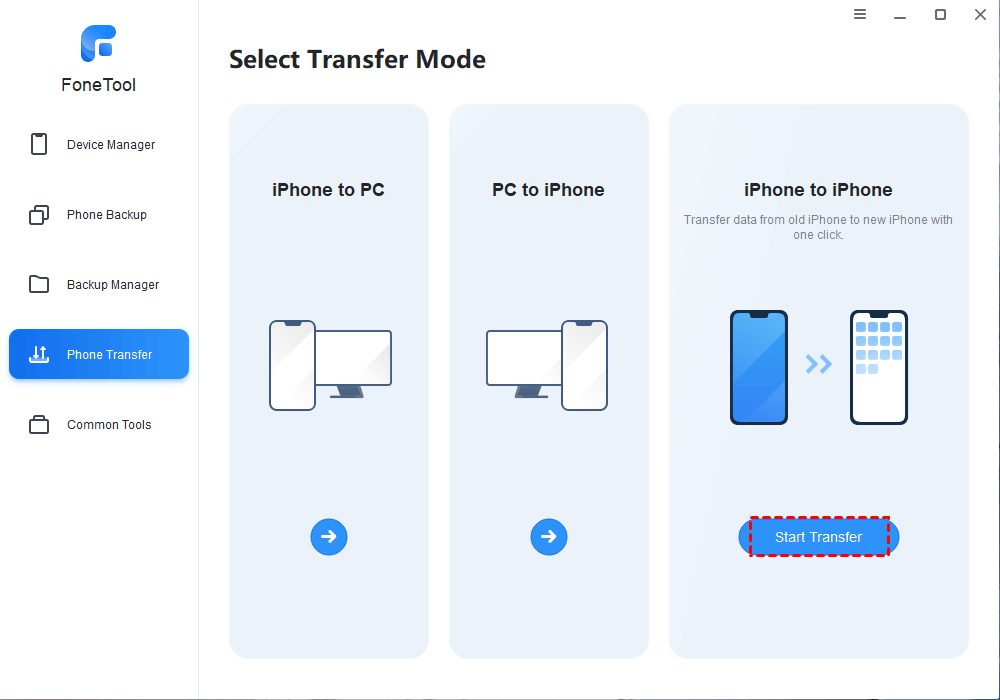
Step 1. Launch FoneTool > Connect the two iOS devices to a computer > Choose Phone Transfer > Click Start Transfer under iPhone to iPhone.
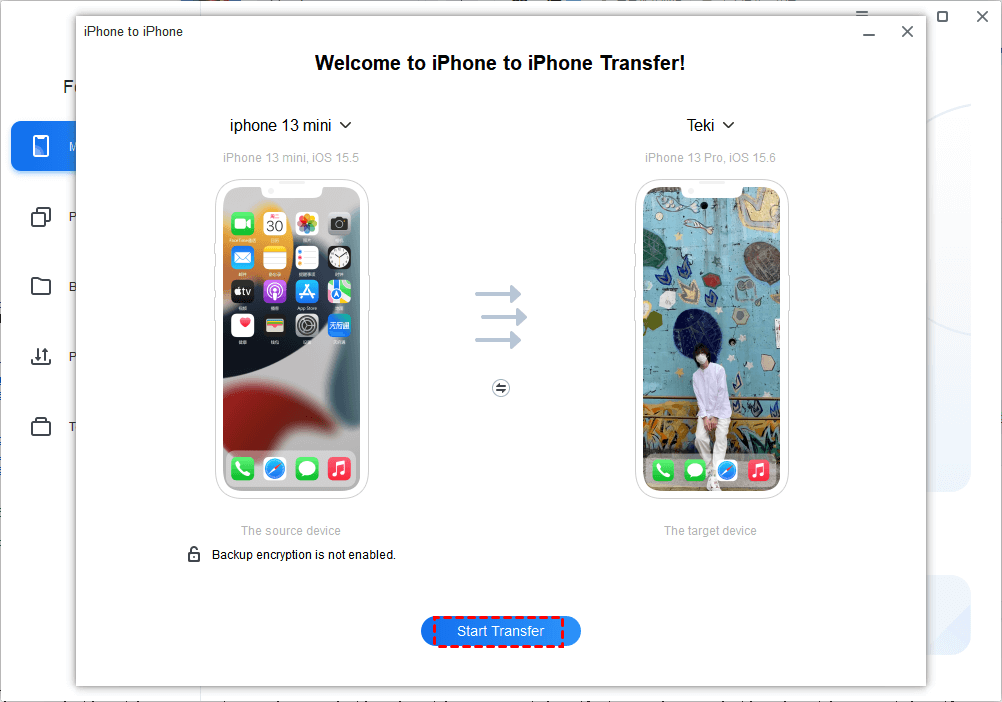
Step 2. Enable Backup encryption to encrypt the data in the source device > Click Start Transfer to start.
Upon completion, the target device will automatically restart. Verify that FoneTool has successfully transferred all the desired data. If you aim to change the Apple ID on the same device, consider performing a Full Backup using FoneTool. You can then restore the data using another account.
Summary
Changing your iCloud account on an iPhone doesn't have to result in data loss, thanks to the careful steps outlined in this guide. Whether you opt for the standard method through iPhone settings, use FoneTool to sync data between iCloud accounts, or transfer all data from one Apple ID to another, it's crucial to follow each step carefully for a seamless transition.
With the right approach and tools, hope you can confidently switch iCloud accounts, knowing that your valuable data is safe and secure. The versatility of FoneTool adds an extra layer of convenience, allowing you to choose the method that best suits your needs while ensuring a smooth transfer without any data loss.
FoneTool - All-in-one iPhone Data Manager
Transfer, backup and manage data on iPhone, iPad and iPod touch in an easy way.
-
 iOS 27 Compatible
 iPhone 17 Supported
Windows 11/10/8/8.1/7
100% Secure

Demi is an editor of FoneTool group as well as an good advisor in the area of iOS-related issues. She does well in finding solutions to people's problems. She enjoys traveling, gardening, and watching movies. She spends most of her free time with her pet and family.
Read author info >>