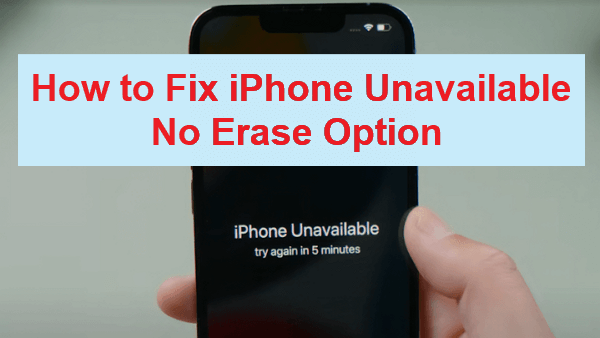
How to Perform an iPhone Unavailable Fix [iOS 26 Supported]
No need to worry if you encounter the “iPhone unavailable no erase option” issue. In this full guide, you will learn effective methods to perform an iPhone unavailable fix whether you choose to erase your iPhone or not.
Why Is My iPhone Unavailable No Erase Option?
Some users have reported the “iPhone unavailable no erase option” error, but why does this happen? One potential cause of the problem with your iPhone not being able to use the No Erase option could be the iOS system version or settings. Besides, if your iPhone is not signed in with an Apple ID or is disabled, you won’t be able to access the erase option.
3 Ways to Fix iPhone Unavailable No Erase Option
The way to fix the “iphone unavailable no option to erase” issue is quite simple and easy. But before performing these methods, please make sure that your iPhone is running an iOS version higher than 15.2. Then, follow the instructions below to perform an iPhone unavailable fix.
Way 1. Unlock iPhone Unavailable via iTunes
When the “iPhone unavailable no erase option” error appears, it’s critical to use iTunes, which offers a no-delete option to protect your data and unlock an unavailable iPhone. iTunes is Apple-developed software that lets you erase your iPhone without an Apple ID and passcode.
Choosing to unlock your iPhone through iTunes allows you to regain access to your device while ensuring the protection of your valuable data. Here is a full guide to do that:
Step 1: Download the latest iTunes > Connect your iPhone to the computer using a USB cable > Tap Trust This Computer on your iPhone.
Step 2: Depending on your iPhone model, follow these steps to enter recovery mode:
- For an iPhone 8 or later model: Hold down the Side (or Top) button until the recovery mode screen appears, then briefly press the Volume Up and Volume Down buttons.
- For iPhone 7 and 7 Plus: Simultaneously press and hold the Side (or Top) and Volume Down buttons.
- For iPhones up to and including the iPhone 6s: Hold down the Side (or Top) and Home buttons together until the recovery mode screen is shown.
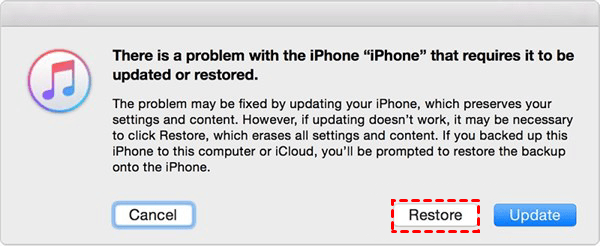
Step 3: Once your iPhone enters recovery mode, iTunes will detect it. Proceed by selecting Restore from the menu to continue the process.
Step 4: Once iTunes downloads the latest iOS firmware, follow the on-screen prompts to proceed with the device restoration.
Step 5: After the restoration, you’ll be prompted to choose whether to set up your iPhone as a new device or restore it from a backup.
- ★Tip:
- Please back up your iPhone data before upgrade in advance, because this method will erase all data on your device.
Way 2. Erase iPhone Unavailable with the No Erase Button via Find My
Even if your iPhone is displayed as “Unavailable” and the erase button is missing, you can still erase it using the Find My feature. Please follow the steps below to resolve the issue on the screen:
Step 1: Visit the iCloud website on your PC or iOS device > Sign in with your Apple ID and password > Once you’re signed in, click Find iPhone.
Step 2: Select your iPhone from the list of available devices > Select Erase iPhone from the menu > A confirmation prompt will appear asking you to confirm the deletion.
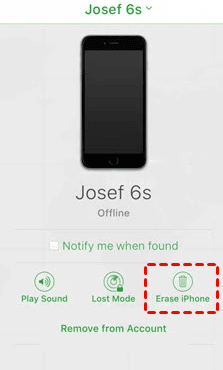
Step 3: After confirming the erase, your iPhone will start the remote erase process.
Video Tutorial: How to Fix iPhone Unavailable No Erase Option
Way 3. Repair iOS System Issue with FoneTool Repair
If your iPhone shows "Unavailable" due to system glitches or software conflicts, using a professional iOS repair tool like FoneTool Repair can help resolve underlying system issues without complete data loss. This method is ideal when you suspect the problem is caused by iOS malfunctions rather than hardware failure.
This powerful iOS system repair tool is the best way to fix iOS/iPadOS issues without data loss
Step 1: Download and install FoneTool Repair on your Windows PC.
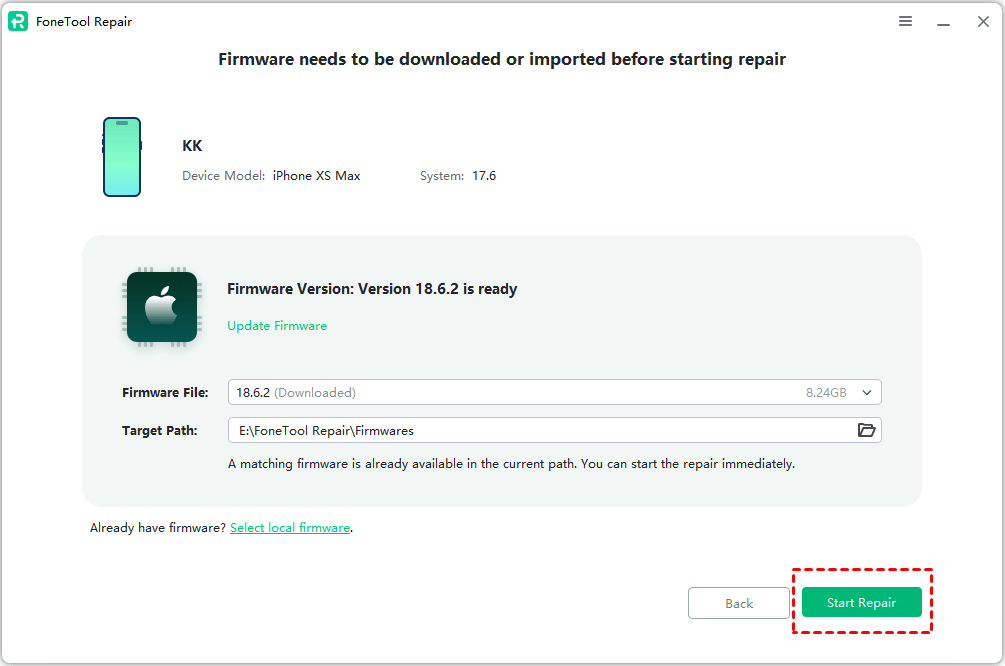
Step 2: Connect your iPhone via USB cable, launch the tool and select iOS System Repair.
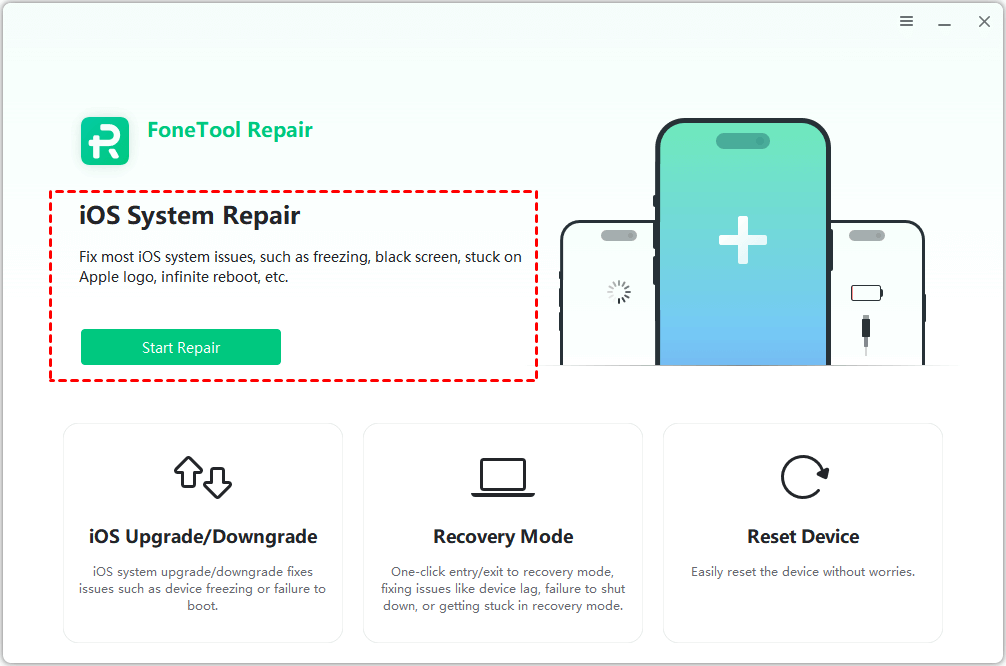
Step 3: Choose Standard Mode (recommended for system issues).

Step 4: Follow instructions to download firmware. Click Start Repair to begin system restoration.
After completion, your iPhone will restart normally. This method can effectively resolve system-related "iPhone Unavailable" errors while preserving your data.
Bonus Tip: How to Wipe Your iPhone Clean – Free & Safe
It’s annoying to meet the “iPhone unavailable with no erase option” error. If you find it complicated to use iTunes or Find My, here it’s strongly recommended to use FoneTool – a safe and professional iPhone management tool. With the help of FoneTool, you don't connect your Apple ID and password, but you can also erase data on your iPhone easily. Here is a step-by-step guide on how to wipe iPhone with FoneTool:
Step 1: Free download and install FoneTool on your PC > Connect your iPhone to your PC through a USB cable > Run FoneTool.
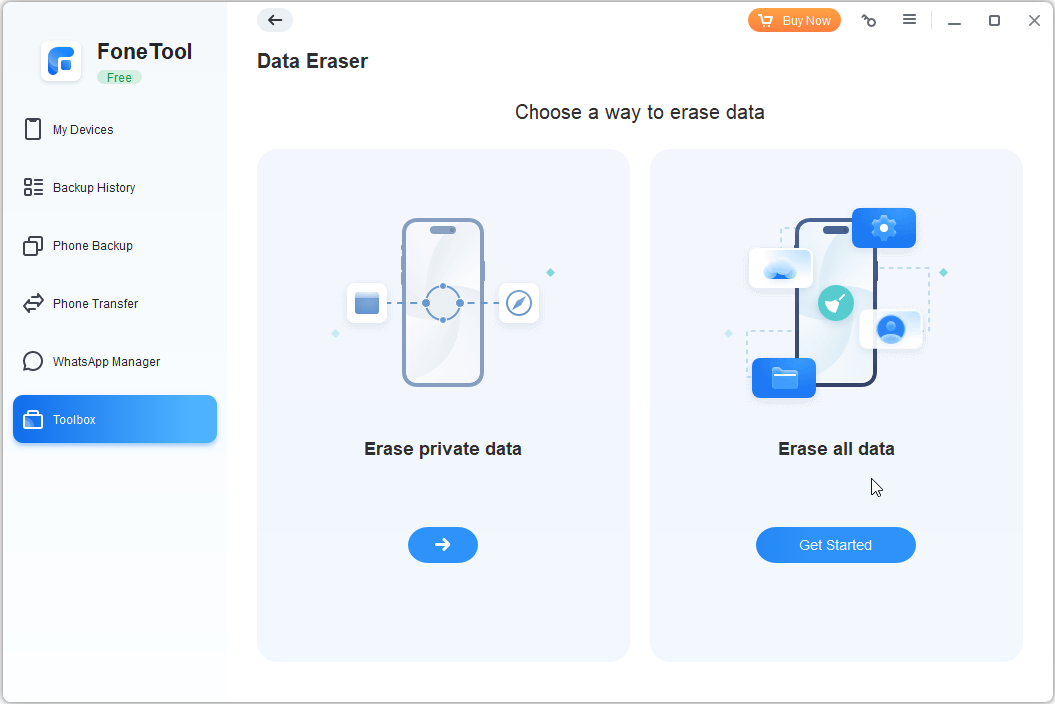
Step 2: Choose Toolbox in the main interface > Click iPhone Eraser > Erase all data.
- ★Tip:
- When you need to selectively delete data on your iPhone, here you can choose Erase private data to delete part of data such as photos, videos, or anything else.
Step 3: Checkmark the option I am aware of the consequence of erasing data and am sure I want to erase it > Click Erase Data to begin the process > Click Yes to continue when you see a warning message.
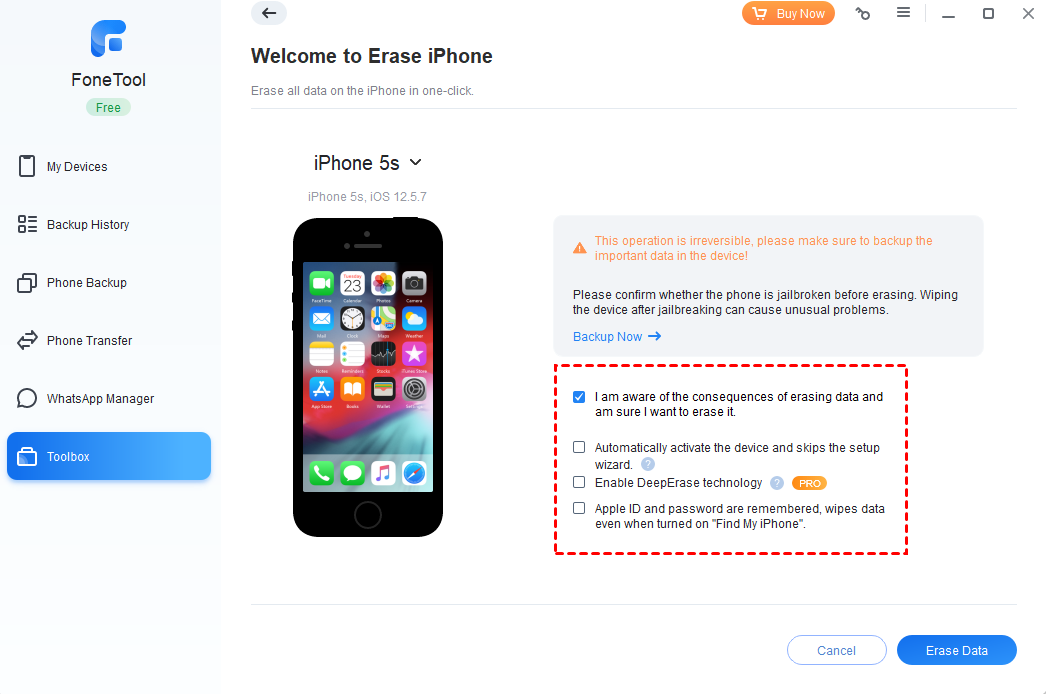
- ★Tips: Here is the meaning of several other options
- Automatically activate the device and skip the setup wizard: FoneTool facilitates the automatic activation of iPhones following data erasure, bypassing the intricate iPhone setup wizard. This seamless function is currently supported for iOS versions up to 14.0 and will be extended to subsequent releases in the future.
- Enable Deep Erase technology: With the Deep Erase option selected, FoneTool ensures a comprehensive wipeout by overwriting and erasing data multiple times. This advanced technology guarantees the protection of privacy files on your iPhone, eliminating the risk of data restoration.
- Apple ID and password are remembered, wipes data even when turned on “Find My iPhone”: By opting to remember your Apple ID and password, FoneTool enables effortless data erasure even when the Find My iPhone feature is activated.
The Bottom Line
Dealing with the "iPhone unavailable no erase option" can be frustrating, but don't worry because this article offers various solutions to this problem. For system-related issues causing the "Unavailable" error, FoneTool Repair provides a professional solution to fix iOS system problems without data loss. If you need to completely erase your iPhone, FoneTool offers a reliable one-click wiping solution.
Both tools provide comprehensive options for different scenarios, ensuring you can regain access to your device regardless of the specific cause of the "iPhone Unavailable" error.
Fixes 160+ iOS/iPadOS issues, boot loops, crashes, failed updates, with no data loss.
-
 iOS 27 Compatible
 iPhone 17 Supported
100% Secure

May is an editor who is passionate about sharing computer tips and providing reliable solutions, specializing in iOS/Android and file backup and recovery. In her spare time, May enjoys watching movies, going shopping, or chatting with friends.
Read author info >>