[Full Guide] How to Approve iPhone from Another Device
Are you finding answers about how to approve iPhone from another device? Follow the instructions below to make it with Apple or non-Apple device. You can also learn how to transfer data between different Apple IDs.
How to approve my iPhone from another device
I had to reset my iCloud password after my daughter locked out of my phone. Now it is saying my old phone passcode is incorrect and I can't access all my data. The message I received says: “If you can't remember your passcode for your iPhone, you can approve this iPhone from one of your other devices signed into iCloud, or you can reset your end-to-end encrypted data”.
- Question from Apple Community
When you buy a new iPhone and sign in to your iCloud, or you forget your passcode, you’ll need to approve your iPhone from another device. Do you know how to approve iPhone from another device? Let’s find detailed instructions in this article.
2 ways to approve iPhone from another device
From this part, you can know how to approve your iPhone from another Apple device or non-Apple device.
Approve iPhone from Apple Devices
When you're asked to approve your iPhone on iCloud, Apple often requires you to approve your new or upgraded iPhone using your another iOS device or Mac. You can follow the steps below to learn how to approve iPhone from another Apple device.
Approve iPhone from Mac
Launch the Menu bar on your Mac > Choose System Preferences > Tap on iCloud and choose Account Details > Security > Tap on Get A Verification Code.
Approve iPhone from another iOS device
Go to your another iOS device (iPad/iPhone) where your iCloud account is logged in > Launch Settings app on your device > Tap on Apple ID > Find and click Password & Security > Tap on Get Verification Code and click OK.
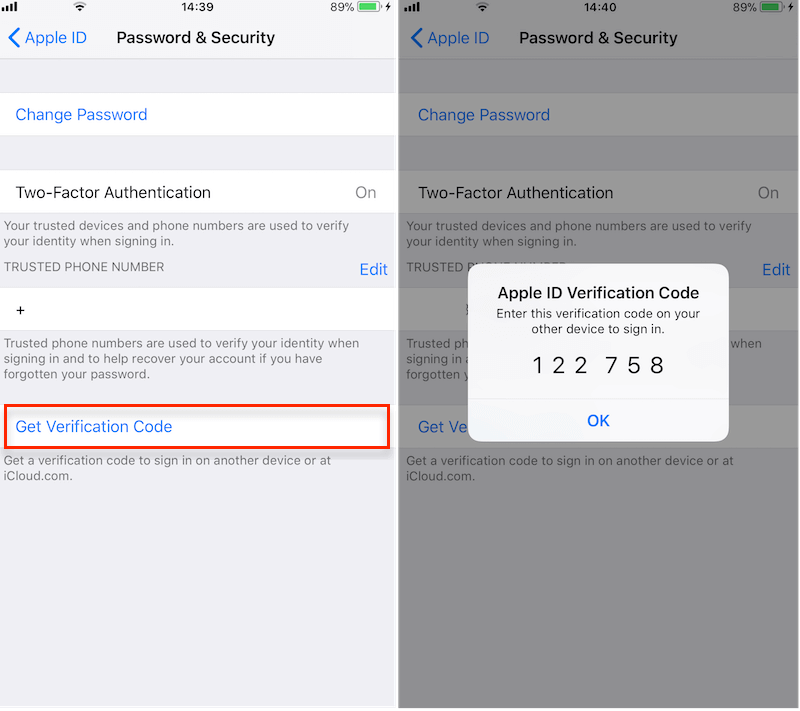
Now you can return to your targeted iPhone and enter the code to approve it.
Approve iPhone from non-Apple devices
Apple typically sends verification codes to trusted Apple devices, making it problematic to send such codes to a Windows PC. But you can also request the code from a Windows PC, and for this method, you'll need to remember your Apple ID and password.
Download the iCloud application from the app store on Windows > Log in using your iCloud ID and password > When you log in to your new iPhone, the verification code will appear within the iCloud application on your Windows PC, then you can use this code to approve your new iPhone.
That’s all about how to approve iPhone from another device. If you need to turn off this feature, find answers in the next part.
How to disable the “Approve this iPhone” feature
If you're still encountering difficulties approving your device, you have the option to disable the security feature entirely. This can be done in two ways: either by turning off Keychain or by opting out of two-factor authentication.
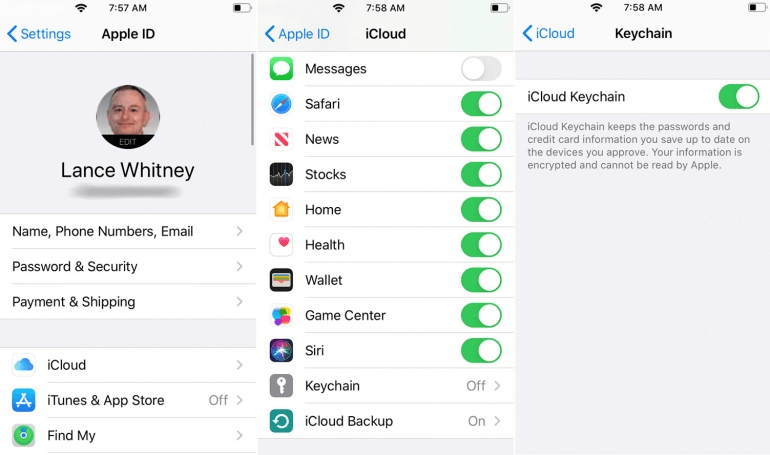
Disable iCloud Keychain
Now you can follow the instructions to disable iCloud Keychain.
Step 1. Skip the "Approve this iPhone" screen if it appears > Open your iPhone's Settings > Tap on your Apple ID > Select iCloud > Keychain > Toggle the switch to turn off iCloud Keychain.
Step 2. Enter your Apple verification code if prompted > Confirm by selecting Approve. This should disable iCloud Keychain and stop the persistent approval prompts.
Disable Two-Factor Authentication
You also have the option to disable two-factor authentication.
Visit the appleid website on your web browser > Enter your iCloud ID and password > Navigate to the Account Settings > Security > Toggle off two-step verification by clicking the Edit button > Find the button for turning the Two-Factor authentication on and off > Then you’ll see two security questions, answer them to turn it off.
Bonus: Transfer data from iPhone to iPhone between different Apple IDs
Due to Apple's security restrictions, it's challenging to directly transfer a large amount of data between two iPhones logged into different Apple ID accounts. However, when you have multiple devices with different accounts or need to switch to a new Apple ID, how can you transfer a significant amount of data on your phone?
The all-in-one iPhone data management app, FoneTool, can be a great help in this situation. With its numerous advantages and features, transferring data between different Apple IDs becomes a straightforward process.
-
 Super fast transfer speed: With its high-speed transfer, you can move lots of data in a very short time. For example, 100 photos can be moved in 3 seconds.
Selectively or fully transfer: You can selectively move photos, videos, music and contacts from iPhone to iPhone, or fully transfer all iPhone data to another device like the Quick Start feature.
Wide compatibility: FoneTool works well with various iOS devices, including iPhone 4 to iPhone 15, iPad/iPod Touch, as well as the latest iOS 17. So you can easily browse iPhone photos on iPad.
Full or selective backup: If need, FoneTool can also fully back up your iPhone data like iTunes or selectively back up iPhone photos, videos, music, contacts and messages on Windows PC to protect your data.
Erase iPhone data: If there is not enough space on your device, you can easily delete podcasts, photos, videos, Safari History, etc. on your iPhone/iPad with FoneTool.
Now you can click the download button to get FoneTool on your PC and learn how to transfer data from iPhone to iPhone. Here we take transferring photos as an example.
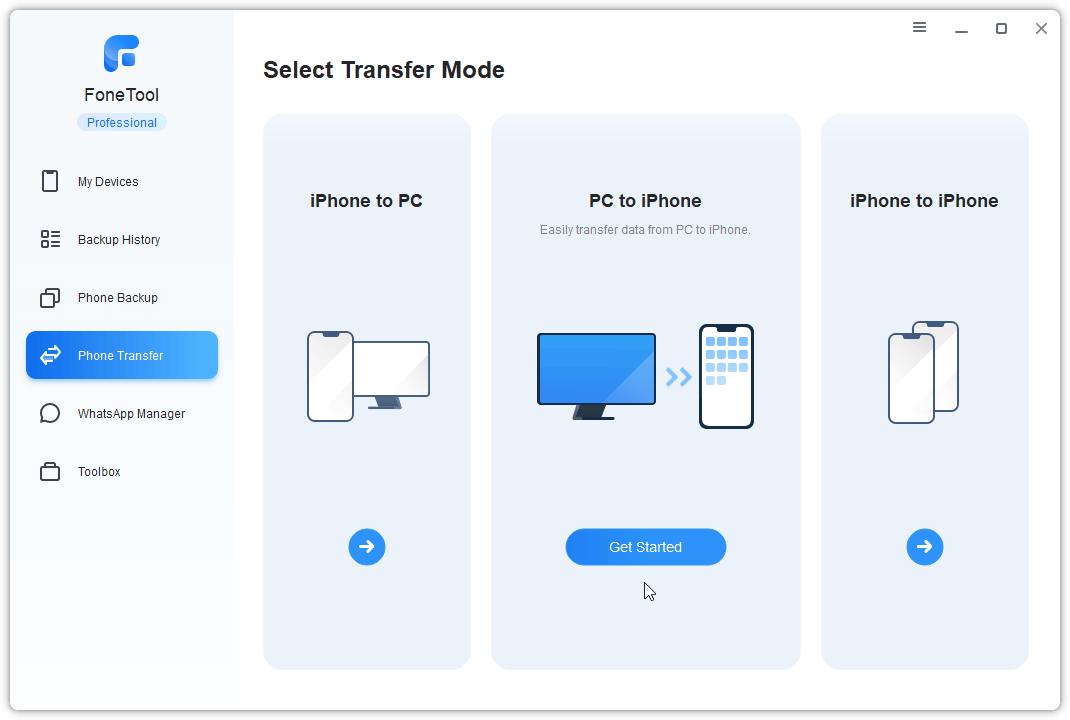
Step 1. Connect your source iPhone to computer with USB > Launch FoneTool and choose Phone Transfer > iPhone to PC > Click Get Started.
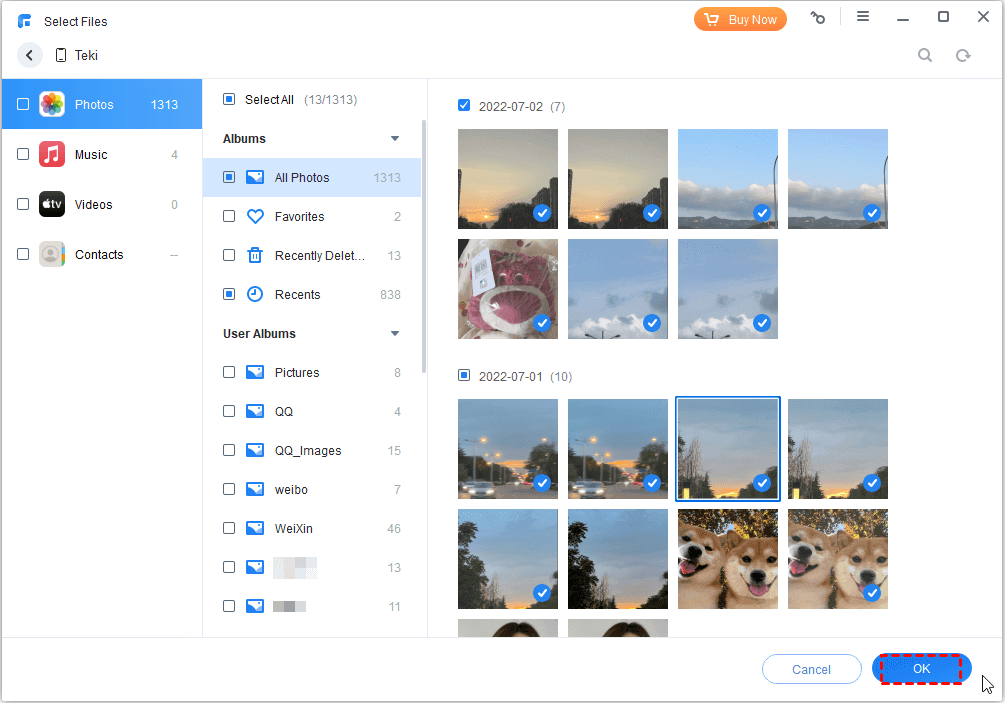
Step 2. Check the Photos icon and uncheck the others > Preview and select the photos you want to transfer > Click OK to confirm.
Step 3. Choose a destination from Transfer Settings as you like (Local folders, external hard drives, USB, etc. are all allowed) > Click Start Transfer to begin the task.
Step 4. Once the photo transfer is finished, you can unplug your source iPhone and plug in your target iPhone > Choose PC to iPhone and click Get Started.
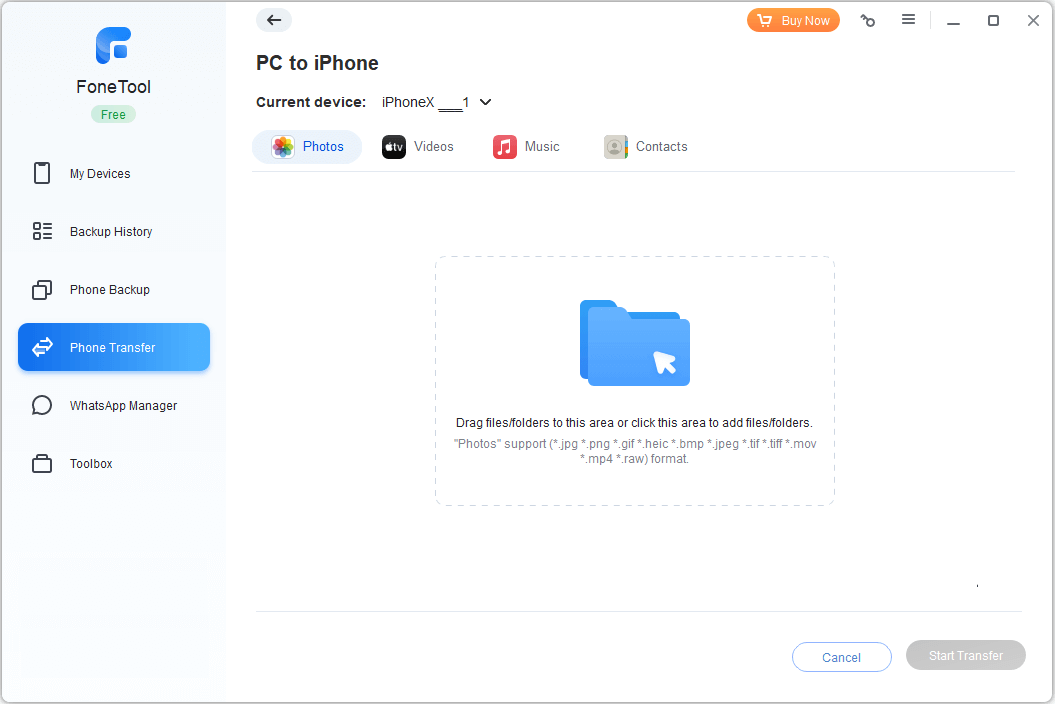
Step 5. Click the box area to add photos from the PC.
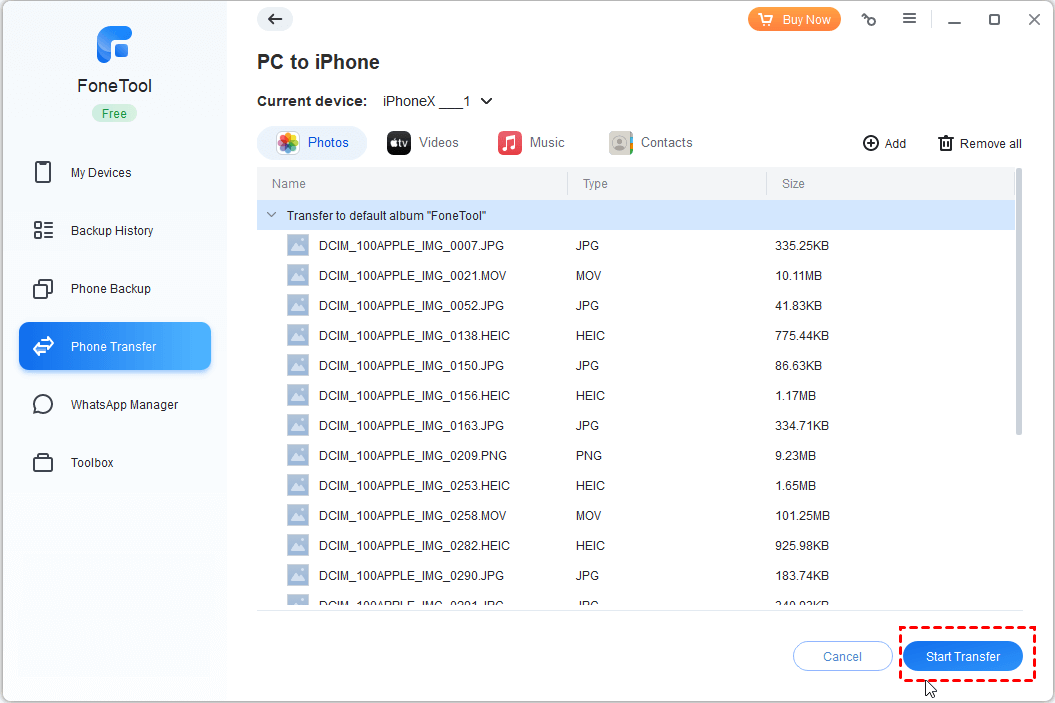
Step 6. Click Start Transfer to send photos to your iPhone.
Conclusion
From this passage, hope you can know how to approve iPhone from another device clearly. You can finish the process using Apple devices or non-Apple devices. If necessary, FoneTool can help you transfer iPhone data between different Apple IDs efficiently.
FoneTool - All-in-one iPhone Data Manager
Transfer, backup and manage data on iPhone, iPad and iPod touch in an easy way.
-
 iOS 27 Compatible
 iPhone 17 Supported
Windows 11/10/8/8.1/7
100% Secure

Kathy is an editor of FoneTool, who prefers to help more users address a series of iOS-related problems. She likes traveling and being close to nature makes her relax. She is also keen to engage in social activities and spend much free time with her friends.
Read author info >>