Dropped iPhone Won’t Turn on? Find Useful Solutions Here
Dropped iPhone won’t turn on? Don’t worry! This post will show you several effective methods to fix the iPhone and offer you a good way to back up your iPhone in case of data loss.
My dropped iPhone won’t turn on
Hey folks, so I kinda dropped my iPhone, and now it won’t turn on at all. Has anyone been through this? Any magic tricks to revive it?
- Question from an iPhone user
The iPhone has many great features that make it stand out in the smartphone world. Also, you have a lot of important files stored on your iPhone. However, what should you do if you accidentally drop your iPhone? Luckily, this post will show you several useful methods to fix “dropped iPhone won’t turn on”. Please keep reading!

How to Fix “Dropped iPhone Won’t Turn on” Easily
If you are experiencing the issue of “dropped iPhone won’t turn on”, there is no need to worry! Let’s dive into these fixes right away and get your dropped iPhone back up and running.
Way 1. Power Up Your iPhone by Charging
If your iPhone isn’t responding after a fall, charge it first. Simply plug your device into the wall charger. If the Apple logo appears, the iPhone will turn on automatically after a short period of time. If the wall charger doesn't work, try using your laptop USB port.
Way 2. Perform a Force Restart on Your iPhone
If your iPhone’s buttons are still responsive, attempt a force restart to check if it can be turned on. Follow these steps based on your iPhone model:
- For iPhone 8 and later: Quickly press and release the Volume Up button, repeat the process with the Volume Down button, and then press and hold the Power button until the Apple logo appears.
- For iPhone 7 and 7 Plus: Hold down the Power and Volume Down buttons until the Apple logo shows up.
- For iPhone 6 and earlier: Press and hold both the Power and Home buttons until the Apple logo appears.
Way 3. Link Your iPhone to iTunes
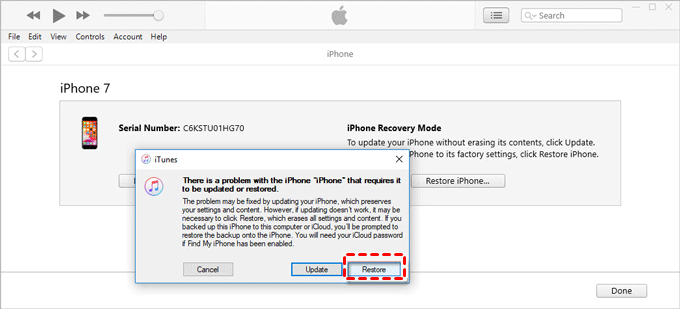
In the event that your iPhone has suffered a fall and remains unresponsive, connecting it to iTunes is a viable option. Simply plug your iPhone into your computer and launch iTunes.
If iTunes successfully identifies your iPhone, please initiate an immediate backup. If recognition fails, try to place your iPhone into Recovery Mode while keeping it connected. When prompted by iTunes to restore, select the Restore option. If there is no response, it could indicate a potential internal issue with the iPhone.
Way 4. Put Your iPhone into DFU Mode
If your iPhone is not responsible in the Recovery Mode, you can also try entering DFU Mode using the following straightforward steps:
Step 1: Close any open apps on your PC and launch iTunes > Connect the iPhone to the PC, ensuring the device is powered off.
Step 2: Hold down the Side (Power) button for at least 3 seconds > Simultaneously, press and hold the Volume Down (or the Home button for iPhone 6 and earlier) > Maintain both button presses for an additional 10 seconds.
Step 3: Release the Power button but continue holding the Volume Down or Home button for another 5 seconds. If the screen goes dark, you have successfully entered DFU mode.
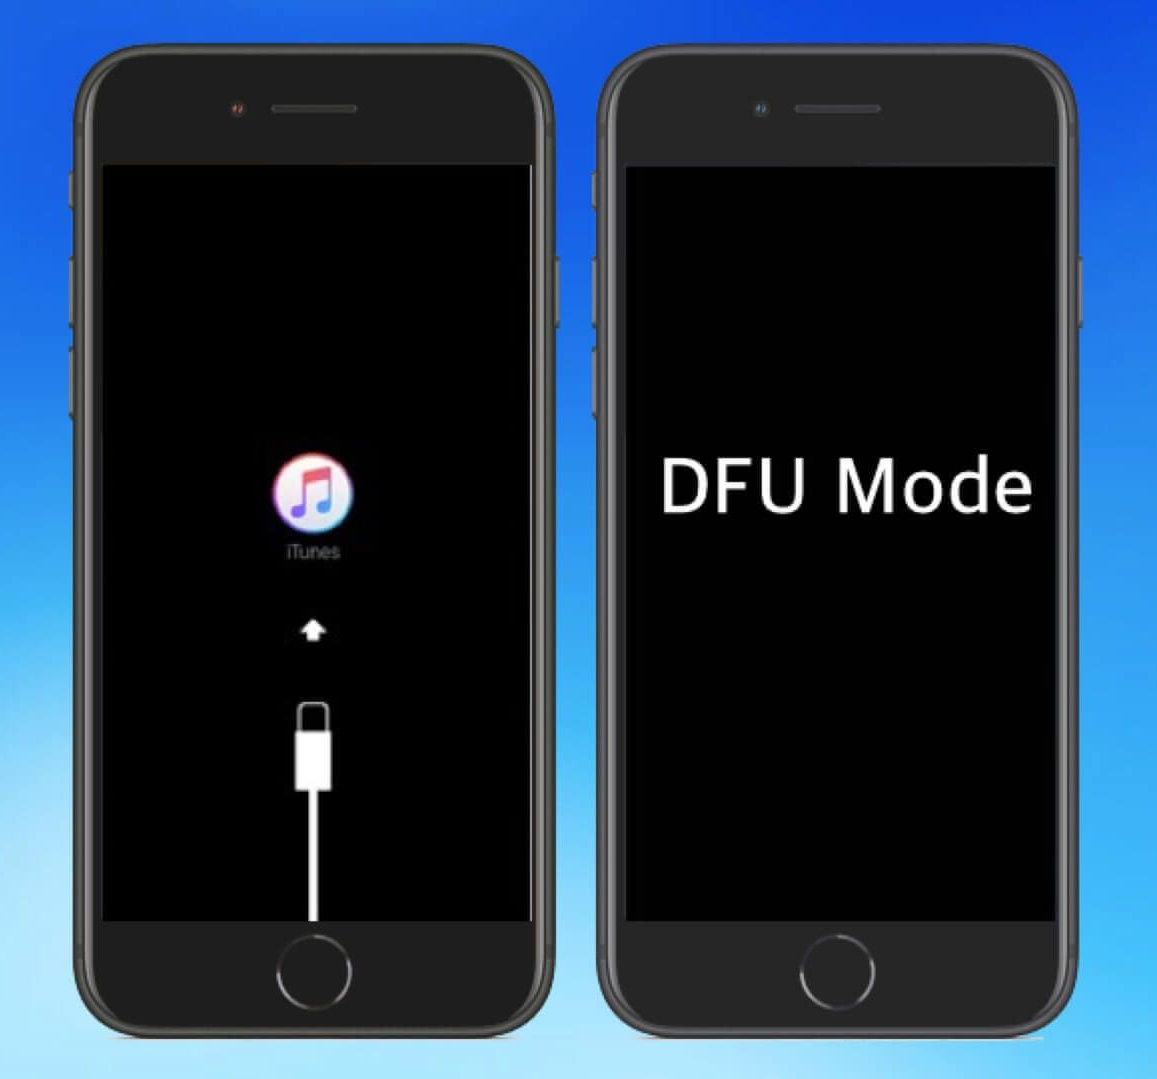
Once iTunes detects your iPhone, you will receive on-screen instructions to proceed with restoring the device. In this way, you may fix some iPhone issues such as “iPhone dropped won’t turn on”, “iPhone died and won’t turn on while charging”, etc..
Way 5. Investigate Potential Hardware Problems
If your iPhone does not respond despite performing the previous steps, there may be an underlying hardware issue. Accidental drops can sometimes cause damage to internal iPhone components, resulting in the device not turning on. For this reason, it’s critical to inspect components such as the motherboard, assess the battery for water damage, and check the screen for signs of breakage.
Way 6. Seek Assistance from Apple Support
For newer devices still within the warranty period, reach out to Apple support for official assistance. Schedule an appointment at a nearby Genius Bar to benefit from expert guidance. The skilled technicians at the Genius Bar can efficiently address and resolve any hardware issues your device may be experiencing.
Bonus Tip: Make a Regular iPhone Backup to Avoid Data Loss
Encountering problems with your iPhone, such as “my iPhone will not turn on after dropping it”, is a common issue. However, the challenge intensifies when you realize that not only is your iPhone malfunctioning but there is also a risk of data loss associated with such dilemmas.
To avoid such data loss, it’s essential to make a regular backup of your iPhone. How to back up your iPhone safely and quickly? FoneTool is highly recommended. It is a free, safe, and professional iPhone backup and transfer tool that allows you to make a full or selective iPhone backup.
Highlights of Using FoneTool to Make a Regular iPhone Backup:
Comprehensive Data Coverage: From contacts and messages to photos and app data, FoneTool ensures that your entire iPhone content is thoroughly backed up, leaving no critical data behind.
Encrypted Backups for Security: FoneTool offers the backup encryption option to encrypt backup for iPhone, adding an extra layer of security to your sensitive data.
Quick and Reliable Restoration: In the unfortunate event of data loss, FoneTool offers a fast and reliable data recovery process that allows you to retrieve your backed-up data with minimal hassle.
Flexible Backup Storage Options: Whether you prefer cloud storage or local backup(like a PC or external hard drive), FoneTool offers the flexibility to choose your preferred storage location.
Below is how to use FoneTool to make a regular iPhone backup to avoid data loss:
Step 1: Free download and install FoneTool on your PC > Connect your iPhone to your PC using a safe USB cable and tap Trust on your iPhone screen.
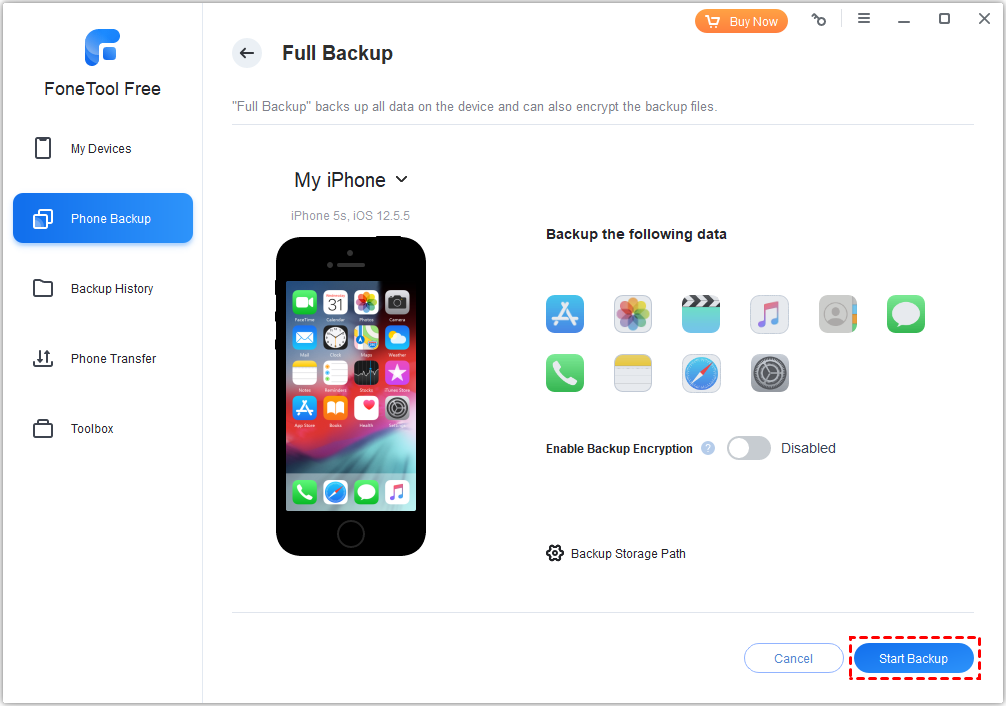
Step 2: Run FoneTool on your PC > Initiate the process by selecting Phone Backup > Hover over the Full Backup option and proceed by clicking Get Started.
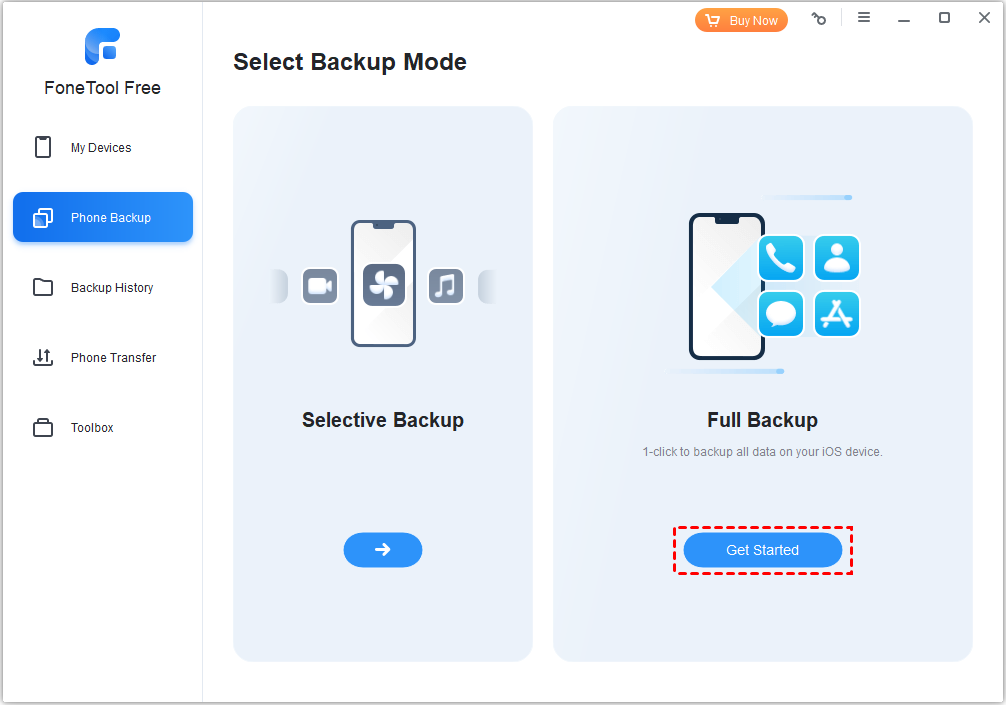
Step 3: Enhance the security of your backups by enabling backup encryption > Choose a designated storage path for your backup and click Start Backup.
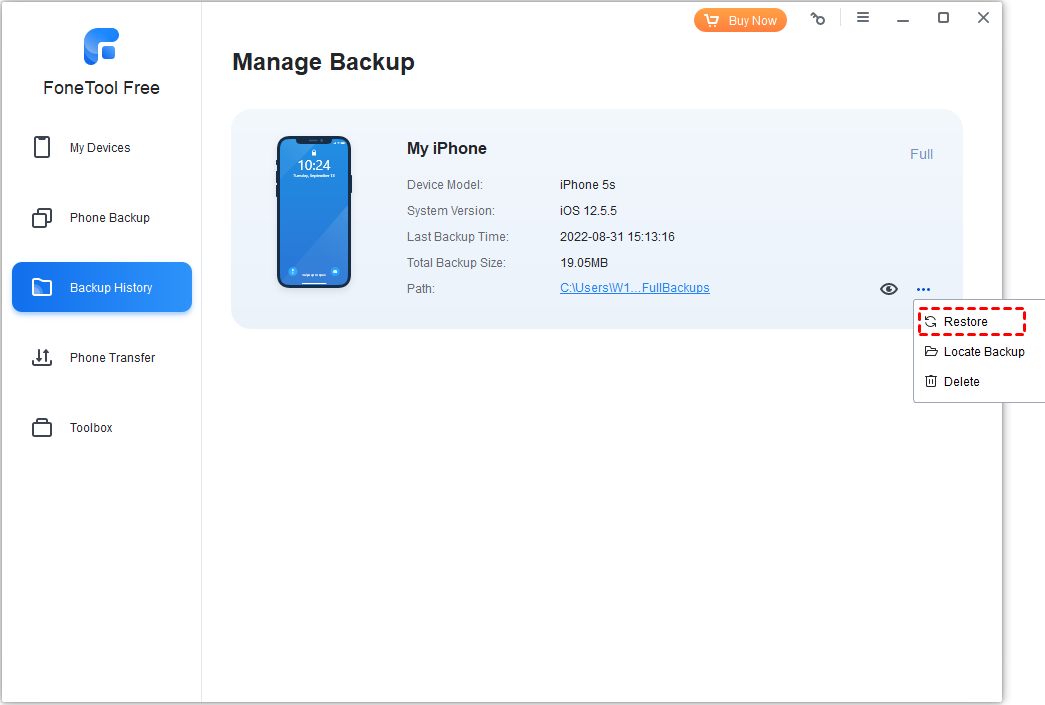
Once the backup concludes, you can go to the Backup History section to view the backup files. When you need to restore your iPhone data, just click the Restore icon to initiate the recovery process.
The Bottom Line
That’s all about how to fix “dropped iPhone won’t turn on”. In this comprehensive guide, you can choose the way that is right for your specific situation. In addition, you’d better develop a good habit of backing up your iPhone to avoid data loss. If you consider an easy and fast way to make an iPhone backup, FoneTool will be a good option for you. With the help of FoneTool, you cannot only back up your iPhone but also transfer data from iPhone to new iPad or other devices easily.
FoneTool - All-in-one iPhone Data Manager
Transfer, backup and manage data on iPhone, iPad and iPod touch in an easy way.
-
 iOS 26 Compatible
 iPhone 17 Supported
Windows 11/10/8/8.1/7
100% Secure

May is an editor who is passionate about sharing computer tips and providing reliable solutions, specializing in iOS/Android and file backup and recovery. In her spare time, May enjoys watching movies, going shopping, or chatting with friends.
Read author info >>