iPhone Died and Won’t Turn on While Charging [Easily Fixed]
How to fix “iPhone died and won’t turn on while charging”? Luckily, this post will first tell you why your iPhone won’t turn on and then offer you corresponding methods to fix this issue.
Why did my iPhone died and won’t turn on?
My iPhone 6 dies when it is at like 75% or higher, drops the battery very fast, and last night it died while it was plugged in. Now it won’t turn back on.
- Question from Apple Community
Why Is My iPhone Not Turning on While Charging?
When your iPhone died and won’t turn on while charging, several possible factors are listed below:
Physical Component Problems: If your iPhone has experienced a physical shock or damage, internal components may be compromised. This could be a key reason behind your device’s refusal to turn on.
Charging Cable Troubles: While your iPhone is plugged in, the charging cable itself may be causing the problem. This can occur if you’re using a non-authentic charger or cable, which might not provide the necessary electric supply.
Malfunctioning Power Button: The Power button is the gateway to turning on your iPhone. If the power button is broken or malfunctioning, it won’t relay the necessary signals to initiate your device’s startup process, leading to difficulties in powering it on.
Operating System Issues: It’s possible that a glitch within your phone’s operating system is preventing it from starting up. Given that the operating system is responsible for loading your iPhone's content, any issues in this area can hinder the power-up process.
How to Fix iPhone Died and Won’t Turn on While Charging
If you are facing the “iPhone died and won’t turn on while charging” issue, don’t worry! This section will show you how to turn on a dead iPhone while charging.
Way 1. Fix “iPhone Died and Won’t Turn on While Charging” [One Click]
If your iPhone won't turn on while charging and there is no hardware damage, it may be due to an iOS system failure. This issue usually occurs after updating to iOS 26 or jailbreaking, and a quick and effective solution is to use FoneTool Repair. By fixing the underlying error, this tool can solve the problem of your iPhone not turning on or charging properly, helping it to reboot and run normally.
Steps to Fix Your iPhone:
Step 1: Download and launch FoneTool Repair on your PC > Connect your iPhone to the PC via USB cable > Navigate to iOS System Repair.
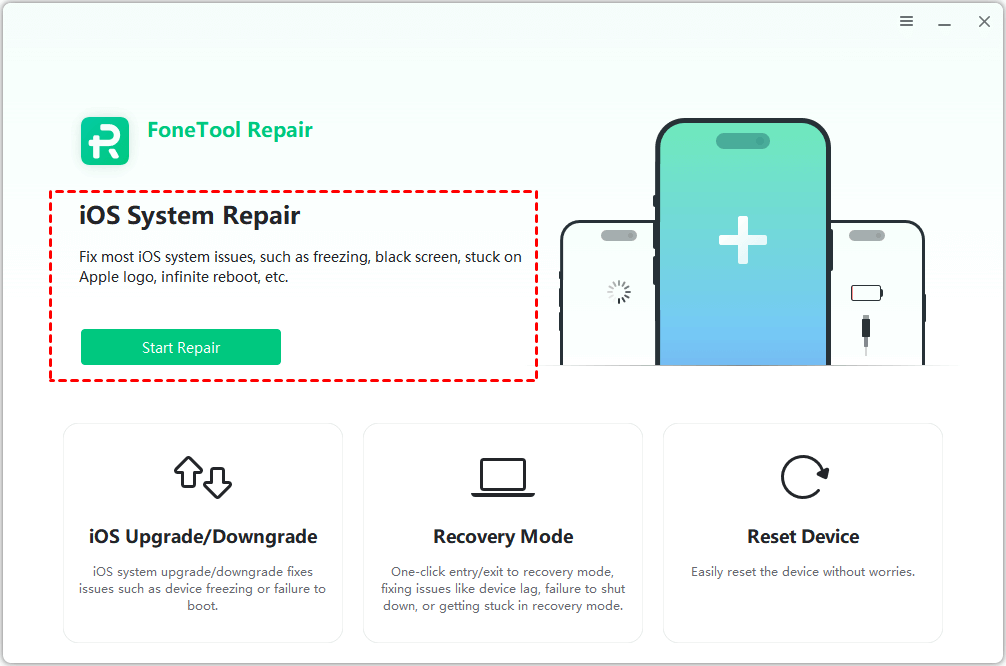
Step 2: Click the iOS System Repair option and choose Standard Mode to fix your iPhone's nonresponsiveness. Then, click Start to proceed.

Step 3: The tool will automatically download the correct firmware for your device. Once completed, click Start Repair.
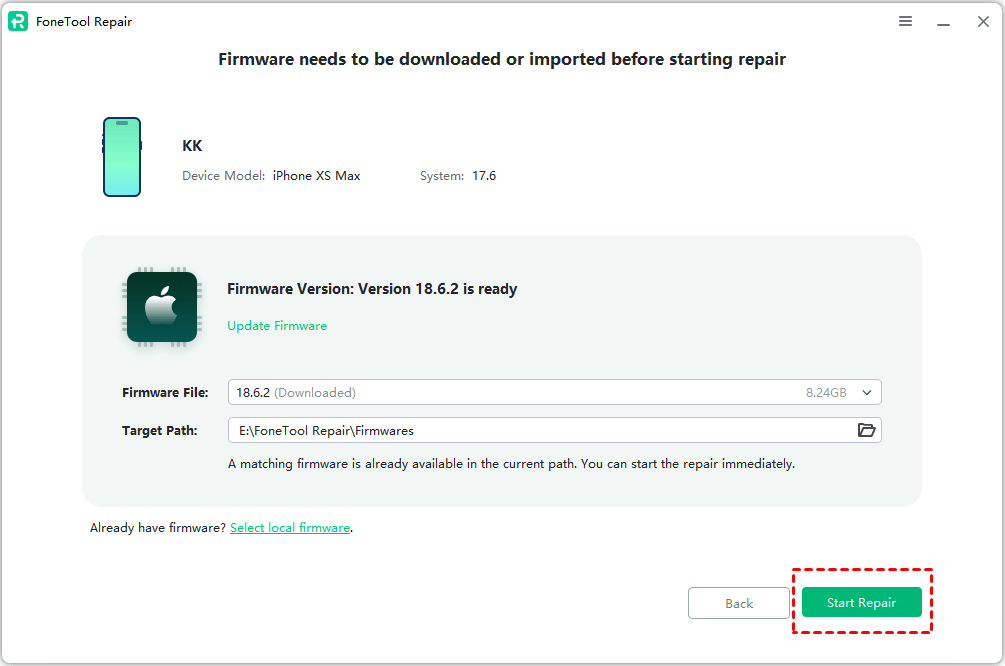
After a few minutes, your iPhone will reboot, and the issue of it not turning on after dying will be resolved.
Way 2. Allow for Extended Charging
If your iPhone battery is completely drained over a long period of time, it won’t turn on immediately when you plug it in. It will take time to regain its charge, and the process may take longer than usual. It’s recommended to wait at least half an hour before assessing its status.
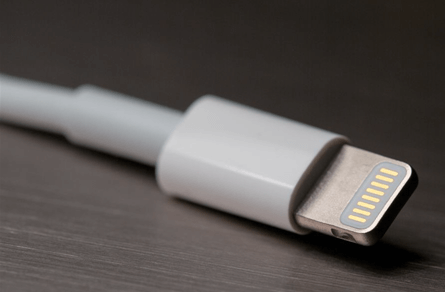
Way 3. Check Your Lightning Cable and Charger
In many instances, the root cause of charging issues lies in the quality of the lightning cable, as it can develop poor connections internally, leading to problems. To confirm this, you can attempt to charge another iPhone with the same cable. If the second device charges normally, then the issue likely resides with your iPhone. If it doesn’t charge, replacing the cable can resolve the problem of your iPhone not charging or turning on.
Way 4. Clean Your iPhone’s Charging Port
If switching out the charging cable and USB adapter yields no results, it's highly likely that your iPhone's charging port might be contaminated or damaged. Examine the port carefully and delicately remove any dust or debris present. Once cleaned, firmly reconnect your charging cable to the device.
Way 5. Repair a Faulty Power Button
When it’s the Power button causing problems, a replacement is in order. You have two options: visit an Apple store for professional repair services, or opt for a local repair shop to have the button replaced.

Way 6. Perform a Force Restart
While you may be familiar with this solution, a force restart can often resolve the issue of your unresponsive iPhone.
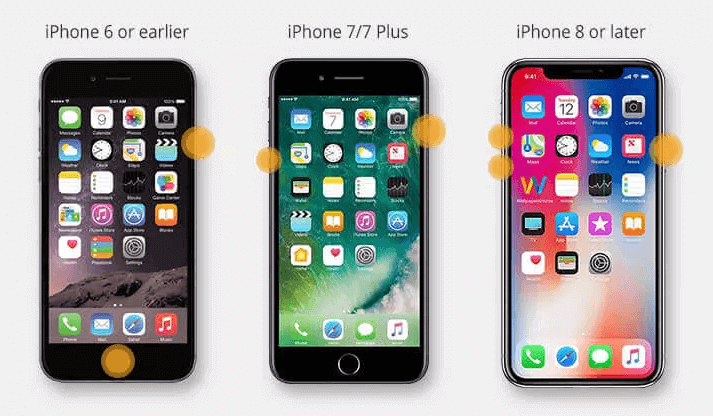
For iPhone 6(s) or older models:
- Simultaneously press and hold the Sleep button on the right side and the Home button.
- Keep holding both buttons firmly until the Apple logo appears.
For iPhone 7/7 Plus:
- Locate the Power button on the right side of your iPhone and press and hold it.
- At the same time, press and hold the Volume Down button until the Apple logo is visible on the screen.
For iPhone 8 and later models:
- Press and release the Volume Up button, followed by pressing and releasing the Volume Down button.
- Now, long-press the Side button and release it when the Apple logo appears.
Way 7. Restore Your iPhone via iTunes
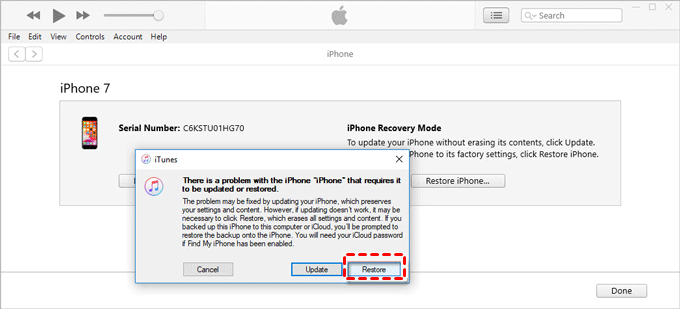
As a final resort, you can attempt to restore your device using iTunes. This process involves entering your iPhone into recovery mode and then using iTunes to perform a clean installation of iOS. Follow these steps to accomplish this:
Step 1: Download the latest iTunes and then open it on your computer > Connect your iPhone to your PC using a reliable USB cable.
Step 2: Press and hold both the Home and Power buttons on your iPhone to enter Recovery Mode while connecting it to your computer.
- ★Tip:
- Specific iPhone models may have different key combinations to access recovery mode.
Step 3: In the prompt that appears on your computer, select Restore to initiate the restoration process for your iPhone.
Bouns: Regularly Backup Your iPhone to Avoid Data Loss [Recommended]
You cannot predict which day your iPhone will fail. As a result, it’s necessary to back up your iPhone to protect your data from being lost. For Apple users, iCloud is an official and preferred way to make a backup of their iPhones. However, some users have reported that the iPhone won’t backup to iCloud due to a poor network connection or insufficient storage.
Under this situation, FoneTool is highly recommended. It is a free and professional iPhone backup and transfer tool that allows you to make a full or selective backup of your iPhone with ease. Here is a step-by-step guide to do that:
Step 1: Download and install FoneTool for free > Link your iPhone to the computer and ensure to grant trust permissions on your iPhone.
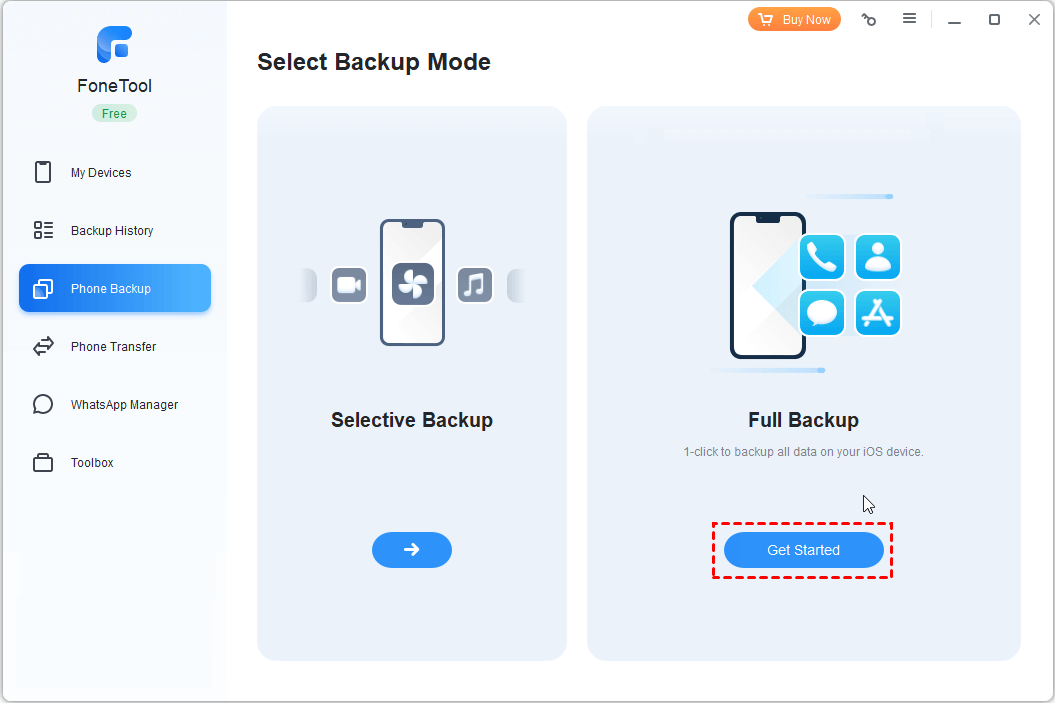
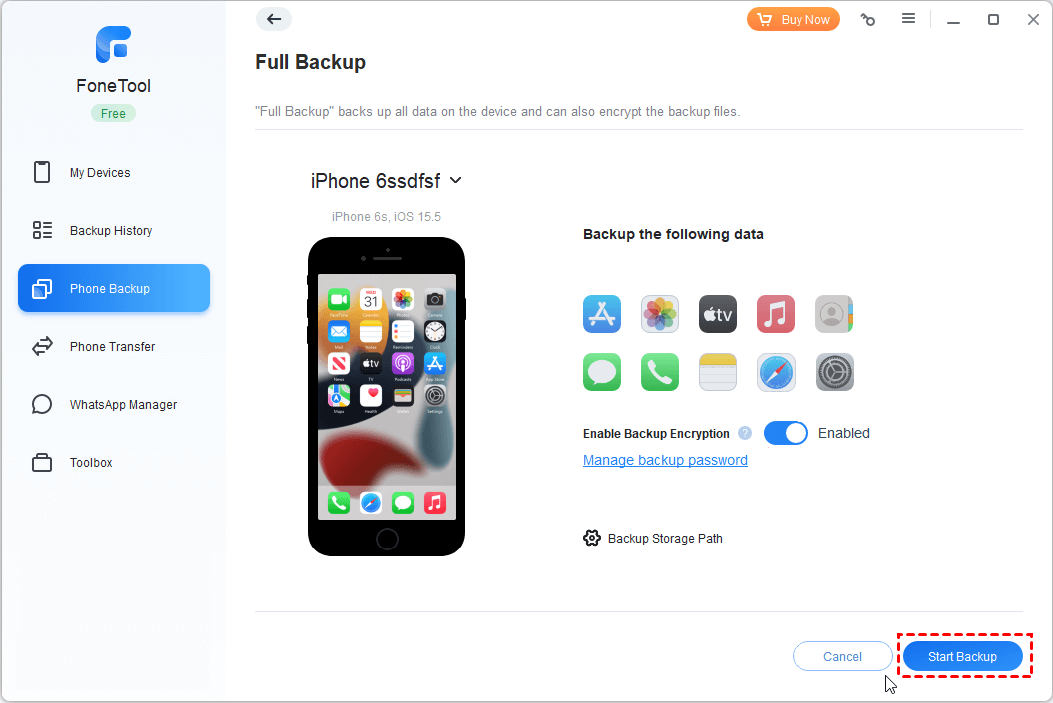
Step 2: Launch FoneTool to its home page > Navigate to Phone Backup > Full Backup (or Selective Backup to preview and selectively back up the desired data) and then click Get Started.
Step 3: If desired, you can Enable Backup Encryption to encrypt backup for iPhone, which can safeguard your personal data during the backup process.
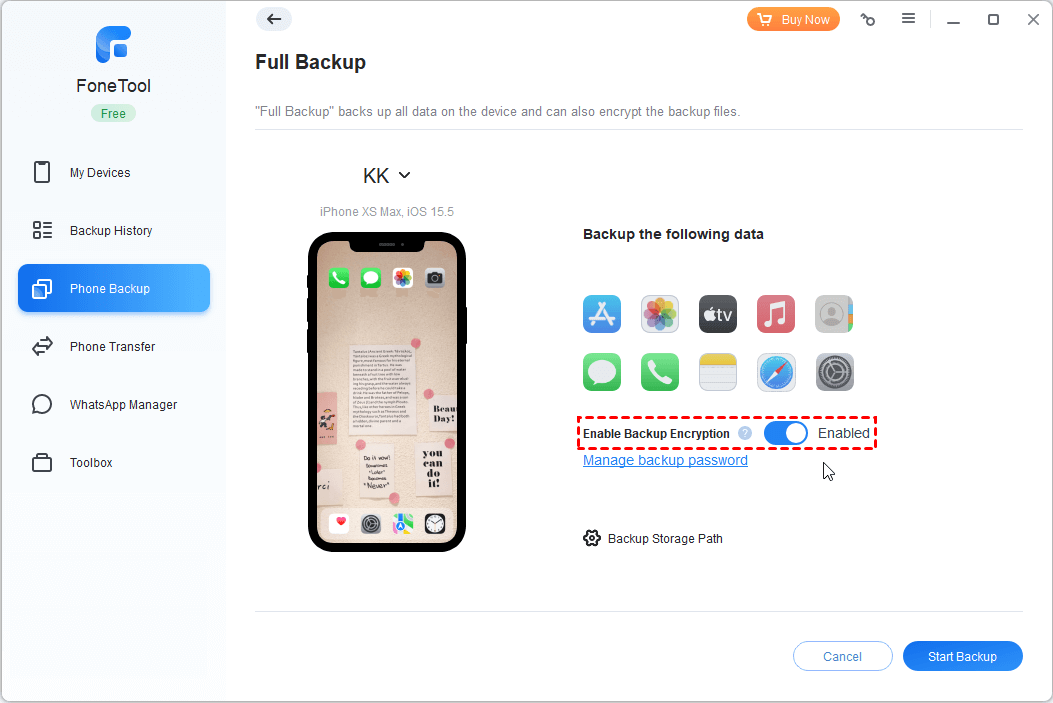
Step 4: Choose a storage destination for your backup, and then initiate the backup procedure by clicking Start Backup.
The Bottom Line
This article presents a comprehensive, step-by-step guide for resolving the issue of “iPhone died and won’t turn on while charging”. Hope these methods in this post can help you solve this problem easily and quickly. In addition, it’s quite important to develop a good habit of backing up your iPhone data, because some iPhone issues may cause data loss. In this case, FoneTool will be a good choice for you, which cannot only back up your data on your iOS device but also transfer data from iPhone to new iPad or other devices. Try it out!
Fixes 160+ iOS/iPadOS issues, boot loops, crashes, failed updates, with no data loss.
-
 iOS 27 Compatible
 iPhone 17 Supported
100% Secure

May is an editor who is passionate about sharing computer tips and providing reliable solutions, specializing in iOS/Android and file backup and recovery. In her spare time, May enjoys watching movies, going shopping, or chatting with friends.
Read author info >>