iPhone Custom Ringtones Not Working [9 Easy Ways to Fix]
iPhone custom ringtone not working? Don’t worry! This post will show you 9 easy and useful ways to troubleshoot custom ringtone not working iPhone.
Why are my custom ringtones not showing up on iPhone?
I’m using iOS 17. Been trying to use custom ringtones but no luck. I created them originally with GarageBand. So, I tried to recreate them using the original files and exported them again as ringtones. No luck, nothing but Apple’s original tones appear. Is this the same for others too, or is it just my device?
- Question from Reddit
Why Is My Custom Ringtone Not Working on iPhone?
Why is my iPhone custom ringtone not working? Here are some possible reasons:
- Incorrect file format for the ringtone.
- The ringtone file is too long or too short.
- Syncing issues with iTunes or iCloud.
- The ringtone is not properly assigned to the contact.
- Software glitches or bugs affecting the ringtone function.
- Compatibility issues with the iOS version.
- Corrupted or damaged ringtone file.
- Settings restrictions preventing custom ringtones from playing.
Now that you learn “why my ringtone is not working in iPhone”, scroll down to learn useful ways to solve this problem.
How to Fix “iPhone Custom Ringtone Not Working”
When you are facing the issue of “iPhone custom ringtone not working”, don’t worry! This section will show you 8 easy and effective ways.
Way 1. Reboot Your iPhone
Refreshing your iPhone by restarting it can often resolve various issues like “iPhone custom ringtone not showing up” and improve its performance. If you are facing problems with your iPhone ringtones not working, try restarting your device to see if it resolves the issue.
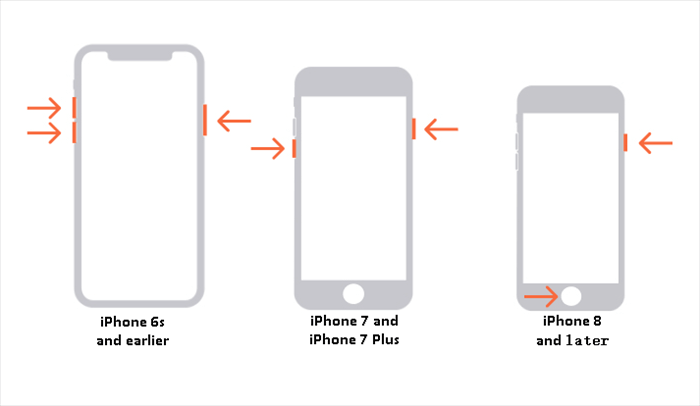
Way 2. Verify the Ring/Mute Button
If your iPhone ringtone is not working, it may be due to inadvertently activating the mute function. To ascertain whether this is the issue, inspect the left side of your iPhone. If there’s a small orange strip visible above the button, the device is in silent mode. Simply toggle the switch to activate the ring mode and ensure your iPhone ringtone functions properly.
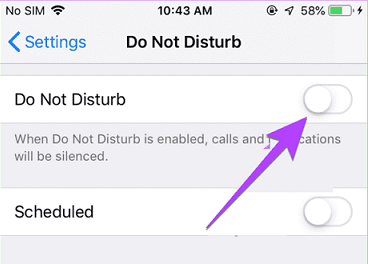
Way 3. Disable Do Not Disturb Mode
When the Do Not Disturb mode is activated, your iPhone silences all incoming calls, messages, and alerts, including your ringtone. To rectify this, navigate to Settings > Do Not Disturb, and ensure that both the Manual and Scheduled sliders are toggled off to deactivate Do Not Disturb mode.
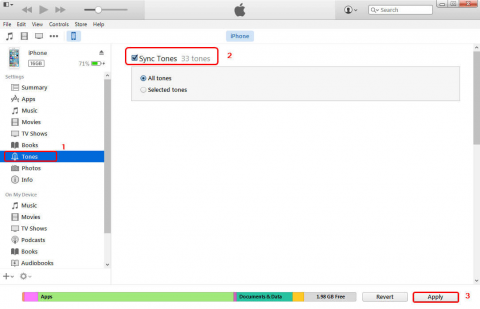
Way 4. Import Tones Manually
Some users have successfully solved the problem of iPhone not playing selected ringtones by manually transferring the old ringtone folder to iTunes and then syncing it to iPhone. You can follow the steps listed below to try this solution:
Step 1. Run iTunes on your PC and navigate to the files in the Tones folder in the iTunes Media Library directory.
Step 2. Connect your iPhone to your PC > In iTunes, select Ringtones under the On My Device section > Drag and drop the previously found Tone folder into the Tone category in iTunes.
Step 3. Click Sync Tones and continue to navigate to Settings > Sounds > Ringtones on your iPhone to verify that you are now in the Ringtones category.
Way 5. Buy a New Ringtone
If your assigned ringtones aren’t working on your iPhone and it consistently plays the default tone, purchasing a new ringtone could be a viable solution, as it has proven effective for some users. Follow these steps to purchase a new ringtone:
Step 1. Open the iTunes Store app on your iPhone > Tap the Search tab to find the music you desire.
Step 2. Tap the price of the desired ringtone > Sign in with your Apple ID to complete the purchase and download the new ringtone.
Step 6. Choose a New Default or Assigned Ringtone
If you’re still facing issues, it’s worth examining your ringtone settings. Sometimes, a deleted or corrupted custom ringtone assigned to specific contacts can prevent your iPhone from ringing. In such cases, setting a new default ringtone might resolve the problem. To do this, follow these steps:
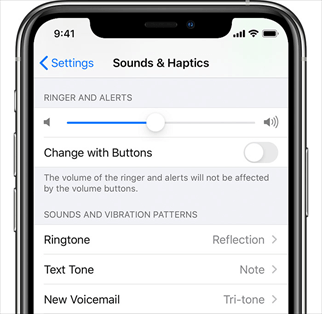
Step 1. Tap Settings on your iPhone > Select the Sound & Haptics option from the menu.
Step 2. Choose Ringtones and pick a new ringtone from the list.
If you encounter problems with assigned ringtones not functioning correctly on your iPhone, it could be due to issues with the source of the ringtones. In such instances, selecting a new ringtone for that contact could be the solution. Here’s how:
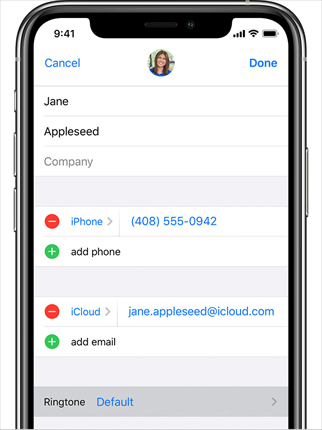
Step 1. Open the Phone app on your iPhone > Navigate to your contacts and find the person’s name.
Step 2. Tap their name and then select Edit > Check the Ringtone line and assign a new ringtone to them.
Way 7. Reset All Settings and Restore iPhone from Backup
Resetting all settings and restoring your ringtones from a backup can be effective when your iPhone cannot play custom ringtones. If you have made a full iPhone backup, please follow these steps:
Step 1. Go to Settings on your iPhone, select General > Transfer and Reset iPhone > Reset, and choose Reset All Settings and enter your passcode if prompted.
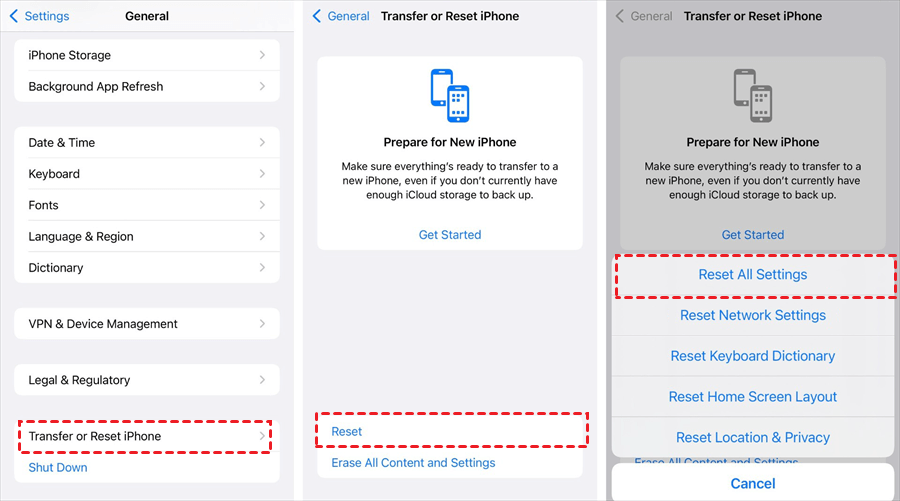
Step 2. Confirm the action by tapping Reset All Settings again > Once completed, you can restore your iPhone to the latest backup from iCloud or iTunes.
Way 8. Repair iOS System to Fix Ringtones Not Working
Some users have reported that their iPhone custom ringtone are not working after updating to iOS 18/17. If you're experiencing this issue, FoneTool can help restore normal functionality. Here’s how to use FoneTool’s iOS System Repair:
Step 1: Download and install FoneTool on your PC > Connect your iPhone to your computer using a USB cable.
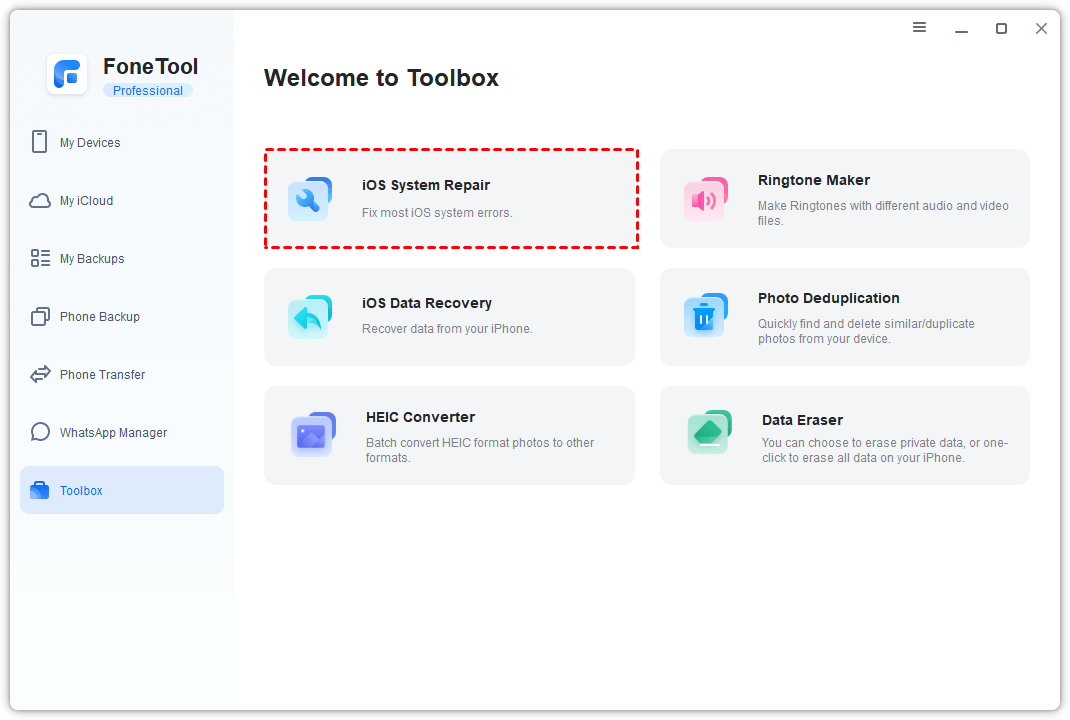
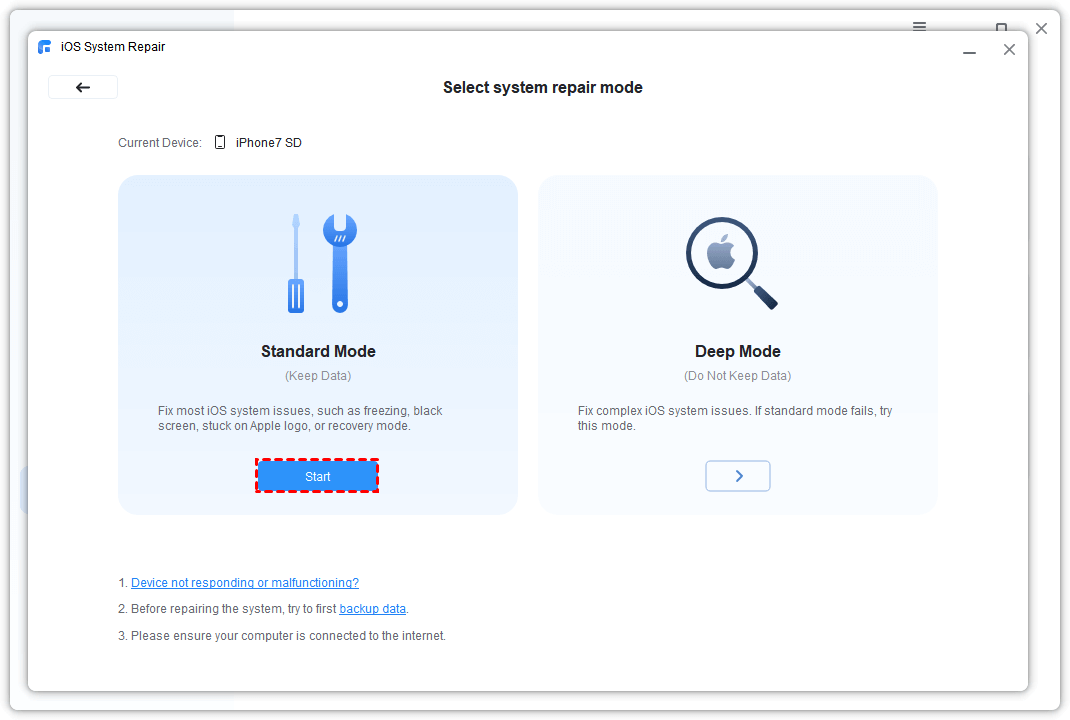
Step 2: Run FoneTool on your PC > Go to the Toolbox and select iOS System Repair.
Step 3: Locate and click Standard Mode to address the issue where your iPhone can't swipe up or ringtones aren’t working > Click Start to proceed.
Step 4: FoneTool will automatically download the appropriate firmware for your device. Once ready, click Start Repair to begin the process.
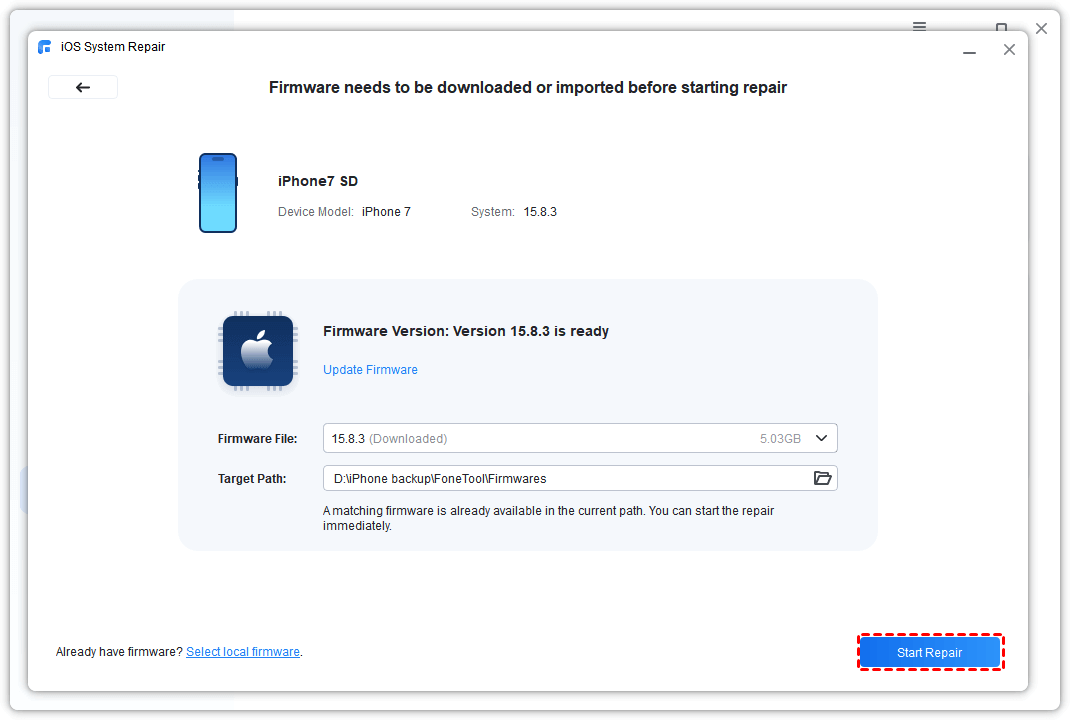
In just a few minutes, your iPhone will reboot, and the ringtone issue should be fixed.
Way 9. Alternative Way to Edit and Custom Ringtones
After trying the above, your iPhone custom ringtone is still not working. In this case, you can look for an alternative way to edit iPhone ringtones. FoneTool is also an excellent ringtone maker and transfer tool. It offers ringtone editing features that let you select your favorite clips with simple actions on your computer.
To edit and custom ringtone on your iPhone using FoneTool, follow these steps:
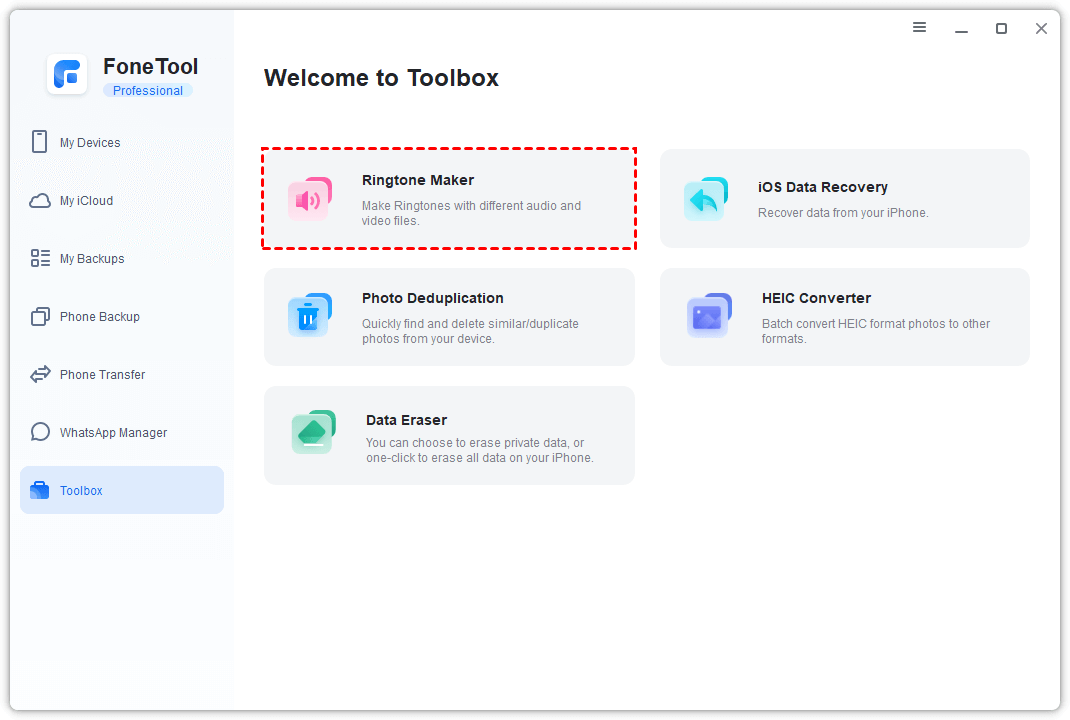
Step 1: Connect your iPhone to your computer with a USB cable > Launch FoneTool, go to the Toolbox, and select Ringtone Maker.
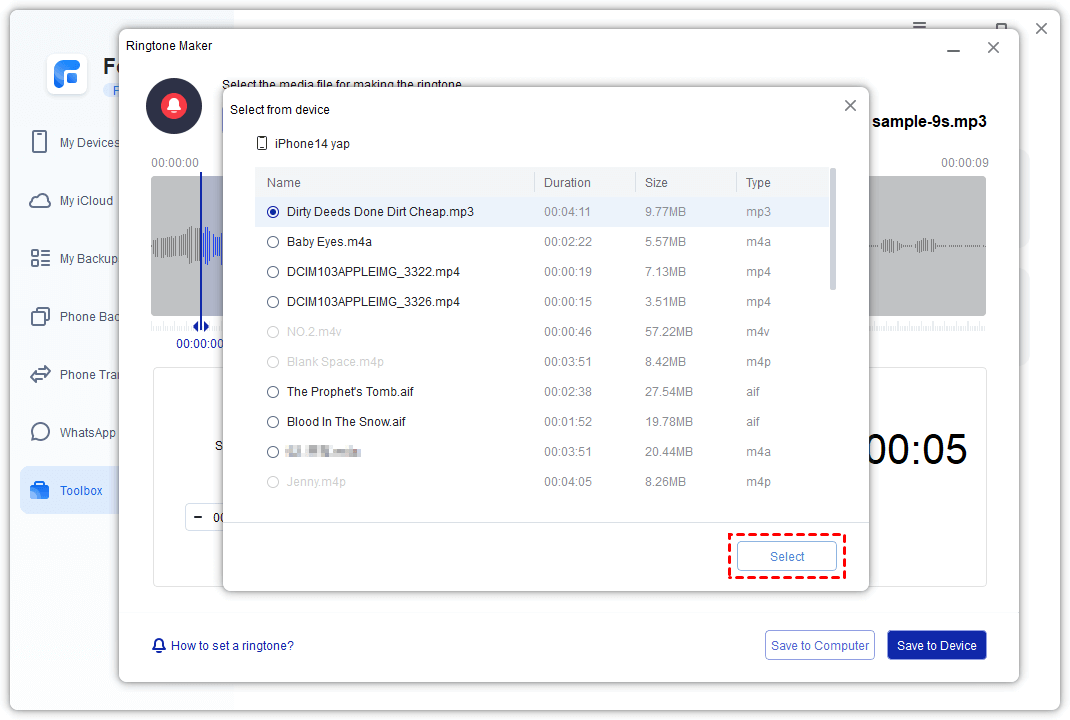
Step 2: Select From Device to choose the desired music > Pick the music on your iPhone and click Select.
Step 3: Edit the music as desired > Once done, click Save to Device to complete the process > Confirm by clicking Save in the pop-up window.

Bonus Tip: How to Transfer Ringtones from iPhone to PC
To effortlessly transfer iPhone ringtones to a PC, it’s highly recommended to use a safe and professional transfer tool called FoneTool. It stands out as the premier software for transferring iPhone data (including ringtones, songs, photos, videos, and more) from iPhone to computer. With its user-friendly interface, the entire process can be completed in just a few clicks.
Now, you can simply click the download button to get and install this free iPhone transfer software and learn how to transfer ringtones from iPhone to PC.
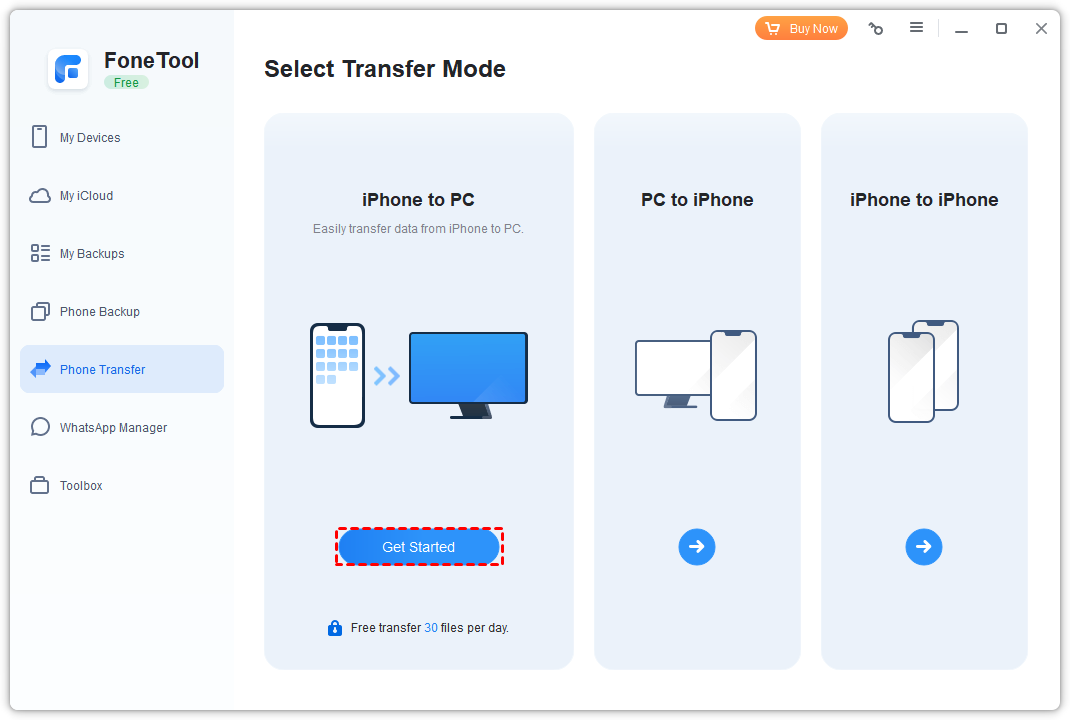
Step 1. Connect your iPhone to the computer using a USB cable and launch FoneTool > Navigate to Phone Transfer > iPhone to PC > Start Transfer.
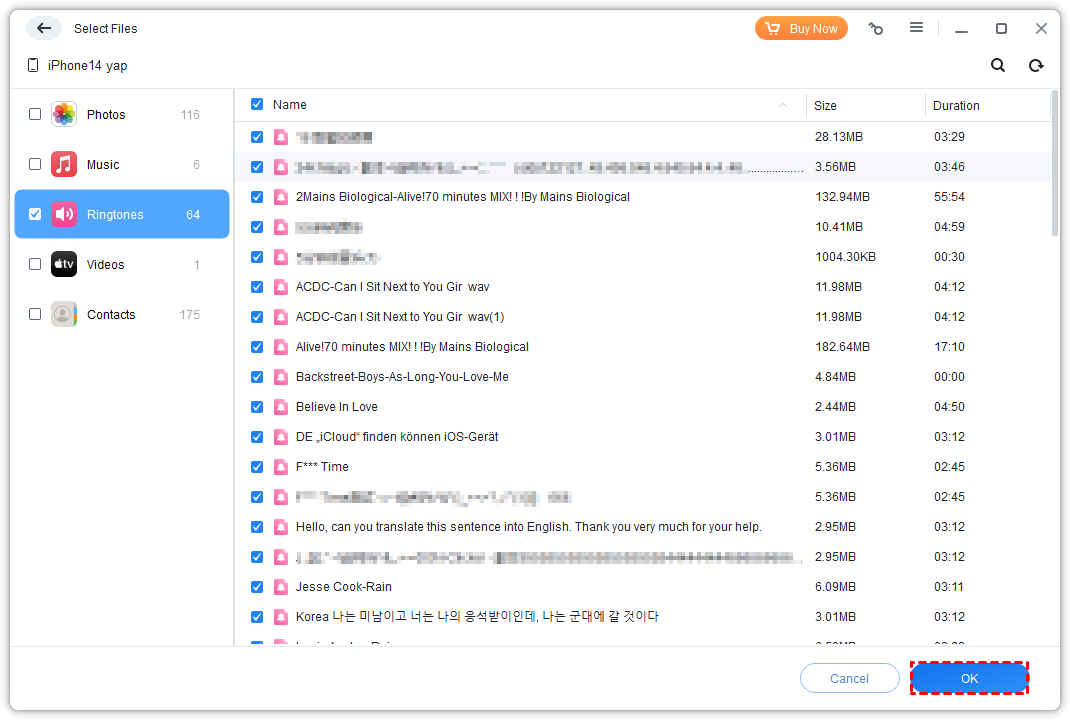
Step 2. Click the plus icon to add ringtones from your iPhone > Click OK to confirm.
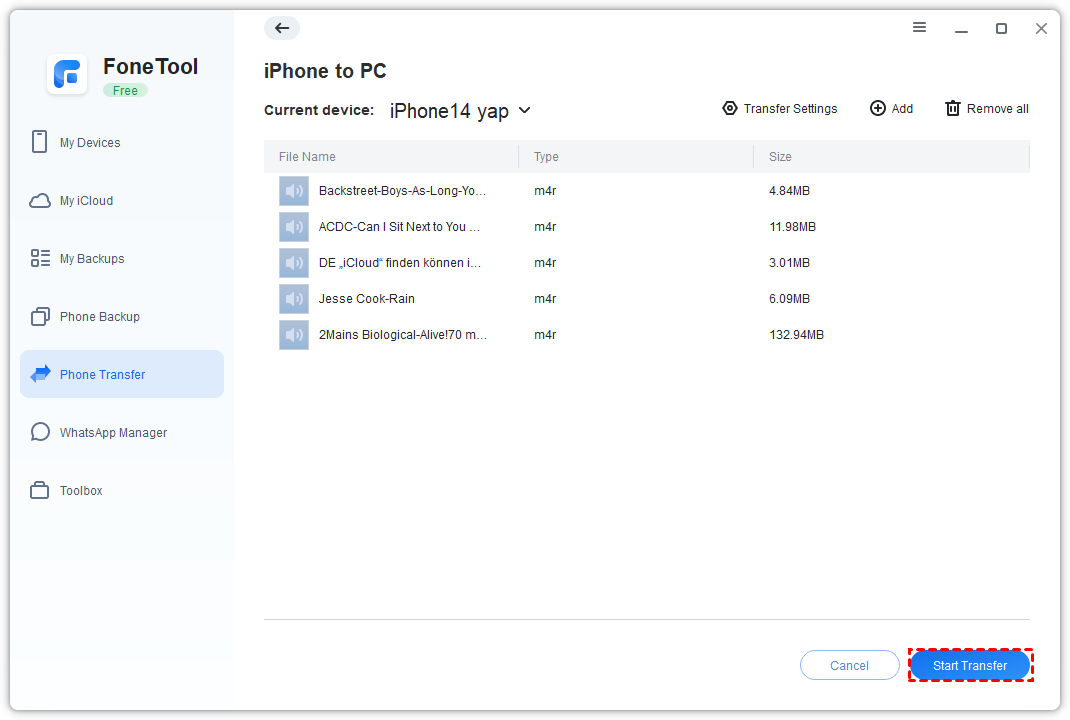
Step 3. Choose a storage path from the Transfer Settings option, and then click Start Transfer to initiate the transfer process.
The Bottom Line
These are 9 easy ways this post has identified to resolve the issue of “iPhone custom ringtone not working”. We will continue to monitor this issue closely and provide additional troubleshooting tips as we identify issues.
Besides, if you need to transfer your ringtones to a PC, you can make use of FoneTool to make it. FoneTool is also one of the powerful iPhone backup software that allows you to make a full or selective backup of your iPhone data. Download FoneTool and use it right now!
FoneTool - All-in-one iPhone Data Manager
Transfer, backup and manage data on iPhone, iPad and iPod touch in an easy way.
-
 iOS 27 Compatible
 iPhone 17 Supported
Windows 11/10/8/8.1/7
100% Secure

May is an editor who is passionate about sharing computer tips and providing reliable solutions, specializing in iOS/Android and file backup and recovery. In her spare time, May enjoys watching movies, going shopping, or chatting with friends.
Read author info >>