How to Delete Hidden App on iPhone? 4 Effective Ways
If you want to know how to delete hidden apps on iPhone, you can find 4 effective ways in this article. If your software is accidentally deleted or has been lost, you can learn how to recover them here.
Where Are Hidden Apps Stored on iPhone?
Are you struggling to locate an app on your iPhone that you haven't used in a while? This article can guide you on how to delete hidden apps on iPhone and find them.
With the introduction of iOS 14 in 2009, Apple created a new feature that allowed users to organize their apps in a folder. This folder, known as the Apple folder, provided a safe and hidden space for apps that users didn't want to display on their home screen.
The small screen size of the iPhone can make it difficult to find a specific app when there are too many apps on the same page. To combat this, Apple introduced the app folder feature in iOS 14, which allows users to hide apps from plain sight and keep their home screen clean and organized.

Why Need to Delete Hidden Apps on iPhone?
To delete hidden apps from your iPhone, the first step is to locate them in the App Library where they're temporarily stored.
If you want to delete hidden apps from your iPhone to free up space and maintain security, you'll need to locate them in the app folder. Unlike Android devices, it's not easy of how to delete apps on iPhone that are hidden on iOS since they're not visible on the home screen.
If you're looking to delete hidden apps from your iPhone, there are four different methods you can try. If one doesn't work, move on to the next until you're successful.
Way 1. Delete Hidden Apps from iPhone using Settings
iOS settings can be more complex than those found on Android devices, and it may take some time to familiarize yourself with how everything works. Once you're ready to delete hidden apps, follow the steps below:
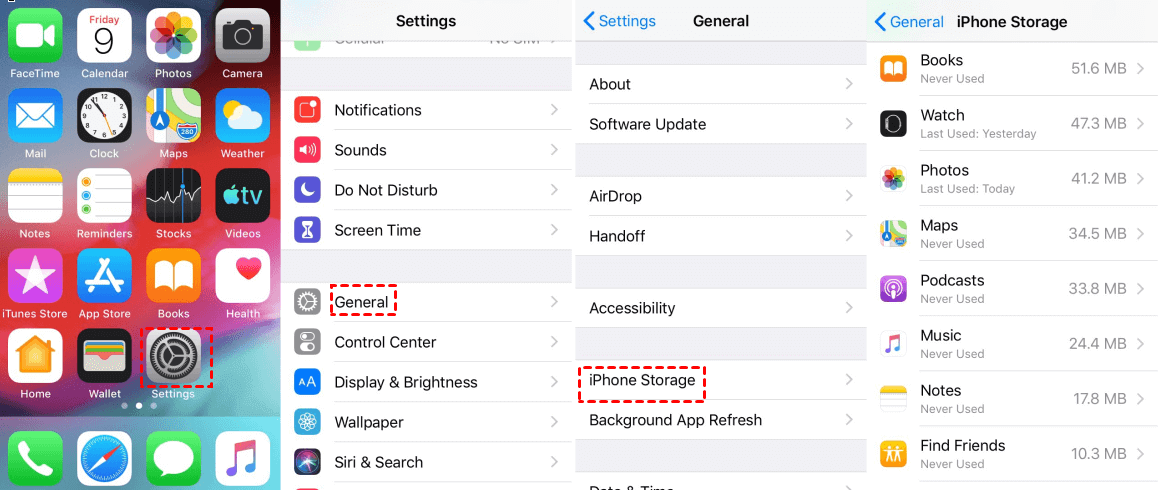
Step 1: Open the "Settings" and select "General". Look for "iPhone Storage" and wait until all hidden apps are displayed. Choose the apps you want to delete and tap on them.
This will take you to a screen with all the relevant details of the app, including its size, storage usage, and more. From here, you can proceed with deleting the hidden apps you've chosen.
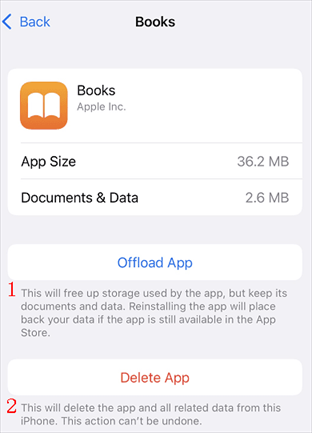
Step 2: Select the app you want to delete from the list displayed in "iPhone Storage". Then you can select the apps you want to delete and tap on them.
This will take you to a screen showing all the relevant details of the app, including its storage usage, data, and app size.
Step 3: Look for the "Delete app" option and select it. Keep in mind that deleting an app will also delete all related data associated with it, and this action can't be undone.
Once you've deleted the app, it will automatically be removed from your app library, folder, or home screen.
Way 2. Delete Hidden Apps on iPhone with App Library
iOS devices have an app library where hidden apps are stored, away from the home screen.
If you can't find an app on your home screen, it might be hidden in the app library. Follow the steps below to learn how to delete hidden purchased app on iPhone:
Step 1: Swipe left on your home screen until you find a blank home screen with no apps. You'll see a bar labeled "App Library".
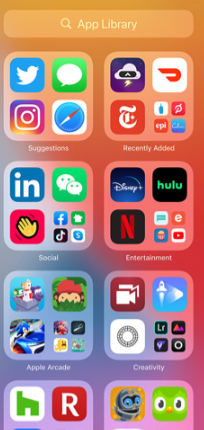
Step 2: Tap on the bar to search for the hidden app you want to delete.
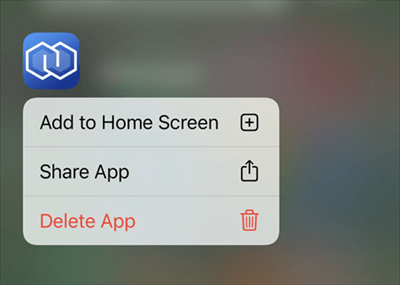
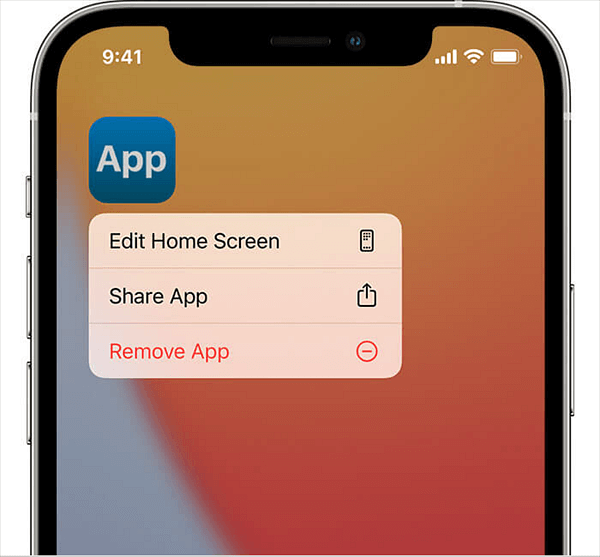
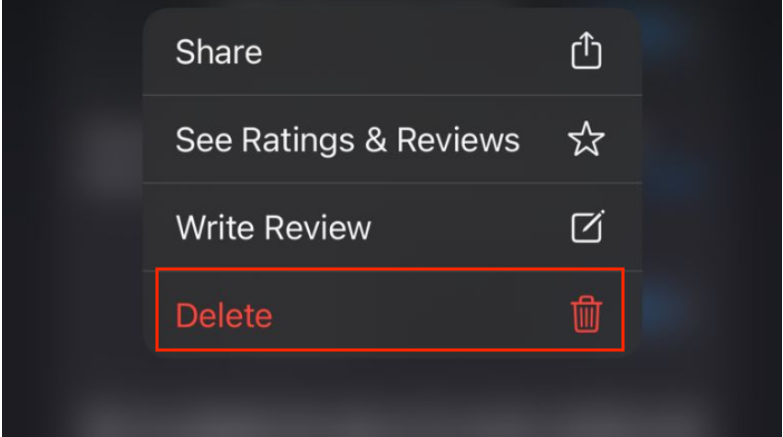
Step 3: Once you find the app you want to delete, tap on it to get the delete option. Alternatively, you can long-press the app to find the Delete option.
Step 4: Click "Delete App" and confirm the action to remove the app from your phone permanently.
Way 3. Delete Invisible Apps with Spotlight
Spotlight is a useful feature on iOS devices that can help you manage apps, files, and emails while keeping your phone free from unnecessary third-party apps.
To delete hidden apps using Spotlight, follow these steps:
Step 1: Swipe down on your home screen to reveal the search bar at the top of the screen.
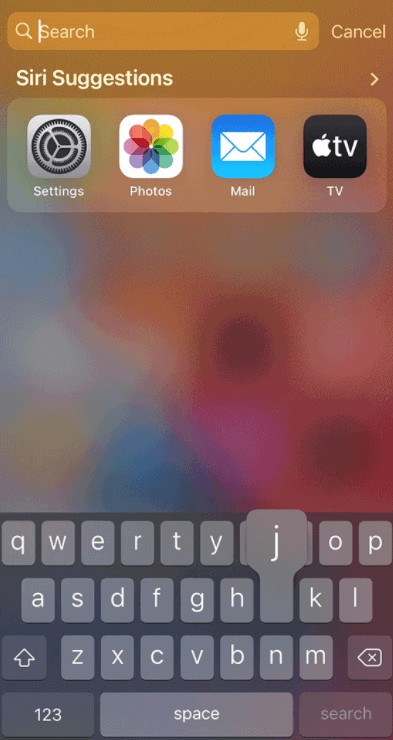
Step 2: Type in the name of the app you want to delete and select the icon for Spotlight. Look for the delete option and tap on it to "Delete App/Remove App".
Once you select this option, a new popup will appear on the screen with the option to delete the app again. If you're sure you want to proceed, click on that option and the app will be deleted from your phone.
Way 4. Delete Purchased Apps on iPhone with App Store
If you have purchased apps from the App Store that you no longer need, there is a traditional method to delete them from your iPhone. Keep in mind that this method only works for apps that have a pending update or a recently updated pending history because the app store only saves apps that have new updates available.
To delete hidden apps from the app store, follow these steps:
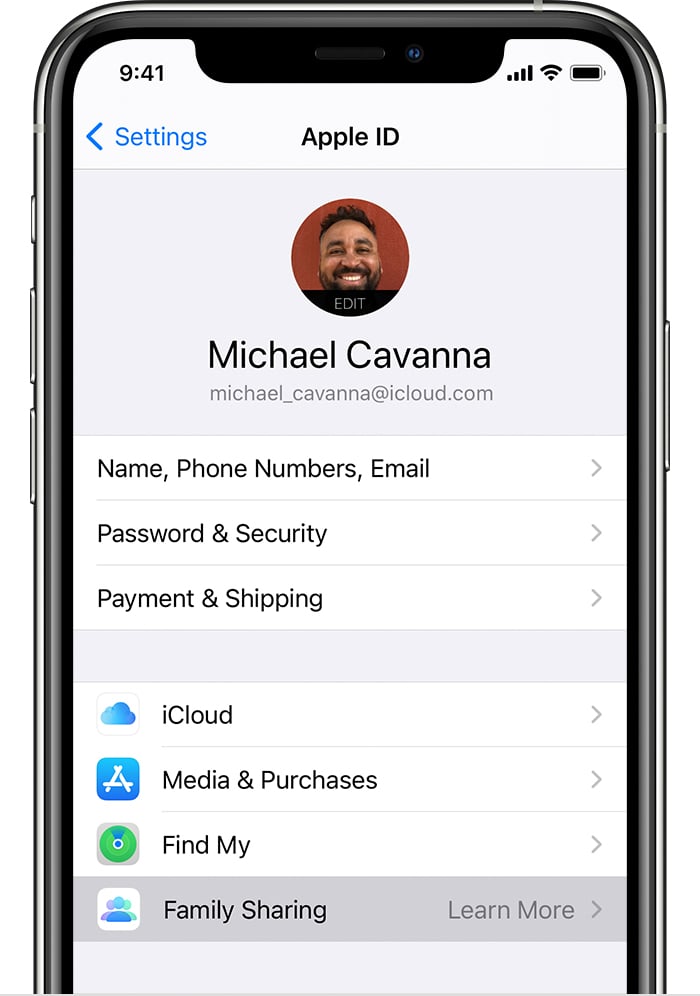
Step 1. Open the app store from your settings and tap on your profile picture to access the next screen with all available updates.
Step 2: Next to each app, you'll see an "Update" option. Swipe left to reveal the "Delete" option. Long-press on that option and select "Delete" to confirm.
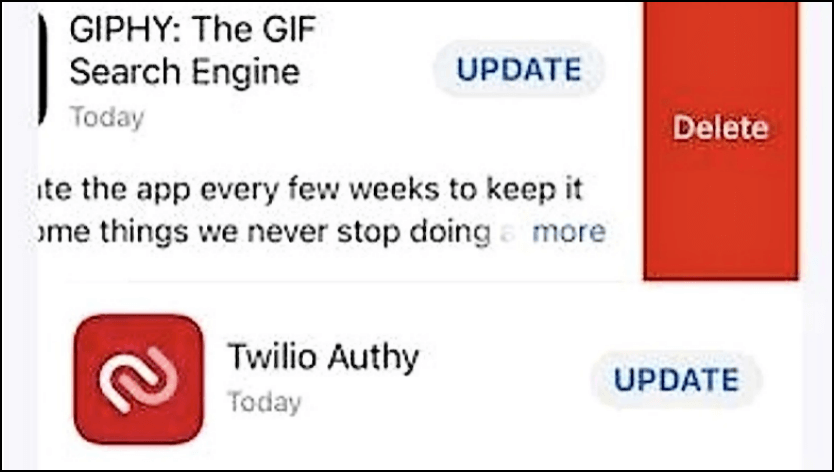
Step 3: The system will ask you to confirm your action, as deleting the app will also delete all related data present on the phone.
How to Recover iPhone Data with iOS Data Recovery Software
Deleting data on an iPhone can be a hassle, and recovering deleted data can be just as challenging, especially if it wasn't backed up on the phone. Fortunately, FoneTool can help you out of this bind.
With its unique features, FoneTool allows you to professionally recover iPhone data directly from iOS devices, iTunes, and Cloud backup. It works great in recovering deleted photos, videos, contacts, chat histories, messages, and more from nearly every iOS device, regardless of whether you have the latest device.
Whether it's been several months or a few years, FoneTool can help you recover unlimited iOS data in just three simple steps. It's a reliable solution for anyone who needs to recover lost data from their iPhone.
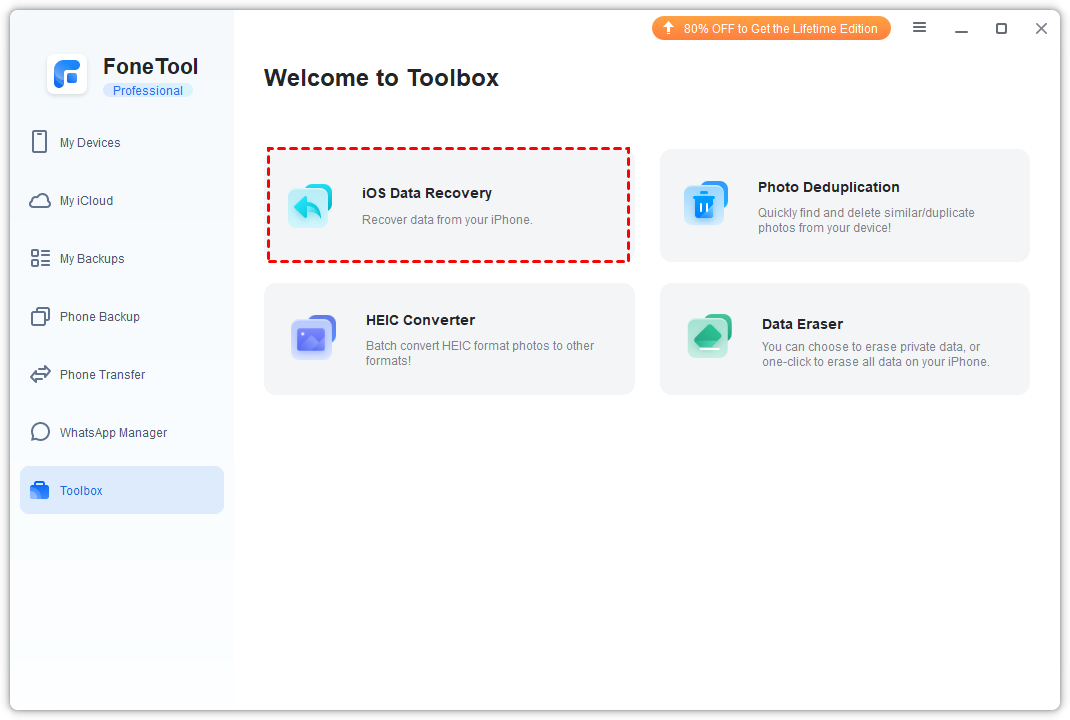
Step 1. First, connect your iPhone to your PC. Once connected, your iPhone will prompt you to "Trust this computer", which you should do. And then click Toolbox >iOS Data Recovery to start.
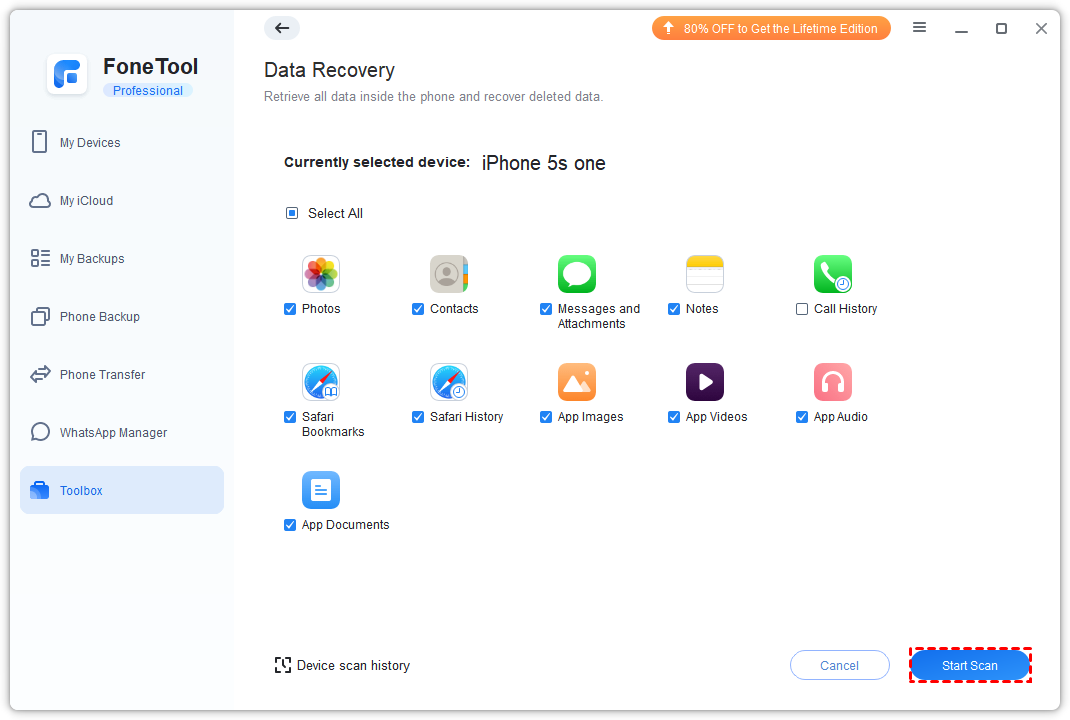
Step 2. Click on "Start Scan" in FoneTool to initiate the scanning process. The software will then scan your iPhone/iPad/iPod and locate both current and lost data. Simply wait for the scan to finish.
Step 3. Select the lost data you want to recover, such as photos, videos, contacts, SMS, notes, voice mails, and other files, and click on the "Recover to PC" button. This will save the data in a different location.

Final Words
In this guide, we have provided you with 4 ways on how to delete hidden apps on iPhone. With the new feature of app folders, organizing apps has become easy, but deleting unnecessary apps can be a bit complicated. However, the solutions we have mentioned above will make the process effortless for you, without the need to spend hours browsing the web.
If you have accidentally deleted important data, you can use FoneTool to recover it in just a few minutes. This iPhone data recovery software can easily retrieve lost, damaged, attacked, or other deleted data with just 3 simple steps. Don't hesitate to give it a try and get back your important iOS data.
FoneTool - All-in-one iPhone Data Manager
Transfer, backup and manage data on iPhone, iPad and iPod touch in an easy way.
-
 iOS 26 Compatible
 iPhone 16 Supported
Windows 11/10/8/8.1/7
100% Secure
Kelsey is an English editor of FoneTool. She is passionate about helping people find effective ways to deal with all problems in phones and computers. She has great insights into iPhone backup and transfer, data recovery and phone data management, and other data protection measures. She likes to learn IT skills to improve herself and enjoy quality time with family and friends.
Read author info >>