iPhone Ringtone Keeps Changing to Default [Easy Ways to Fix]
Have you ever encountered the issue of “iPhone ringtone keeps changing to default”? Don’t worry! Read on to learn easy ways to solve this problem.
Why Does My iPhone Ringtone Keep Changing?
Why does my ringtone keep changing back to default? Before discovering how to fix iPhone ringtone keeps changing to default, here are some potential reasons:
- Software Glitches: Occasionally, a software error or malfunction within iOS may cause your iPhone to revert to its default settings, including the ringtone.
- Corrupted Settings: If your iPhone's settings are corrupted or accidentally changed, this may cause the ringtones to automatically reset to default values.
- iCloud Sync Issues: iCloud synchronization issues can sometimes cause your iPhone's settings, including ringtone preferences, to revert to defaults.
- Hardware Malfunctions: In rare cases, a hardware failure or internal device component issue may affect ringtone settings.
- User Error: Sometimes, user error (like incorrectly selecting the default ringtone or unintentionally modifying settings), may result in accidental ringtone changes.
Now that I have learned why my ringtone keeps changing back to default, so how do I change the default ringtone on my iPhone? Scroll down for more details!
How to Fix “iPhone Ringtone Keeps Changing to Default”
If you have been using your iPhone for a long time, you may have had to deal with a very annoying issue “iPhone ringtone keeps changing to default”. If you are currently dealing with an iPhone ringtone that keeps changing to the default, read on to learn effective ways to fix this issue.
Way 1. Delete and Re-download Ringtones on iPhone
For iPhone users who are frustrated by having their ringtones restored to default, here is a solution tailored specifically for purchased ringtones. The process is simple and we have broken it down into clear steps below:
# Delete the Ringtone
Step 1. First launch iTunes on your PC and connect your iPhone via USB cable. Once connected, tap the iPhone icon to navigate to the Summary page.
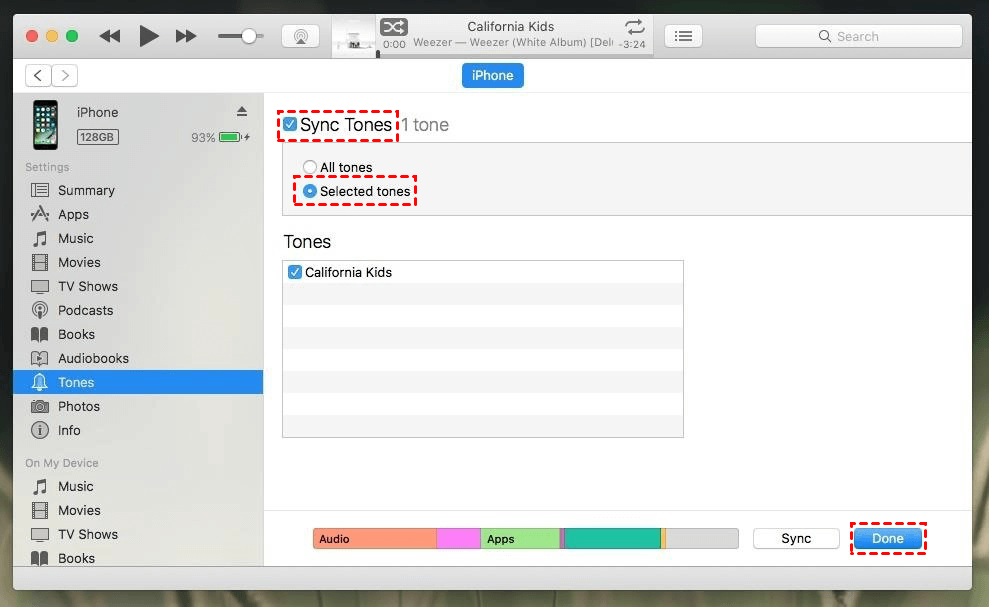
Step 2. In the left panel, locate and select Ringtones under the Summary section.
Step 3. Ensure Sync Ringtones > Selected Ringtones is checked and proceed to select the ringtones you want to synchronize.
Step 4. Finally, click Apply > Done. This will delete all previous ringtones from your iPhone, leaving only the ringtones you selected in the previous step.
# Re-download the Ringtone
Step 1. First, make sure that the Apple ID used to purchase the music you want is the same Apple ID that is used to sign in to your iOS device.
- ★Tip:
- To do this, navigate to Settings > iTunes & App Store and tap your Apple ID to verify it. ID for verification.
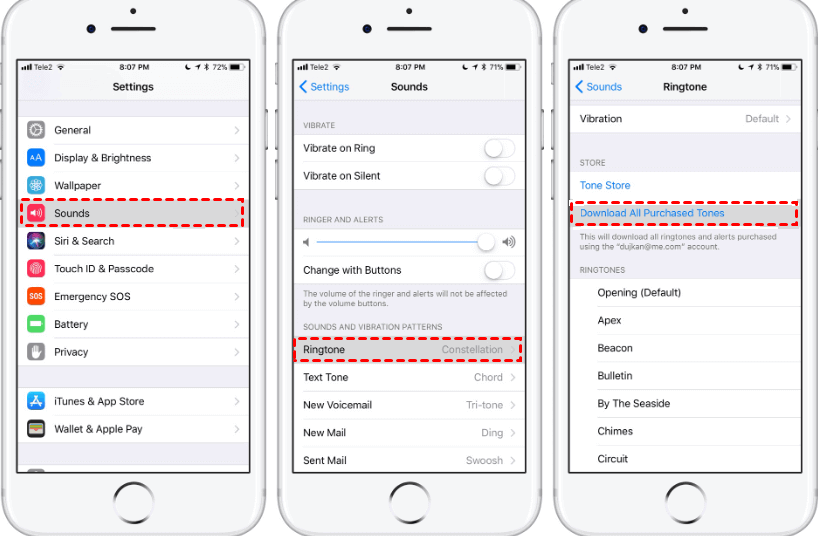
Step 2. Once you have verified your Apple ID, return to the Settings screen and select Sounds. > Then, select Download All Purchased Ringtones.
Way 2. Reset All Settings on Your iPhone
If you’re having problems with “iPhone ringtone changed on its own” due to the complexity of the settings, a reset may be the solution. Here's how to do it:
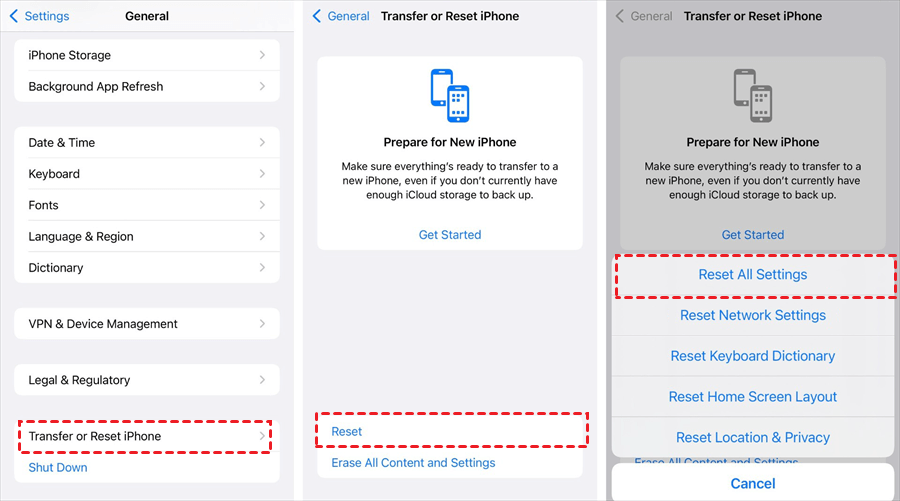
Step 1. Launch the Settings app on your iPhone, then scroll down to find the General section.
Step 2. Look for the Transfer or Reset iPhone option and tap it > Select Reset and then Reset All Settings.
Step 3. Enter your iPhone’s passcode when prompted > Tap Reset All Settings again to confirm the reset to factory default settings.
Way 3. Re-Edit iPhone Ringtone with Professional Ringtone Maker
If you have always encountered the issue of “iPhone ringtone changed on its own”, you can look for safe and professional Ringtone Maker like FoneTool to re-edit and manage your iPhone ringtones.
FoneTool enables you to edit a wide range of audio files, such as MP3, M4A, M4B, M4P, M4R, AIF, AIFF, FLAC, WAV, AAC, and others. In addition to choosing MP3 files from your computer, it also lets you select and edit music files directly from your iPhone by connecting it to your computer.
Here is a full guide on how to edit iPhone ringtones with FoneTool:
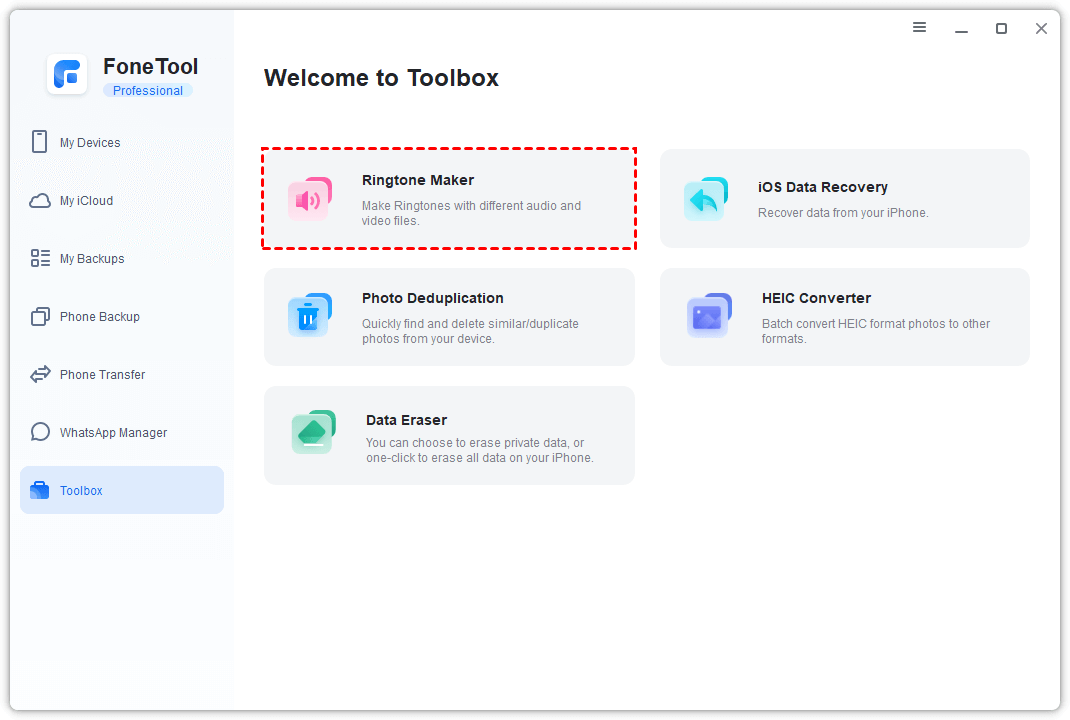
Step 1: Use a USB cable to connect your iPhone to your computer > Open FoneTool, navigate to the Toolbox, and choose Ringtone Maker.
Step 2: Choose From Device to select the music you want > Locate the desired track on your iPhone and click Select.
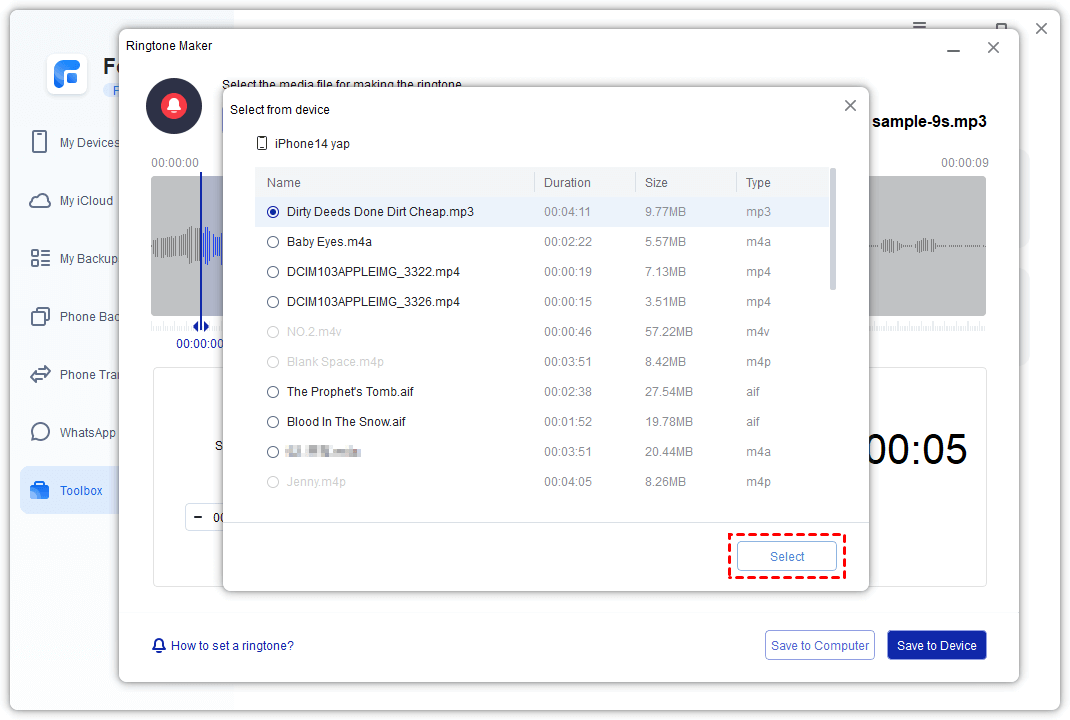
Step 3: Edit the selected music according to your preference > When finished, click Save to Device > Confirm by clicking Save in the pop-up window.

Bonus: How to Transfer iPhone Ringtones to Your PC for Safety
To seamlessly transfer iPhone ringtones to your PC, we highly recommend using the reliable and professional transfer tool FoneTool. This excellent software specializes in transferring all kinds of iPhone data (including ringtones, songs, photos, videos, etc.) from iPhone to computer. Its intuitive interface ensures that the whole process can be completed in just a few clicks.
To begin, simply click the download button to acquire and install this free iPhone transfer app, and follow these steps to transfer your ringtones from your iPhone to your PC:
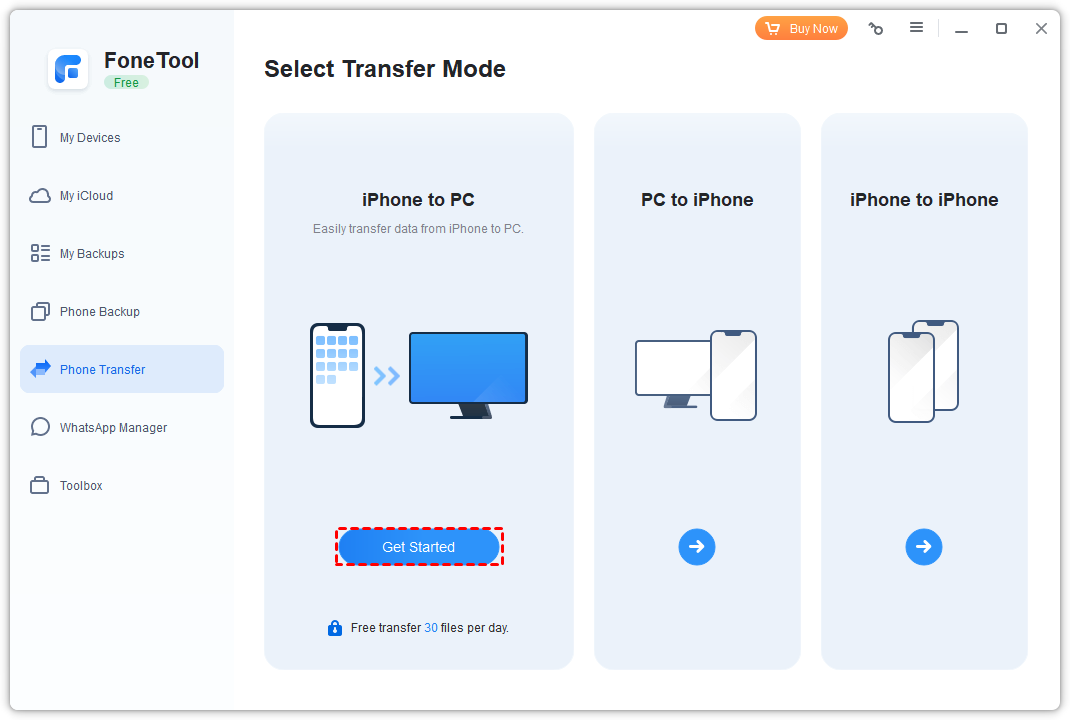
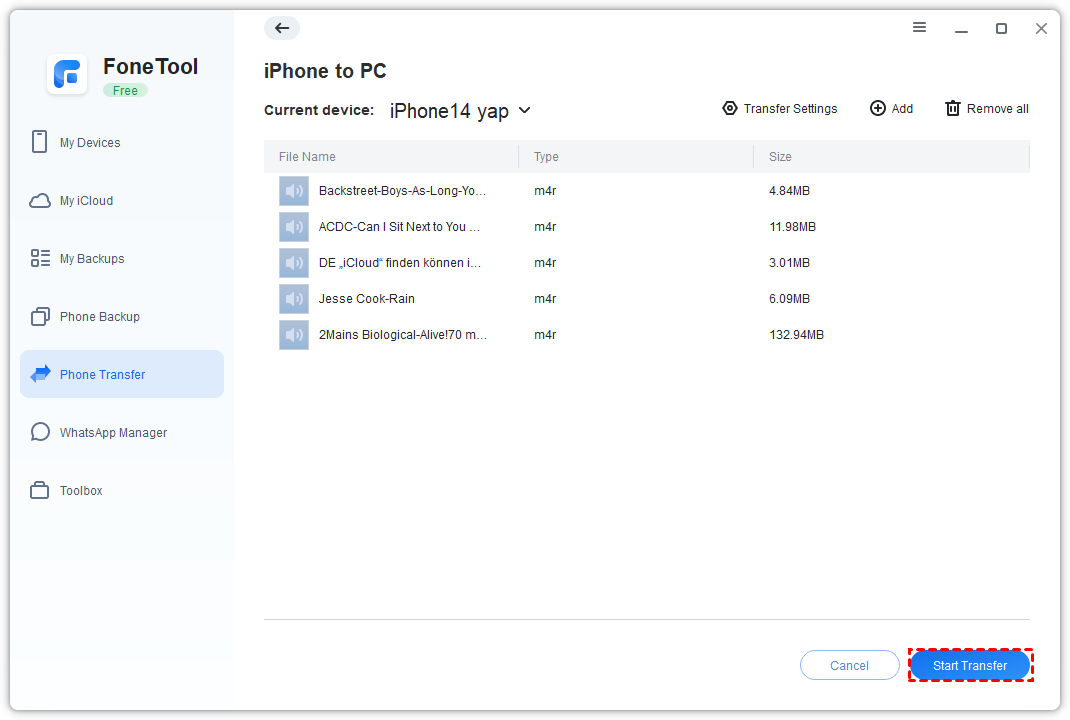
Step 1. Connect your iPhone to your computer using a USB cable > Launch FoneTool on PC > Navigate to Phone Transfer > iPhone to PC > Start Transfer.
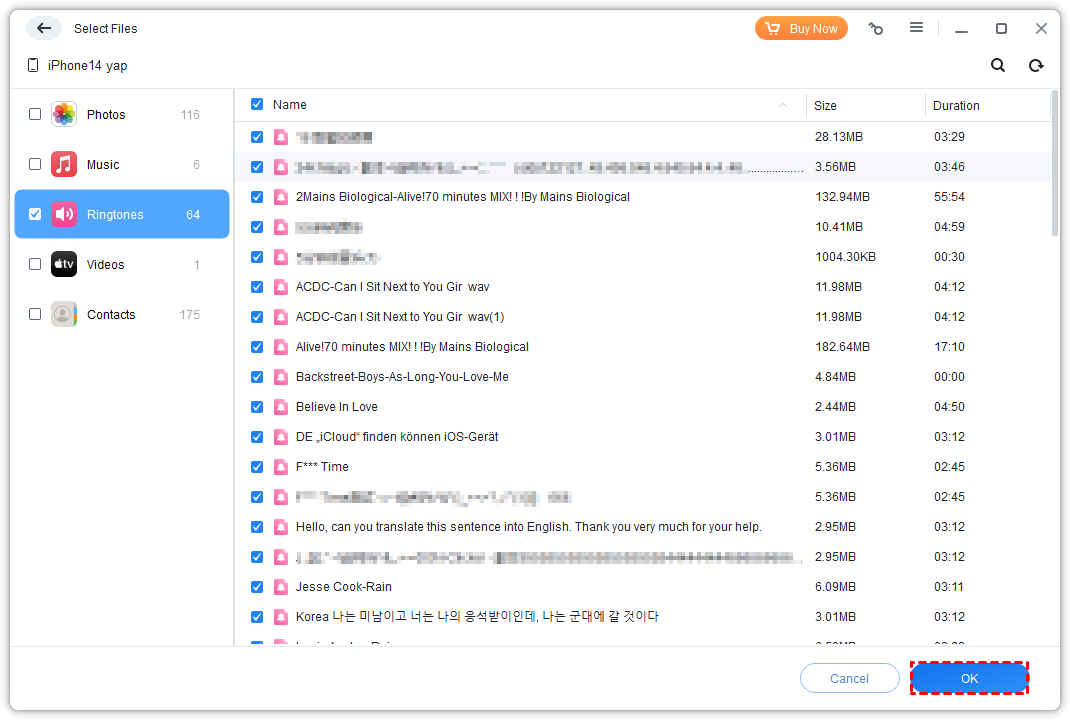
Step 2. Click the plus icon to preview and select the desired ringtones to transfer > Once done, click OK to continue.
Step 3. Choose a storage path from the Transfer Settings option, and then click Start Transfer to initiate the transfer process.
The Bottom Line
That’s all about how to fix the “iPhone ringtone keeps changing to default”. Hope the two easy and useful ways can help you fix this issue. In addition, if you want to protect your ringtones from such issues, FoneTool can help you transfer your ringtones from iPhone to PC to avoid data loss. Also, FoneTool is one of the best photo backup tools for iPhone to make a full or selective backup of your iPhone. Download FoneTool and use it right now!
FoneTool - All-in-one iPhone Data Manager
Transfer, backup and manage data on iPhone, iPad and iPod touch in an easy way.
-
 iOS 27 Compatible
 iPhone 17 Supported
Windows 11/10/8/8.1/7
100% Secure

May is an editor who is passionate about sharing computer tips and providing reliable solutions, specializing in iOS/Android and file backup and recovery. In her spare time, May enjoys watching movies, going shopping, or chatting with friends.
Read author info >>