How to Change Screenshot Settings on iPhone 12/13/14/15
Personalize your iPhone experience with our comprehensive guide on changing screenshot settings for iPhone 12, 13, 14, and 15, offering step-by-step instructions for a tailored screenshot process.
The ability to take screenshots on your iPhone is a handy feature that allows you to capture and share moments from your device's screen. However, the default screenshot settings may not always align with your preferences.
In this detailed guide, we will explore the significance of customizing screenshot settings on iPhone, the impact on user experience, and provide step-by-step instructions on how to change these settings for a more tailored and efficient screenshot experience.
The Significance of Customizing Screenshot Settings
Screenshots have become integral to our digital communication, from sharing information to troubleshooting issues. Customizing screenshot settings can significantly enhance this experience, offering users more control and flexibility. According to a survey, a large number of iPhone users express the desire for personalized settings, emphasizing the importance of tailoring features to individual preferences. By changing screenshot settings, users can optimize the screenshot process, improve organization, and tailor the experience to their specific needs.
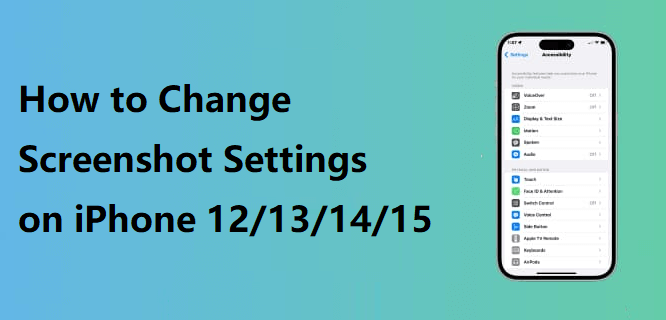
Common Screenshot Settings on iPhone
1. Save To Album: By default, screenshots are saved to the "Screenshots" album in the Photos app. Customizing this setting allows users to choose a different album or save screenshots directly to the camera roll.
2. Show Floating Thumbnail: When you take a screenshot, a thumbnail preview appears briefly at the bottom left corner of the screen. Customizing this setting allows users to disable the thumbnail or adjust its duration.
3. Markup: The Markup tool allows users to annotate and edit screenshots immediately after capture. Customizing Markup preferences can enhance the editing experience.
4. Share Sheet Options: The share sheet provides various options for sharing screenshots. Customizing these options allows users to streamline the sharing process and prioritize preferred apps or actions.
5. Delete Screenshot Confirmation: When deleting a screenshot, a confirmation prompt appears. Customizing this setting allows users to skip the confirmation step for quicker deletion.
Step-by-Step Guide to Change Screenshot Settings on iPhone
1. Access Settings: - Open the "Settings" app on your iPhone.
2. Scroll Down and Tap on "Photos": - In the Settings menu, scroll down and tap on "Photos."
3. Customize Screenshot Settings:
- Within the Photos settings, find and tap on "Screenshots." Here, you can customize various screenshot settings according to your preferences.
- Save To Album: Choose the album where you want your screenshots to be saved. This could be an existing album or a new one created for this purpose.
- Show Floating Thumbnail: Toggle the switch to enable or disable the floating thumbnail. You can also adjust the duration of its display.
- Markup: Toggle the switch to enable or disable Markup. Enabling Markup allows you to edit and annotate screenshots immediately after capture.
- Share Sheet Options: Tap on "Share Sheet" to customize the apps and actions that appear in the share sheet when you capture a screenshot.
- Delete Screenshot Confirmation: Toggle the switch to enable or disable the confirmation prompt when deleting a screenshot.
4. Test the Changes:
- Capture a screenshot to test and confirm that the changes made to the screenshot settings are reflected in the actual screenshot experience.
Additional Tips for Optimizing Screenshot Experience
1. Use Siri Shortcuts: Leverage Siri Shortcuts to create custom commands for specific screenshot actions. This can further streamline your screenshot workflow.
2. Organize Albums Effectively: If you use multiple albums to organize screenshots, ensure that the album structure aligns with your preferences for easy retrieval.
3. Explore Third-Party Apps: Consider exploring third-party apps that offer advanced screenshot features and customization options beyond the built-in settings.
4. Stay Updated: Keep your iPhone's operating system up to date to access the latest features and improvements related to screenshot settings.
Bonus Tip: Transfer iPhone Screenshot to PC via FoneTool
Step into the future of iPhone management with FoneTool, a revolutionary companion that transcends boundaries and elevates your device experience. FoneTool isn't just a tool; it's a digital enigma, seamlessly blending innovation with simplicity to redefine how you interact with your iPhone. Say goodbye to the mundane and welcome a world where every tap, transfer, and interaction is a seamless, secure, and emotionally resonant journey.
In a digital era where every screenshot captures a moment, FoneTool introduces a game-changing bonus feature – the effortless transfer of iPhone screenshots to your PC. Relive your memories with ease, ensuring every snapshot finds its place in your digital realm.
Step 1: Launch FoneTool
Open the FoneTool application on your computer – a haven where cutting-edge technology converges with an intuitive interface, laying the foundation for seamless screenshot transfer.
Step 2: Connect Your iPhone
Plug your iPhone into the computer using a USB cable. FoneTool establishes a secure and swift connection, setting the stage for an effortless transfer experience.
Step 3: Navigate to Screenshot Transfer Section
Within FoneTool, explore the dedicated section for screenshot transfer. Effortlessly tailor the transfer process to align with your preferences and needs.
Step 4: Select Screenshots to Transfer
Choose the specific screenshots you want to transfer. FoneTool empowers you with precision and control over reliving your captured moments.
Step 5: Initiate Transfer
Click "Transfer," and watch FoneTool seamlessly transport your iPhone screenshots to your PC, ensuring each snapshot is preserved with precision. FoneTool – where innovation meets the art of preserving memories.
Examples of Screenshot Settings Customization
1. Professional Workflow: Users who frequently capture screenshots for professional purposes may prefer to save screenshots to a dedicated work-related album for easier organization.
2. Efficient Sharing: Individuals who primarily use specific apps for sharing screenshots, such as messaging or productivity apps, can customize the share sheet options to prioritize those apps.
3. Minimalistic Experience: Users seeking a minimalistic experience may choose to disable the floating thumbnail and delete confirmation prompt for a cleaner and quicker screenshot process.
4. Creative Annotation: Those who enjoy creative annotation may enable the Markup tool by default to add drawings, text, or shapes to screenshots immediately after capture.
Impact of Screenshot Settings Customization
1. Improved Productivity: Customizing screenshot settings can lead to a more efficient and personalized workflow, ultimately improving overall productivity.
2. Enhanced Organization: Tailoring the save location of screenshots and organizing them into specific albums contributes to a more structured and organized photo library.
3. Personalized Experience: Customized screenshot settings provide users with a personalized experience, aligning with individual preferences and habits.
4. Streamlined Sharing: By customizing share sheet options, users can streamline the sharing process, making it quicker and more intuitive.
Conclusion
Changing screenshot settings on your iPhone is a simple yet impactful way to enhance your overall user experience. As we increasingly rely on screenshots for communication and documentation, having the ability to tailor settings to our preferences becomes essential.
By following the step-by-step guide, exploring additional tips, and considering examples of customization, users can optimize their screenshot workflow for improved productivity, organization, and personalization. Embrace the power of customization and make capturing and sharing screenshots on your iPhone a seamless and tailored experience.
FoneTool - All-in-one iPhone Data Manager
Transfer, backup and manage data on iPhone, iPad and iPod touch in an easy way.
-
 iOS 27 Compatible
 iPhone 17 Supported
Windows 11/10/8/8.1/7
100% Secure

Demi is an editor of FoneTool group as well as an good advisor in the area of iOS-related issues. She does well in finding solutions to people's problems. She enjoys traveling, gardening, and watching movies. She spends most of her free time with her pet and family.
Read author info >>