[Solved] Possible Solutions to iTunes Error 9
iTunes error 9 usually pops up when you're trying to upgrade or restore your iPhone using iTunes on your computer.This guide provides effective steps to handle this issue properly and successfully complete the task you were working on.
iTunes is a powerful tool that allows users to manage their iOS devices, but occasionally, users might encounter error codes that hinder their experience. One such error is iTunes Error 9, which can disrupt the device restoration or update process. This error can be frustrating, but fear not, as there are effective solutions to address it.
In this article, we'll delve into what iTunes Error 9 is, its potential causes, and provide you with a comprehensive guide on how to fix it.
Part 1. What is error 9 in iTunes?
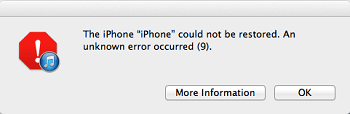
iTunes Error 9, often accompanied by the message "The iPhone could not be restored. An unknown error occurred (9)," occurs during the device restoration or update process. It can affect iPhones, iPads, and iPods. This error typically signifies a communication problem between iTunes and the connected device.
Potential causes behind iTunes unknown error 9:
⛔ USB Cable or Port: Faulty or damaged USB cables or ports can lead to connectivity issues during the update or restore process.
⛔ Network Issues: Poor or unstable network connections might interrupt the communication between iTunes and Apple's servers.
⛔ Security Software: Antivirus or firewall software on your computer might block communication between iTunes and the device.
⛔ Hardware Issues: In some cases, hardware problems within the device, such as a malfunctioning memory component, can trigger Error 9.
Part 2. 5 fixes to iTunes error 9
Now, let's explore some effective solutions to address the issue of iTunes Error 9. You can try them one after another until your issue gets fixed.
1# Check and change cable or USB port
To begin, attempt connecting the cable to a different USB port. Surprisingly, this straightforward action can often resolve a range of problems that might occur during firmware upgrades or updates. To ensure a secure USB cable connection, please follow these steps:
• Confirm that you are utilizing the original USB cable that was included with your device. Alternatively, you can experiment with a standard Apple USB cable.
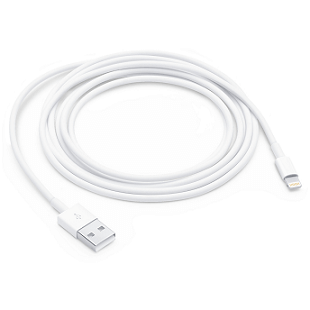
• Examine the cable connection between your iPhone/iPad and the computer (or vice versa). Make sure all connections are firm and that there are no loose cables.
• Detach the USB cable from both your iPhone and the USB port on your computer. Afterward, reconnect the cable to establish a new connection.
2# Check for iTunes update
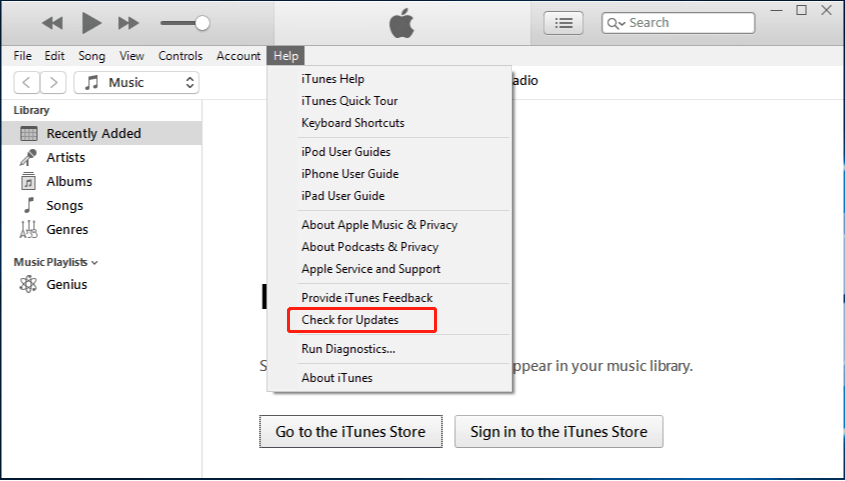
Using an older version of iTunes might lead to various problems on your computer. This is mainly due to the fact that older versions tend to have multiple bugs that have been fixed in more recent releases. Essentially, it's advisable to regularly update the iTunes app on your computer to ensure smoother performance.
To update iTunes, open iTunes > Click Help from the toolbar > Tap Check for Updates > If there is a new version available, update it.
3# Disable firewall software
A firewall on a computer is designed to reject incoming network requests from sources that are not deemed trustworthy. However, due to its nature, it can occasionally mistake legitimate Apple and iTunes servers as malicious entities, leading to blockage of the traffic going to and coming from these servers.
This situation can give rise to diverse problems in iTunes, including encountering error code 9. Thankfully, resolving this issue is relatively straightforward. You can temporarily disable the firewall on your computer while using iTunes, and subsequently re-enable it once you've completed the process of restoring your phone. Here are how to disable firewall.
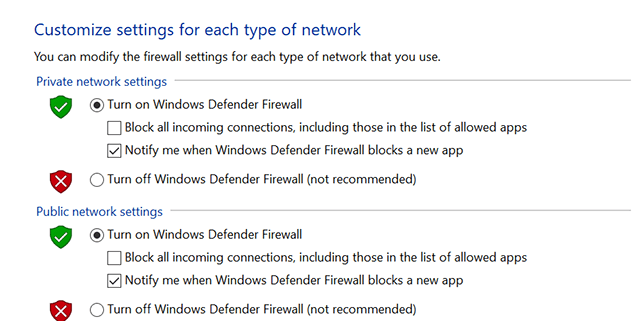
Step 1. Head over to Control Panel > System and Security > Windows Defender Firewall.
Step 2. Click on Turn Windows Defender Firewall on or off in the left sidebar, and choose Turn off Windows Defender Firewall on the following screen.
4# Force restart your iOS device
Restarting your iOS device can be effective in resolving temporary software glitches and rejuvenating system processes, potentially aiding in the resolution of Error 9. The procedure for restarting your device can differ based on the specific model you have. Consult the information provided below to properly restart your device:
Force restart iPhone
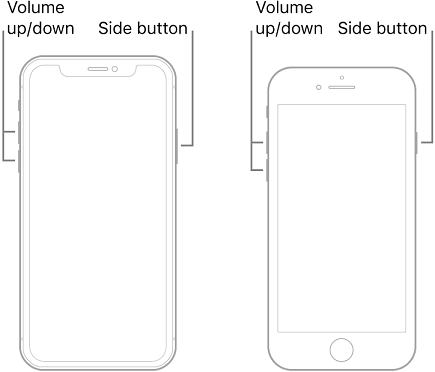
● For iPhone 8 and later with Face ID:Quickly press and release the Volume Up button > Quickly press and release the Volume Down button > Press and hold the Side/Power button until the Apple logo appears.
● For iPhone 7/7 Plus:Press and hold the Top button and Volume Down button together > Release both buttons when the Apple logo appears.
● For iPhone 6s, SE and earlier with Home button: Hold down the Home button and the Top (or Side) button at the same time > Release both buttons when the Apple logo appears.
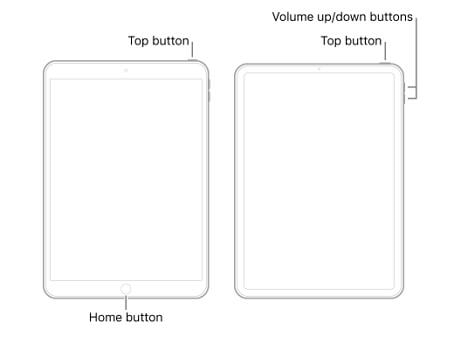
Force restart iPad
Press and hold the Sleep/Wake button and Home button at the same time > Release both buttons when you see the Apple logo.
5# Use recovery mode on your device
Recovery Mode is another prevalent approach to address the "iPhone/iPad could not be restored" error 9. Below, we outline the steps in detail. However, it's crucial to be aware that utilizing recovery mode can potentially lead to data loss. Hence, if needed, make certain you have backed up your data before embarking on the repair process.
Step 1. Keep your iPhone/iPad connect to computer > Run the latest version of iTunes.
Step 2. Once your device is recognized, you have to restart your iPhone/iPad according to the steps mentioned in 4# solution > Then you will go to recovery mode.
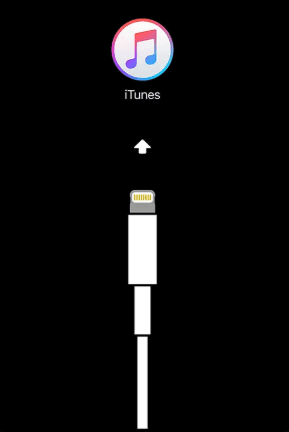
Step 3. Once you have entered recovery mode, select Update option and follow the onscreen instructions to finish.
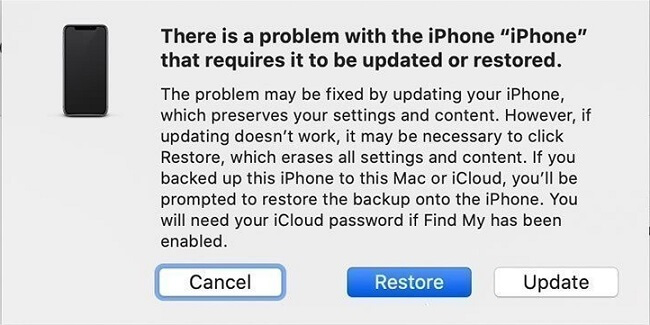
Once the restore process is complete, your iPhone/iPad will restart. Follow the on-screen instructions to set up your device again.
Conclusion
Experiencing iTunes Error 9 can be frustrating, but with the solutions provided in this article, you have the tools to troubleshoot and resolve the issue and ensure a smooth and successful device restoration or update process.
If the issue persists, consider reaching out to Apple Support or visiting an authorized service center for professional assistance to ensure your device remains in optimal working condition.
FoneTool - All-in-one iPhone Data Manager
Transfer, backup and manage data on iPhone, iPad and iPod touch in an easy way.
-
 iOS 26 Compatible
 iPhone 16 Supported
Windows 11/10/8/8.1/7
100% Secure

Demi is an editor of FoneTool group as well as an good advisor in the area of iOS-related issues. She does well in finding solutions to people's problems. She enjoys traveling, gardening, and watching movies. She spends most of her free time with her pet and family.
Read author info >>