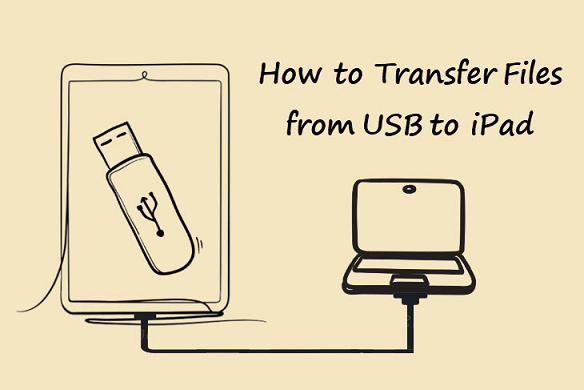
[3 Ways] How to Transfer Files from USB to iPad
Wondering how to transfer files from USB to iPad? No matter whether you have a computer or not, the three methods in this guide get you covered.
The iPad has undoubtedly become an indispensable tool for productivity, entertainment, and creativity. However, one common challenge users face is transferring files from a USB drive directly to their iPad.
In this comprehensive guide, we'll explore various methods for file transfer from USB to iPad with or without computer. You can go through all the methods introduced in this guide, and choose one that can best meet your demands.
1# Quickest Way to Transfer Files from USB to iPad via FoneTool
If you have a computer at hand, the simplest and fastest way to transfer files from USB to iPad is to rely on professional iOS data transfer software, and FoneTool can be one of the best choices for you. FoneTool's clear UI and comprehensive capabilities make it simple to manage and transfer data between devices.
FoneTool - Your Data Transfer Master
▶ Supports multiple file types. It is able to transfer videos, music, and photos from USB/PC to iPad.
▶ Lossless transfer. It will transfer the file to its original size without compression or degrading quality.
▶ No data loss. During the transfer, existing iPad data will not be affected or overwritten.
▶ High compatibility. FoneTool is widely compatible with models of iPad, iPad Pro/Air/mini, iPhone, and iPod, enabling you to share files with Windows PC, USB, external hard drive, NAS, etc.
Can't wait to try this powerful tool? Free download it, and let's see how to transfer files from USB to iPad via FoneTool.
Step 1. Connect both your iPad and USB to your computer, and launch FoneTool. You will be asked to tap Trust on your iPad to let computer access your iPad.
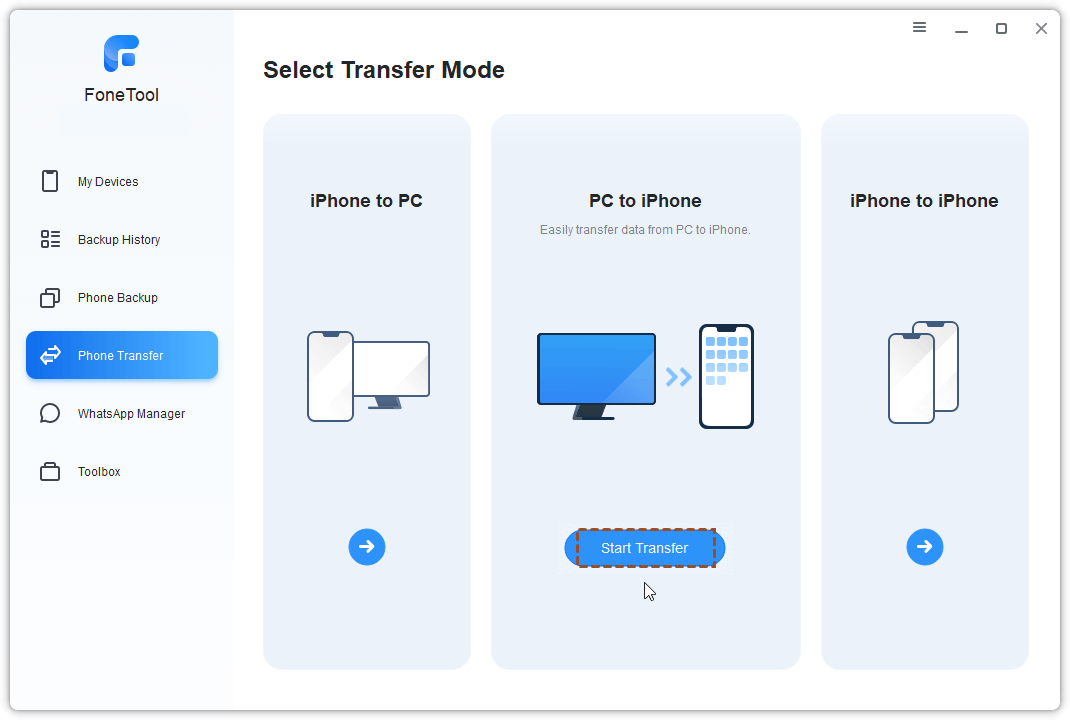
Step 2. From the main interface of FoneTool, click Phone Transfer > Choose the PC to iPhone mode > Click Start Transfer.
Step 3. Tap the icon of the file type you'd like to transfer, here we take Music as an example > Tap the folder icon to preview and select the files in USB.
? Optionally, you can directly drag and drop wanted files from USB to the box in FoneTool.
? You can also select files in the different file types you want to transfer in this step.
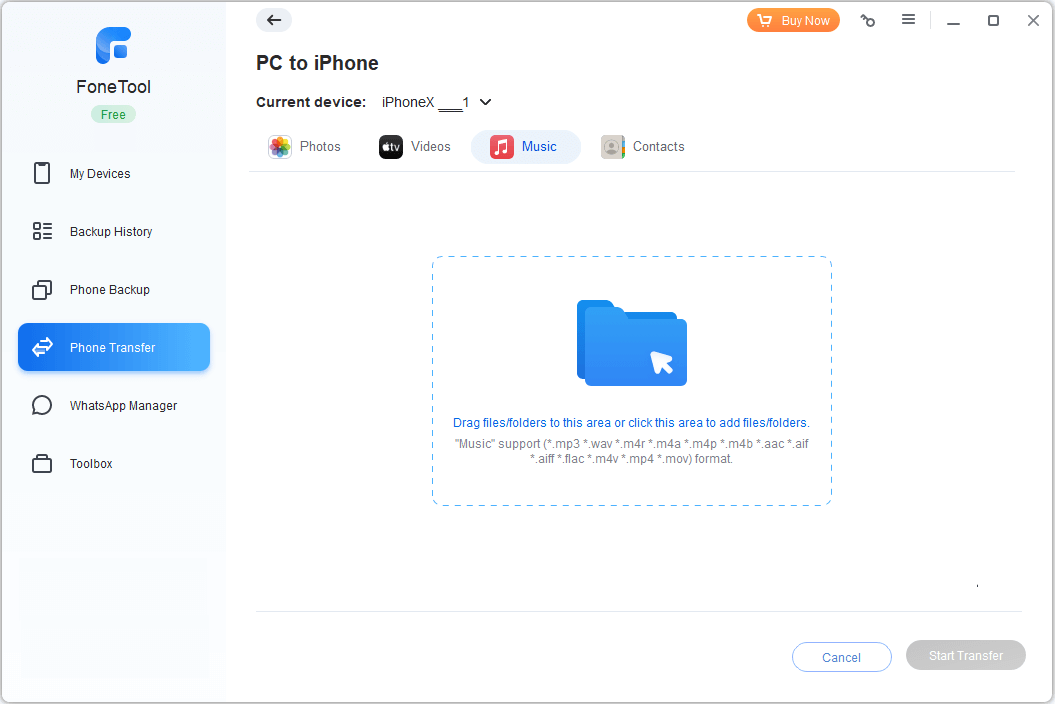
Step 4. Finally, make sure you've chosen all wanted files from your USB, click Start Transfer to begin the task.

To check these transferred files on your iPad, you can go to relevant apps, like photos in the Photos app, and music files in the Apple Music app.
2# Transfer Files from USB to iPad using iCloud
If you prefer a wireless solution, iCloud, the built-in cloud backup service can do you a favor. Although iCloud only provides 5GB of free storage space, transferring a small number of files from USB to your iPad using iCloud is a nice choice, especially if you'd like to transfer documents from documents (word, excel, PPT, PDF, etc.) from USB to iPad.
Before proceeding, transfer the relevant files to your iCloud account from USB on the PC and then download them to your iPad. Here's a step-by-step instructions:
Step 1. Upload files from USB to iCloud
• Go to the iCloud site on your PC and log in with your Apple ID > Connect your USB drive to your PC.
• Click the iCloud Drive option from the pop-up window > Click the Upload icon on the top side of the iCloud Drive page > Browse and select the files from your USB drive to upload them to iCloud.
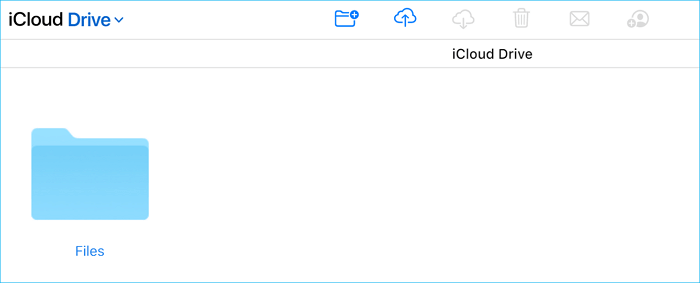
Step 2. Access USB files on iPad
• On your iPad, go to the Files app > Choose iCloud Drive. You should see the files synced from iCloud here. If not, wait for a while for the files to be synced.
3# Transfer Files from USB to iPad Without Computer
What if you don't have a computer and only want to transfer data from USB to iPad? You can accomplish that if you have a Type-C flash drive or a lightning to USB converter.
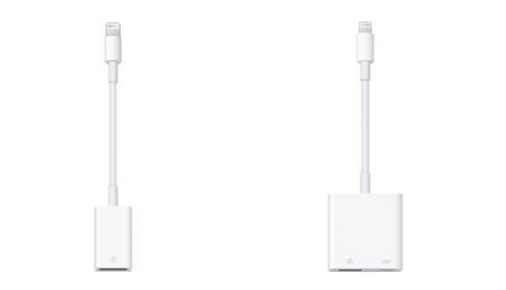
If you have a Type-C flash drive, you may attach it straight to your iPad and transfer data as needed. If you plan to use an adapter, make sure it has a lighting port (which I will explain later) and follow the instructions below to learn how to transfer data from USB to your iPad using it.
Step 1. Connect your USB stick directly to your iPhone via the Lightning to USB adapter.
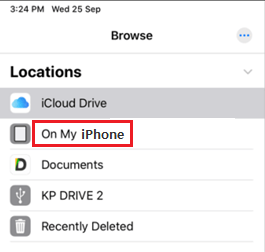
Step 2. Open the Files app on your iPhone > Tap Browse in the lower right corner > Go to On My iPad under Locations, create a new folder for the files you want to transfer.
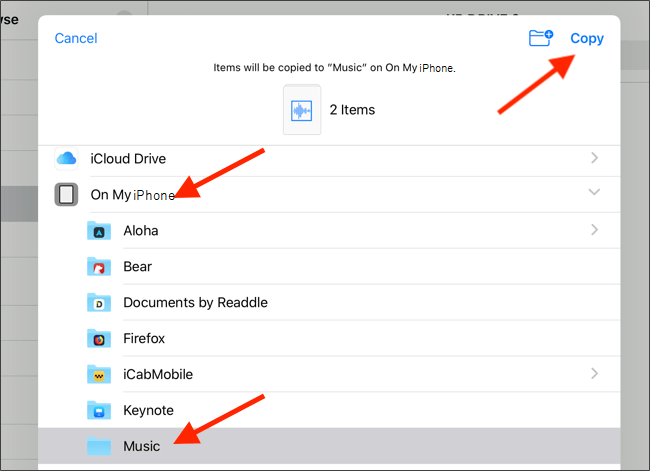
Step 3. Go back and choose your USB drive from Locations > Hold and select the files you want to transfer > Tap Move at the bottom.
Step 4. Here you could choose the destination of the selected files > Find the new folder and tap Copy. Finally, you can get USB files imported to iPad.
Conclusion
In conclusion, transferring files from a USB drive to your iPad can be achieved through various methods, each offering its own advantages and benefits. Whether you prefer the quickest method using FoneTool, utilizing iCloud for cloud-based transfer, or transferring files directly without a computer, you can choose the method that best suits your needs and preferences. By following the step-by-step instructions outlined in this guide, you can easily transfer files from USB to iPad and enjoy seamless access to your content on the go.
FoneTool - All-in-one iPhone Data Manager
Transfer, backup and manage data on iPhone, iPad and iPod touch in an easy way.
-
 iOS 26 Compatible
 iPhone 16 Supported
Windows 11/10/8/8.1/7
100% Secure

Demi is an editor of FoneTool group as well as an good advisor in the area of iOS-related issues. She does well in finding solutions to people's problems. She enjoys traveling, gardening, and watching movies. She spends most of her free time with her pet and family.
Read author info >>