5 Proven Methods to Fix iPod is Disabled Connect to iTunes
When your iPod prompt “iPod is disabled connect to iTunes”, you have to reset it. Click this guide to learn 5 proven methods to unlock your iPod.
iPod is "disabled" and cannot connect to iTunes
My iPod's screen says "iPod is disabled. Connect to iTunes". When I try erasing my iPod by doing the recovery method, it just says that my iPod needs to be unlocked to connect, which I can't do since it doesn't allow me to type a passcode. Help?!
- Question from Apple Discussions
Why does iPod is disabled connect to iTunes error occur?
When you enter the wrong password several times, your iPod will be locked with a timer and a prompt:
- "Try again in [x] minutes" (after 6 failed attempts)
- "iPod is disabled. Connect to iTunes” (after 10 failed attempts)
If your iPod is completely disabled, you can access the device by resetting the iPod, but this will erase all data unless you have a backup. Don't worry, here are 5 proven ways to fix "iPod is disabled, connect to iTunes" with or without data loss. Includes step-by-step guide for iTunes, iCloud, DFU mode, etc.

What to do if your iPod is disabled and says connect to iTunes?
Here are 5 proven methods to restore the iPod and reset the passcode. You can choose one appropriate solution to solve “iPod is disabled connect to iTunes how to unlock.”
📧Tips:
- The restoration will wipe all content, you can backup your data first using iCloud or iTunes.
- If you don’t have a backup, you can use Method 1 to finish the process without losing data.
Method 1. Unlock iPod using FoneTool Unlocker [No password needed]
When it comes to iOS device unlock, a professional unlock software named FoneTool Unlocker can be a good helper. It is designed to unlock a disabled iPod without passcode and Apple ID, saves your time and complicated steps. You can easily fix the iPod is disabled connect to iTunes without losing everything.
- ★Features of FoneTool Unlocker:
-
- Unlock all types of passwords in simple operations.
- A high success rate of up to 99.99%.
- Remove Apple ID from iPod, no tech knowledge is required.
- A safe and stable process protects your data from leakage.
- The latest iOS devices/versions are supported.
Now download the FoneTool Unlocker and restore your iPod:
Step 1. Launch FoneTool Unlocker > Connect your iPod to the computer via a USB cable.
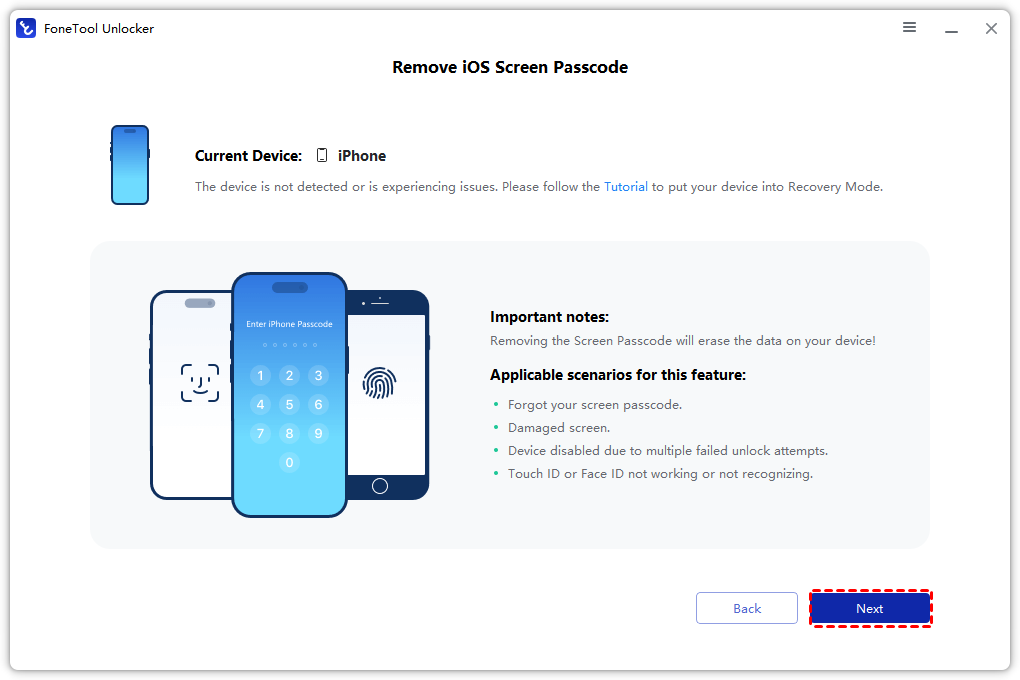
Step 2. Go to Remove iOS Screen Passcode > Click Remove Now.

Step 3. Confirm the on-screen instructions > Click Next to continue.
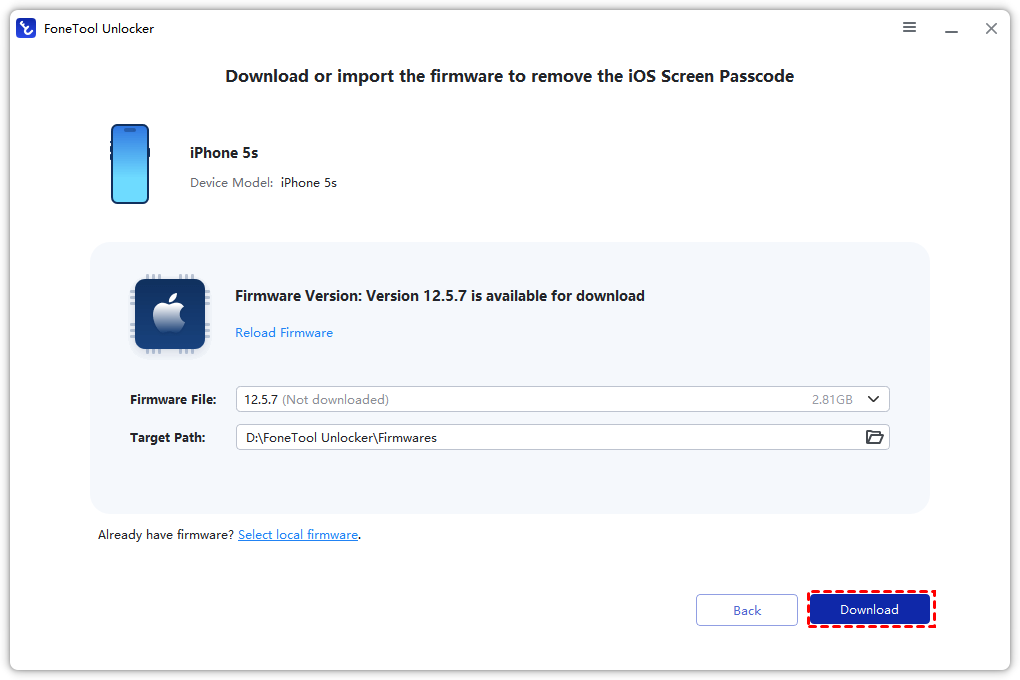
Step 4. Choose the firmware file you need > Click Download.
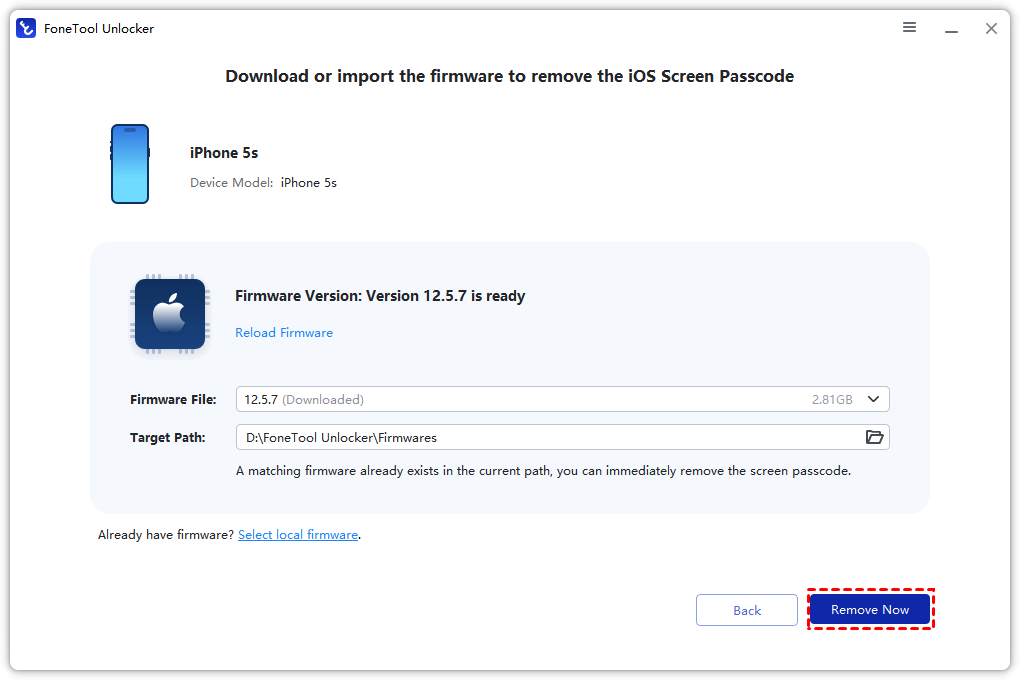
Step 5. Click Remove Now once the firmware files are downloaded.
🤩Tip: You can also use the FoneTool Unlocker to remove Screen Time passcode and iTunes backup encryption without a passcode in simple clicks. You can also use it in the following scenarios:
- The screen is damaged and can’t be unlocked and used for input.
- The previous owner of the used device has not logged out of the account.
Method 2. Restore using DFU mode
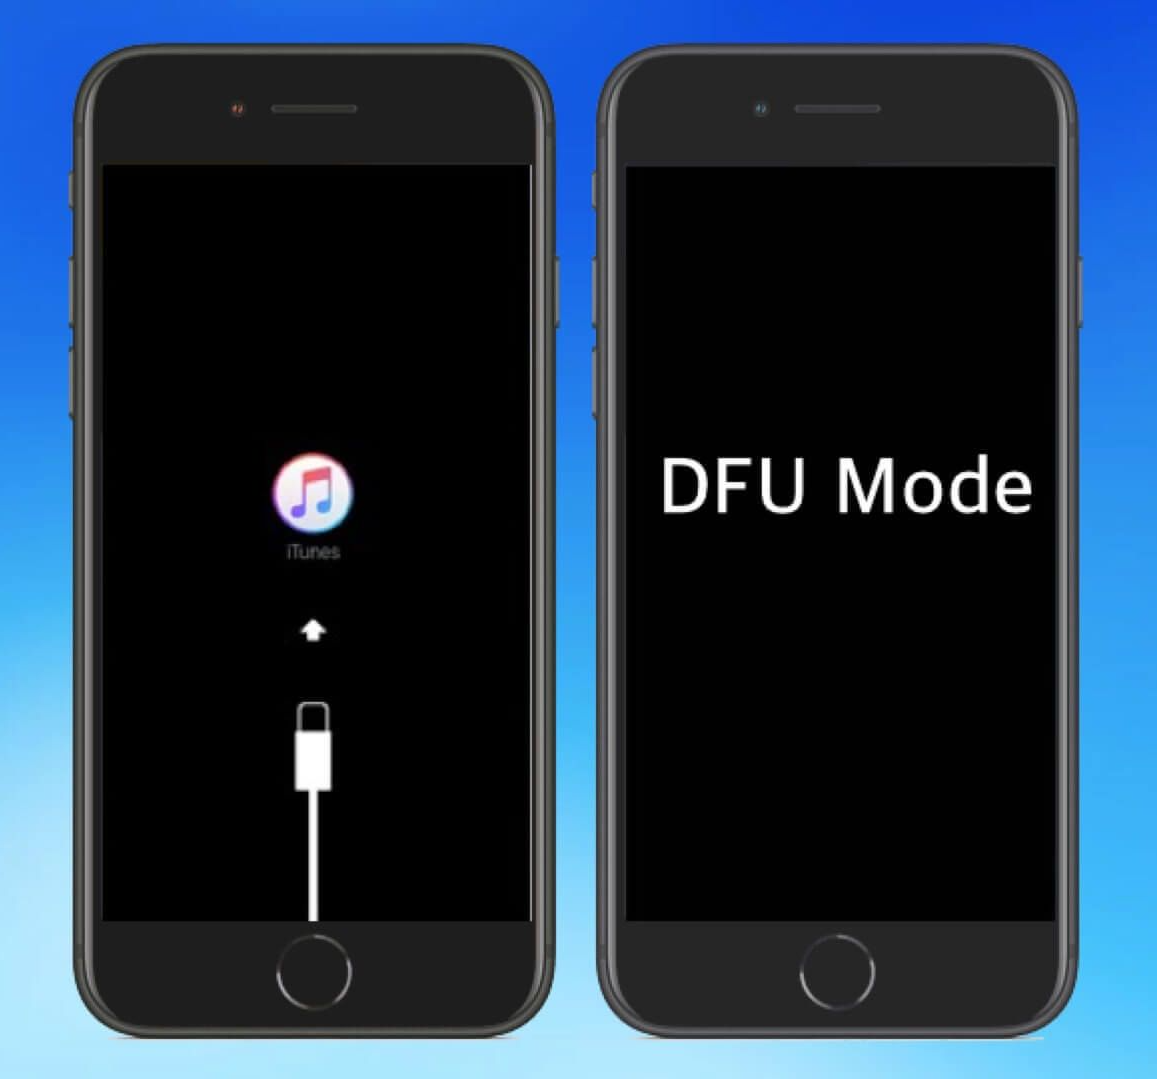
DFU mode (Device Firmware Update) is an advanced method that allows you to restore your iPod without entering the passcode. This mode allows you to restore or update your iPod depending on your decision.
Step 1. Connect your iPod to your computer using a USB cable.
Step 2. Hold down the Power button for 3 seconds > Hold down the Home button.
Step 3. Hold both buttons for 10 seconds > Release the Power button.
Step 4. Keep holding the Home button for another 10 seconds.
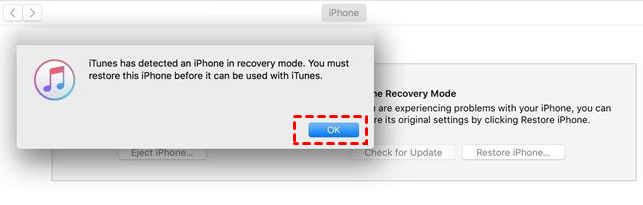
Step 5. While in DFU mode, your iPod‘s screen will turn black > If iTunes shows that your device is detected in Recovery Mode.
Step 6. Then, click OK on the computer’s iTunes to facilitate the recovery process.
Method 3. Erase via iCloud
If your iPod is signed in with an Apple ID and has Find My enabled, you can use iCloud to erase the disabled iPod.
Step 1. Go to iCloud on your computer.
Step 2. Sign in with the Apple ID account.
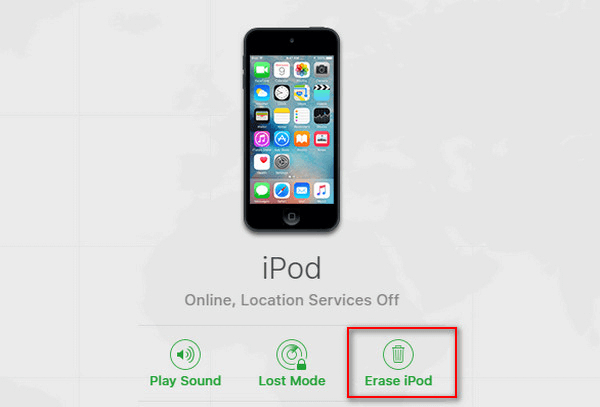
Step 3. Choose Find My > All Devices and select your iPod.
Step 4. Select Erase iPod to factory reset your iPod without a passcode.
Method 4. Erase in recovery mode
If you’ve never set up Find My iPhone in iCloud, you’ll need to use recovery mode to restore your device. The process will erase all your data and settings.
Here’s how to connect iPod to iTunes when disabled and restore it from there:
Step 1. Connect your iOS device to your computer and open iTunes.
Step 2. Force restart your iPod: Press and hold the Sleep/Wake and Home buttons at the same time. Don’t release the buttons when you see the Apple logo > Keep holding until you see the recovery mode screen.
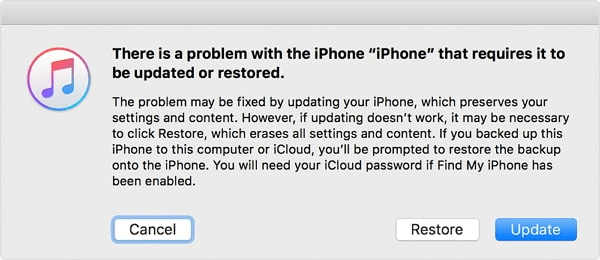
Step 3. When you see the option to Restore or Update, choose Restore.
Step 4. iTunes will download software for your device > Wait until the process finishes.
Method 5. Using Find My app without computer
No computer nearby and want to know how to fix iPod disable connect to iTunes without computer? Don’t worry. If you have enabled Find My iPhone on your iPod, you can also use another iPhone to fix the error without computer.
Follow the steps to unlock and erase and unlock your iPod:
Step 1. Install and launch Find My app on another iPhone > Sign in with the Apple ID associated with the disabled iPod.
Step 2. Select Devices > Select your disabled iPod.
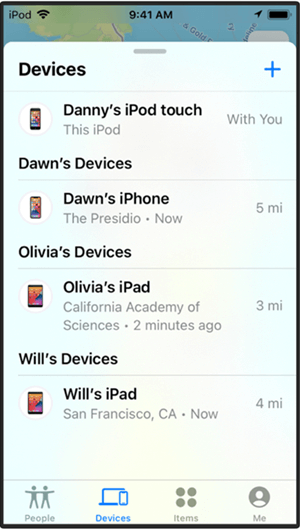
Step 3. Scroll down and tap on Erase This Device.
FAQs about iPod is disabled when connecting to iTunes
Conclusion
This guide provides 5 detailed methods - FoneTool Unlocker, iCloud, recovery mode, DFU mode, and Find My app to help you fix “iPod is disabled connect to iTunes.” We highly recommend a professional unlock tool, FoneTool Unlocker, help you reset your iPod without passcode easily.
FoneTool Unlocker - 1-Click iPhone Unlock Software
Easily unlock all passcodes and restrictions on your iPhone, iPad, and iPod Touch.
-
 iOS 27 Compatible
 iPhone 17 Supported
100% Secure

Scarlett is an editor of FoneTool, with years of experience in the field of mobile data backup, transfer, recovery, and data management in solving iOS-related issues. She hopes her writing can help people out of their current problems.
Read author info >>