How to Recover Data from iPhone in Recovery Mode
Discover expert strategies for recovering data from your iPhone in Recovery Mode. This comprehensive guide ensures a safe and effective retrieval process for lost files.
Facing the unfortunate situation of having your iPhone stuck in recovery mode can be stressful, especially when you have important data on the device. However, there's good news – with the right tools and methods, you can recover your data and get your iPhone back to normal. In this in-depth guide, we will explore various methods and step-by-step instructions on how to recover data from an iPhone stuck in recovery mode.
Whether it's due to a failed update, software glitch, or other issues, follow these detailed steps to retrieve your valuable data and restore your iPhone to its previous state. Let's delve into the methods, tools, and tips to navigate the recovery process successfully.
Part 1. What Is iPhone Recovery Mode?
Recovery mode, literally speaking, is a troubleshooting state that allows you to restore your iPhone firmware, usually in cases of software malfunction or failed updates. When in recovery mode, your iPhone can communicate with iTunes on a computer, enabling you to perform actions such as updating or restoring the device's software.

Part 2. How to Recover Data from iPhone in Recovery Mode via iTunes
How can you recover data from iPhone in recovery mode? You may first need to get iPhone out of recovery mode via iTunes. iTunes offers a built-in feature to get your iPhone out of recovery mode, and you can recover data to iPhone from iTunes backup seamless. You can follow the simple steps below to make it.
Step 1. Get iPhone out of recovery mode
• Download and install the latest version of iTunes > Connect your iPhone that’s in recovery mode to the computer.
• You may receive a pop-up prompt saying “There is a problem with iPhone that required need to be updated or restored.” > Click Restore.
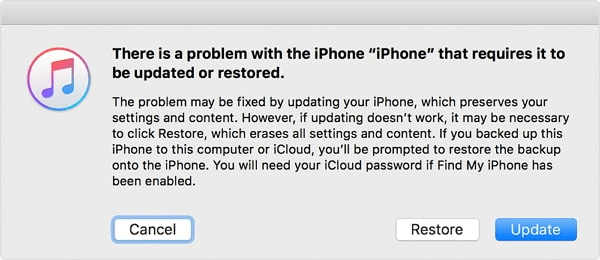
• Wait for a few minutes > Click Restore and Update if iTunes is opened with a pop-up window.
• Click Next > Click Agree to agree with the rules and regulations > You will now get new iOS on your iPhone and restart the device.
Step 2. Restore iTunes Backup to iPhone
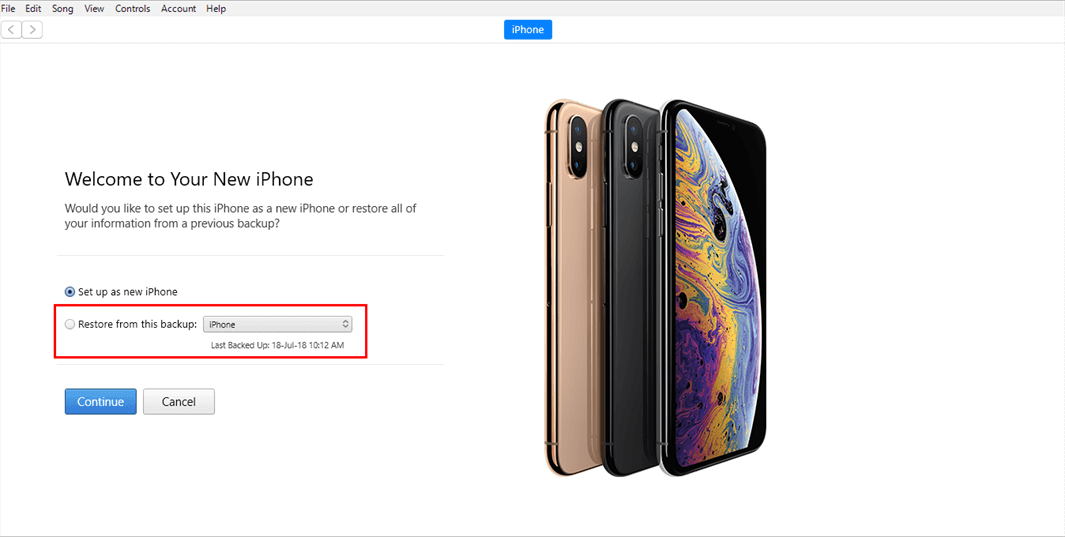
• Open your iPhone and follow the on-screen prompts to set up your iPhone the way you used to do until you see the App & Data screen, and tap Restore from Mac or PC.
• Connect your iPhone to computer again and wait for iTunes to detect the device > On the welcome screen, choose Restore from this backup > Select the most recent backup to restore and click Continue.
Part 3. Recover Permanently Lost Data from iPhone by MyRecover
Even though you have successfully gotten your iPhone out of recovery mode and restored the latest iTunes backup to the iPhone, you may find you have lost some files more or less. What's worse, it seems that you cannot get them back.
In this case, you may MyRecover for iOS, a powerful data recovery tool designed to retrieve permanently lost data from iOS devices, including iPhones. You can simply download it, and follow the instructions below to give it a try.
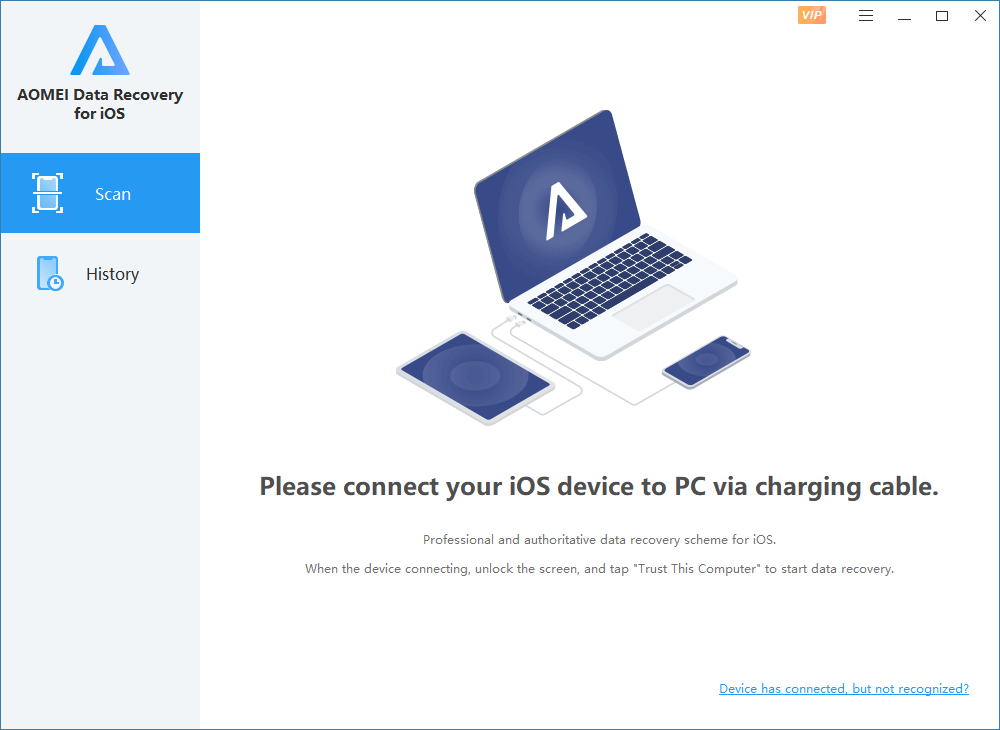
Step 1. Start from connecting your iPhone to computer with a USB cable. Run MyRecover for iOS, click Scan from its left pane.
Step 2. Tap the Scan Now button to let it scan your iPhone data. Wait patiently for the scanning process completes.

Step 3. When the scanning process completes, simply tap each types of data to preview and click the data you’d like to recover, finally, click Recover to get data back to your iPhone.
Part 4. Better Protect Your iPhone Data with FoneTool
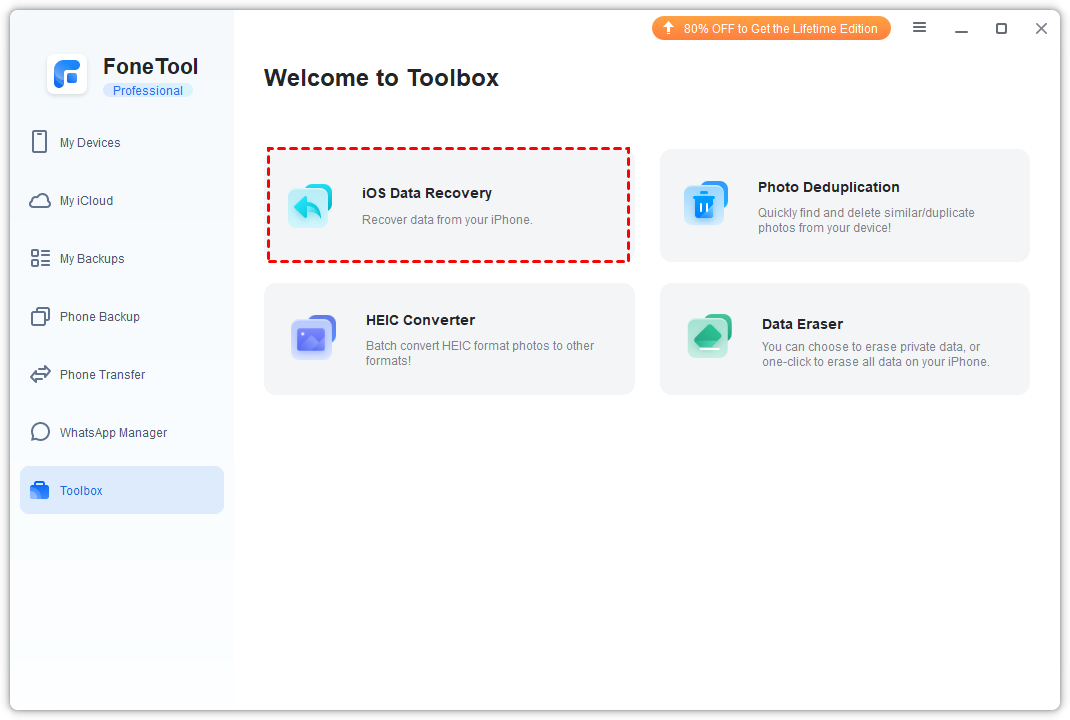
You can also try FoneTool, an all-in-one iOS data management tool to get deleted iPhone data back. Besides, this all-in-one iOS data management tool offers comprehensive solutions to assist you to do iOS data recovery, backup, transfer, and more. Click on the button below to download FoneTool to your computer, and let's go over how it can help you.
One-click Recover deleted data from iPhone
FoneTool helps retrieve a variety of restorable file formats, including photos, contacts, messages, media files in app, etc. You are allowed to preview and recover only wanted data to your computer in one click. Here are how you can recover deleted data from iPhone via FoneTool.
Step 1. Connect your iPhone to PC via USB. Run FoneTool, and go to Toolbox, and click iOS Data Recovery to continue.
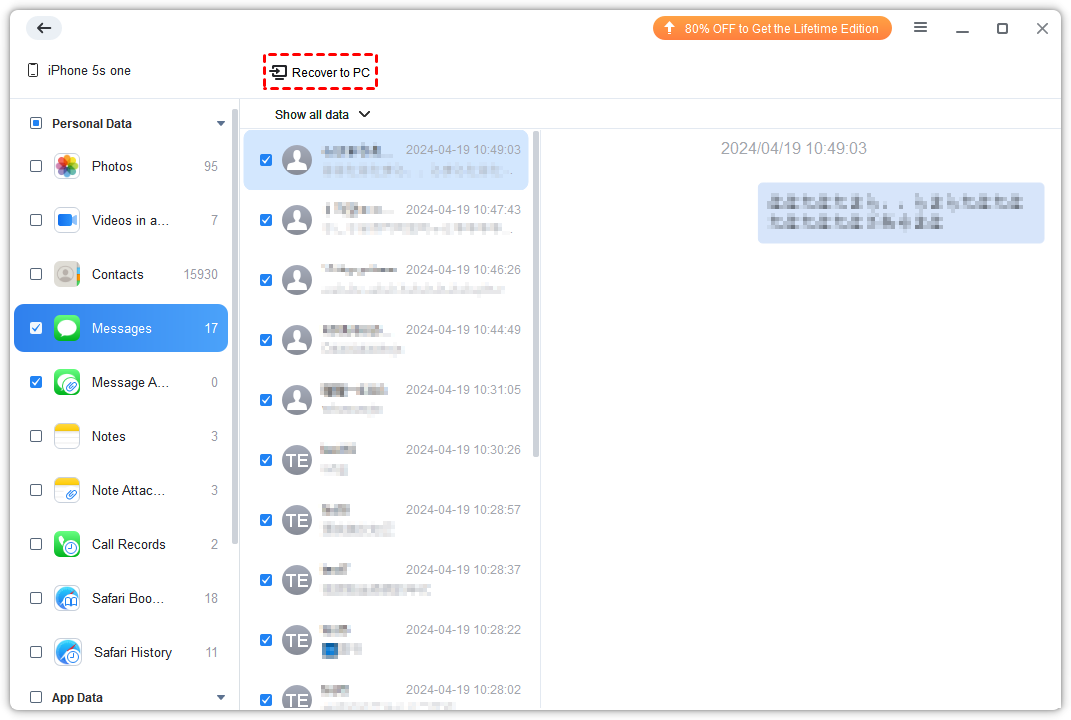
Step 2. Check the box next to the file types you'd like to recover, and tap Start Scan to begin the scanning process.

Step 4. Choose the lost files you'd like to recover, and tap Recover to PC to save them to your computer.
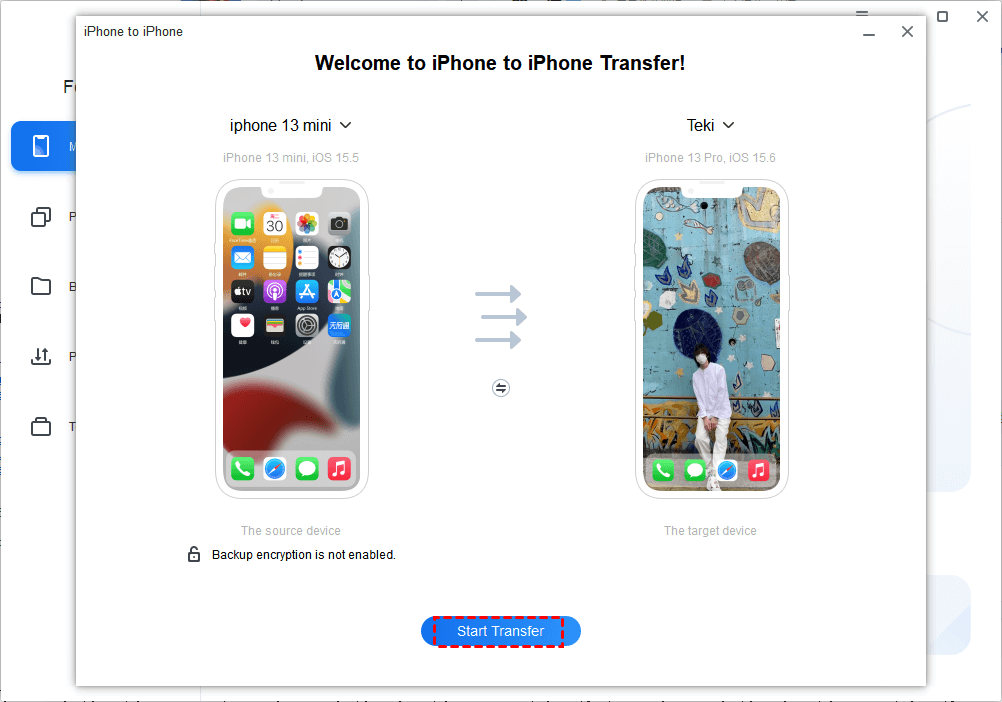
Transfer everything to new iPhone from the old iPhone
If you are unlucky enough that even if you put iPhone into recovery mode, you still cannot troubleshoot iPhone issue, it may be the time to switch to a new iPhone. In this case, you can try FoneTool's iPhone to iPhone transfer function to transfer everything from old iPhone to new iPhone without backup. Here are the steps you can follow.
Step 1. Connect both old iPhone and new iPhone to PC > Launch FoneTool, and click Phone Transfer > Go to iPhone to iPhone and click Start Transfer to continue.
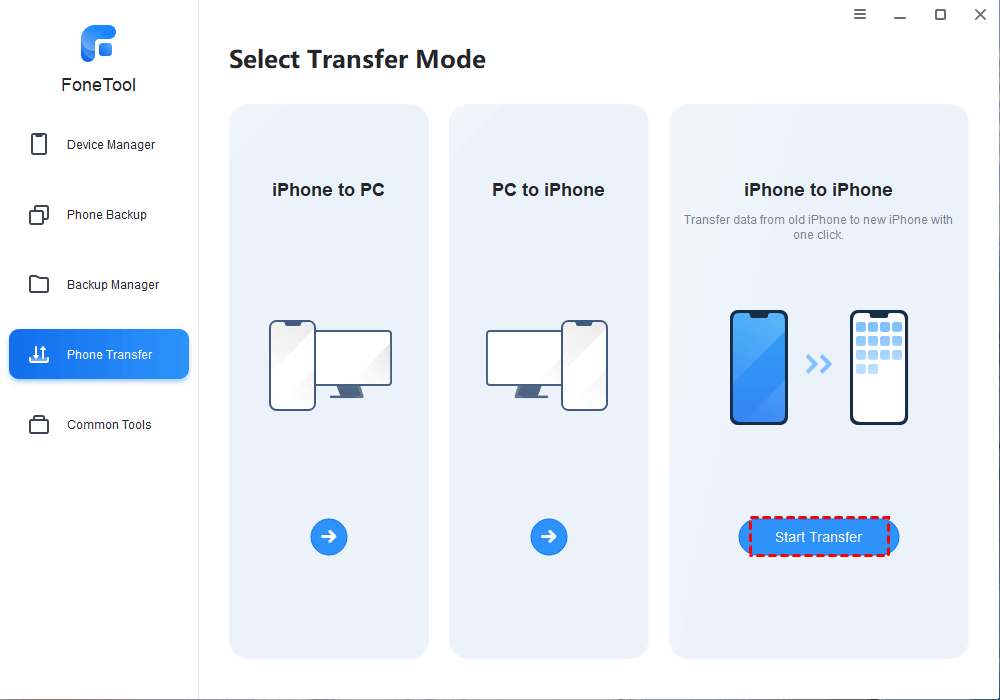
Step 2. The source and target iPhone will be listed. You can enable Backup encryption to encrypt the data in your source iPhone.

Step 3. Click Start Transfer to begin the transfer > Wait for the transfer to complete, and the target iPhone will be restarted automatically.
Conclusion
Experiencing an iPhone stuck in recovery mode doesn't have to result in permanent data loss. By following the methods outlined in this guide – whether through iTunes, or third-party recovery software – you can effectively recover your data and restore your iPhone to a functional state.
Remember to keep backups regularly and stay informed about the tools and methods available to safeguard your valuable information. With the right approach, you can turn a challenging situation into an opportunity to reinforce the importance of data backup and recovery preparedness.
FoneTool - All-in-one iPhone Data Manager
Transfer, backup and manage data on iPhone, iPad and iPod touch in an easy way.
-
 iOS 26 Compatible
 iPhone 16 Supported
Windows 11/10/8/8.1/7
100% Secure

Demi is an editor of FoneTool group as well as an good advisor in the area of iOS-related issues. She does well in finding solutions to people's problems. She enjoys traveling, gardening, and watching movies. She spends most of her free time with her pet and family.
Read author info >>