Transfer Photos from Android Phone to External Hard Drive
Are you looking for good ways about how to transfer photos from Android to external hard drive? Read on to learn effective methods to transfer photos from Android to external hard drive.
Can You Transfer Photos from Android Phone Directly to External Hard Drive?
Of course, transferring photos directly from your Android phone to an external hard drive is entirely possible. In this day and age, smartphones have become the device of choice for taking and saving photos. However, as photo libraries flourish on these devices, the need for effective storage space continues to grow due to the limited storage capacity inherent in smartphones.
So, how to transfer photos from Android to external hard drive? Read on to learn easy and effective methods to move Android photos to external hard drive with or without computer.
Method 1: Transfer Photos from Android Phone to External Hard Drive Without Computer
To transfer photos from Android to external hard drive without computer, you need the USB OTG adapter. With the convenience of a USB OTG (On-The-Go) adapter, you can create a direct link between your Android device and an external hard drive without the need for a computer. Follow the steps below to learn how to transfer photos from Android to portable hard drive without involving your computer:
Step 1. Connect your Android device to an external hard drive using a USB OTG adapter > Once your phone detects the drive, go to your device's file manager app, usually labeled Files or My Files.
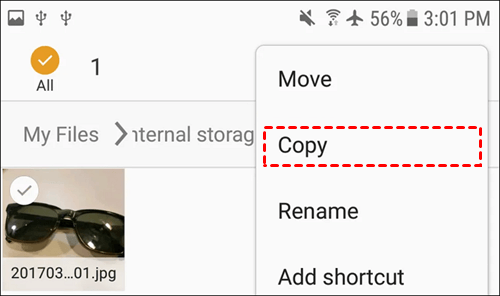
Step 2. Locate the folder containing your photos, usually stored in the Camera folder in the DCIM directory. Once located, select the desired photo and choose the Copy or Move option.
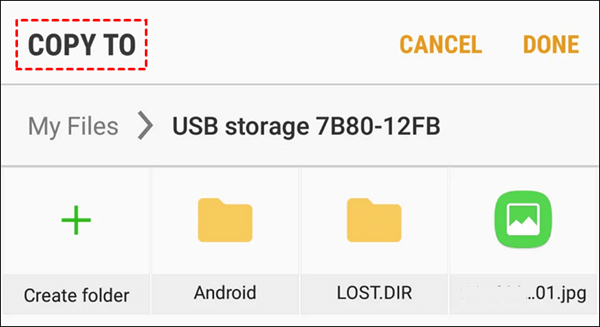
Step 3. After copying the photos, go to the directory on the external hard disk to which you want to transfer them > Select the destination folder and paste the copied images into it.
Method 2: Move Photos from Android to External Hard Drive with Computer
Another method of transferring photos to an external hard drive requires the use of a computer as a middleman. In the realm of Windows OS, Windows Explorer not only acts as an integrated file management tool that simplifies the organization of files and folders, but also helps to smoothly handle data transfers to and from external devices. Here is a complete guide on how to transfer photos from Android to hard drive on Windows:
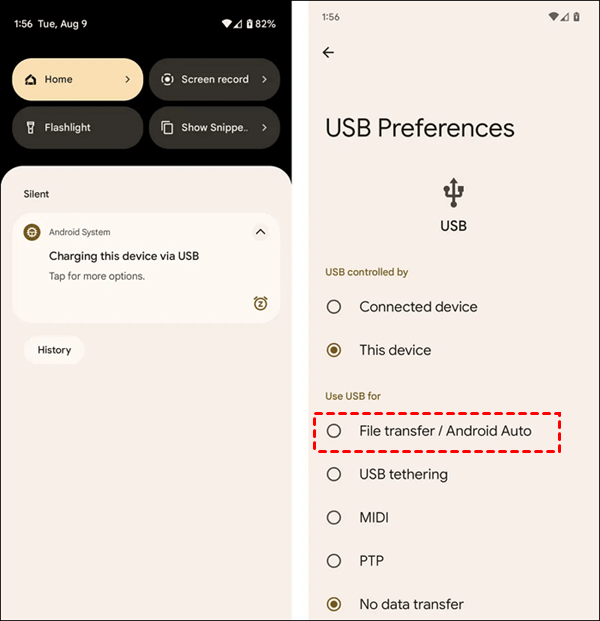
Step 1. Connect your Android device and external hard drive to your computer using a USB cable > Unlock your phone and select File transfer/Android Auto mode.
Step 2. Open Windows Explorer on your computer and go to your Android device’s folder > Find the folder containing the photos (usually named DCIM) and copy them.
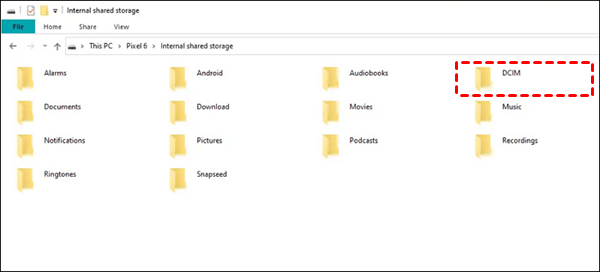
Step 3. Go to the folder on the external hard drive and paste the copied photos > Ensure that neither the Android device nor the external hard drive is disturbed during the transfer.
Bonus Tip: Transfer Photos from Android to Android/iPhone (and Vice Versa)
In addition to transferring photos from Android to external hard drive or PC, it is necessary to transfer photos and data between different mobile devices. Whether you want to upgrade or change devices, data transfer is very important. Therefore, choosing the right data transfer method is crucial.
FoneTool for Android/iOS is one of the most reliable transfer apps that supports a wide range of data types such as photos, videos, contacts, messages, etc. to ensure a smooth data transfer between iOS devices, as well as iPhones and Androids.
So, how to transfer data between Android and Android or iPhone using FoneTool? Follow the simple steps below:
Step 1: Begin by launching FoneTool on both your iPhone and Android devices, and grant the app permission to use WLAN. Simply activate the Wi-Fi option; no actual Wi-Fi connection is necessary.
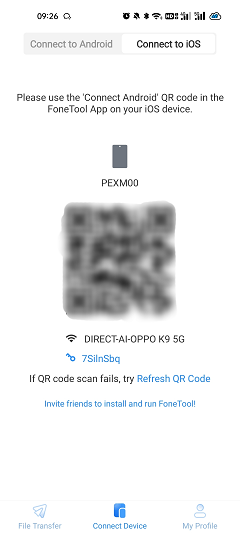
Step 2: Creating a connection involves the following steps:
- On your Android: Navigate to Connect Device and select Connect to iOS to obtain the connection code.
- On your iPhone: Navigate to Connect Device and choose Connect to Android. Utilize your iPhone to scan the code displayed on your Android device.
Step 3: Proceed to File Transfer on your source Android device, select the photos you wish to transfer and tap Send to initiate the process.
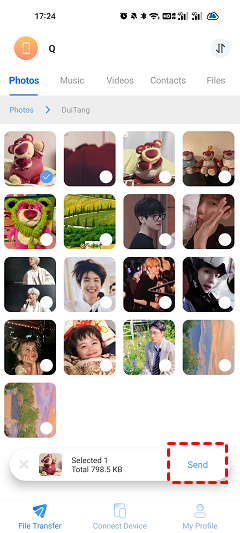
Step 3: On your iPhone, tap Confirm to ensure the reception of these pictures. Upon completion, you can access all transferred pictures within the Photos app on your iPhone.
The Bottom Line
This post has explored various methods of how to transfer photos from Android to external hard drive, each suited to specific preferences and device platforms. The straightforward way is to use a USB OTG adapter for Android devices provides fast, direct transfers without the need for a computer.
In addition, FoneTool is a user-friendly and versatile phone transfer tool that serves as an alternative method to transfer data between Android and iPhone devices. The tool simplifies the transition to a new smartphone and ensures a smooth and hassle-free experience.
FoneTool - All-in-one iPhone Data Manager
Transfer, backup and manage data on iPhone, iPad and iPod touch in an easy way.
-
 iOS 27 Compatible
 iPhone 17 Supported
Windows 11/10/8/8.1/7
100% Secure

May is an editor who is passionate about sharing computer tips and providing reliable solutions, specializing in iOS/Android and file backup and recovery. In her spare time, May enjoys watching movies, going shopping, or chatting with friends.
Read author info >>