How to Restoring iPhone from Backup Without Erasing
This article provides a detailed guide on how to restore an iPhone from a backup without erasing any existing data. Whether you're switching to a new iPhone or need to recover data from an old backup, this article will help you achieve your goal.
Accidents happen, and sometimes, you may find yourself needing to restore your iPhone from a backup without wanting to go through the process of erasing all your data. Whether you've lost some important files, encountered software issues, or upgraded to a new device, the ability to restore from a backup without wiping your iPhone is invaluable.
In this detailed guide, we'll explore the methods and step-by-step procedures for achieving this delicate balance between recovery and preservation. From iCloud to iTunes, we'll cover the various approaches, ensuring you can restore your iPhone seamlessly while keeping your valuable data intact.
Understanding the Basics of iPhone Restoration
Before diving into the methods, it's essential to grasp the fundamentals of iPhone restoration. When you restore your iPhone, you essentially revert it to a previous state, either from an iCloud or iTunes backup. Typically, this process involves erasing all existing data on the device. However, there are specific scenarios where you may want to retain your current data while still benefitting from a restoration.
Restoring iPhone from iCloud Backup Without Erasing
1. Backup Your iPhone:
- Before initiating any restoration, ensure you have a recent iCloud backup. Go to Settings > [your name] > iCloud > iCloud Backup and tap "Back Up Now."
2. Check Last Backup:
- Verify the date and time of your latest iCloud backup to ensure it includes the data you want to restore.
3. Erase and Reset Settings:
- Go to Settings > General > Reset.
- Choose "Reset All Settings" and enter your passcode.
4. Restore from iCloud Backup:
- After resetting settings, go to Settings > [your name] > iCloud > Manage Storage > Backups.
- Select the relevant backup and tap "Restore."
5. Follow On-screen Instructions:
- Follow the on-screen instructions to complete the restoration process.
- Your iPhone will restart, and the data from the chosen iCloud backup will be restored without erasing existing data.
Restoring iPhone from iTunes Backup Without Erasing
1. Backup Your iPhone Using iTunes:
- Connect your iPhone to your computer and open iTunes.
- Click on the device icon and go to the "Summary" tab.
- Select "Back Up Now" to create a full backup.
2. Check Last iTunes Backup:
- Verify that your most recent iTunes backup contains the data you want to restore.
3. Download and Install Third-Party Software:
- To restore from an iTunes backup without erasing, third-party tools like iMobie PhoneRescue or Dr.Fone - Phone Backup (iOS) can be useful.
4. Launch Software and Choose Restore:
- Launch the chosen software and select the "Restore" or "Restore from Backup" option.
5. Select iTunes Backup:
- Choose the specific iTunes backup you want to restore from and proceed with the restoration process.
6. Follow On-screen Instructions:
- Follow the on-screen instructions provided by the third-party software to complete the restoration.
- Your iPhone will be restored from the selected iTunes backup without erasing existing data.
Backup and Restore Using FoneTool (No Data Loss)
When restoring your iPhone post-setup, consider using FoneTool, a top-notch iOS data transfer and backup tool. It allows one-click data transfer between iPhones and offers a "Selective Backup" feature. This feature lets you restore specific data to your iPhone without a factory reset. It's ideal when you've added new data to your device and want to avoid a complete reset. Simply back up data to your PC and restore it to your new iPhone seamlessly.
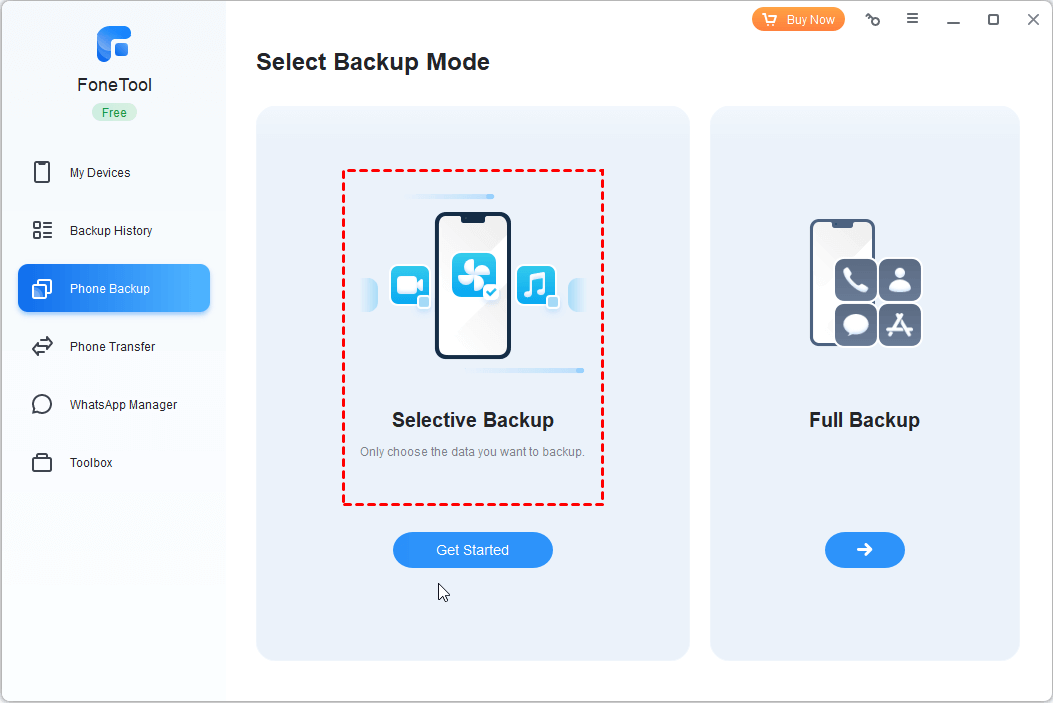
Step 1. Connect the current iPhone to the computer and run FoneTool. Choose Phone Backup. Choose Selective Backup. Click Get Started.
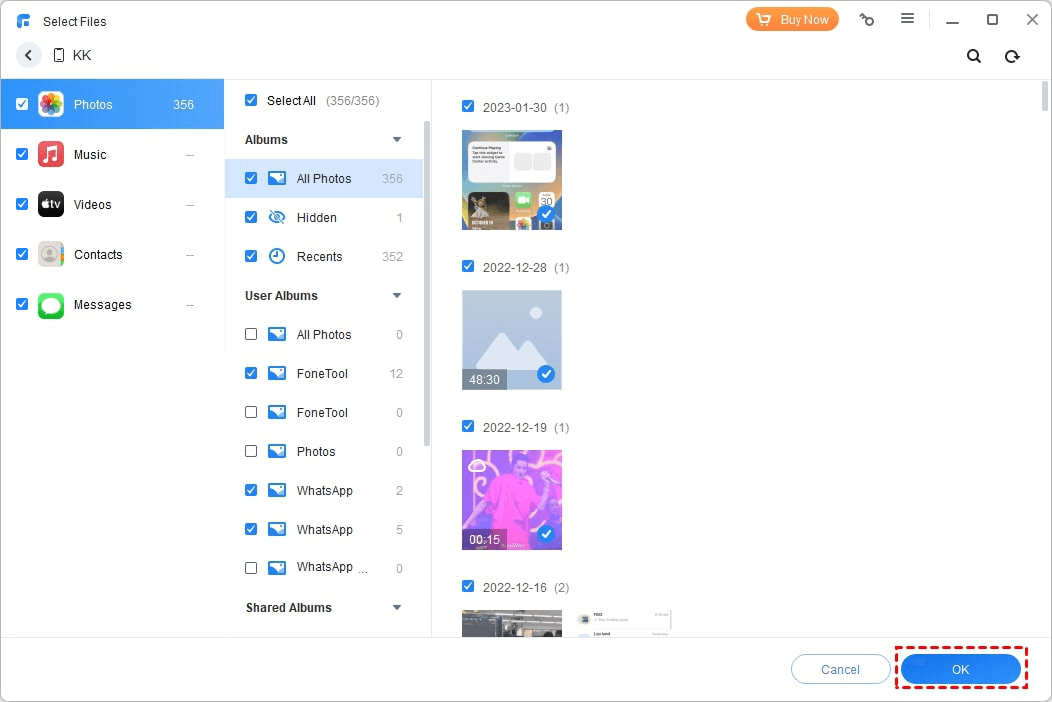
Step 2. Select the files you want to backup, and you can click the file type icon to choose the specific items.
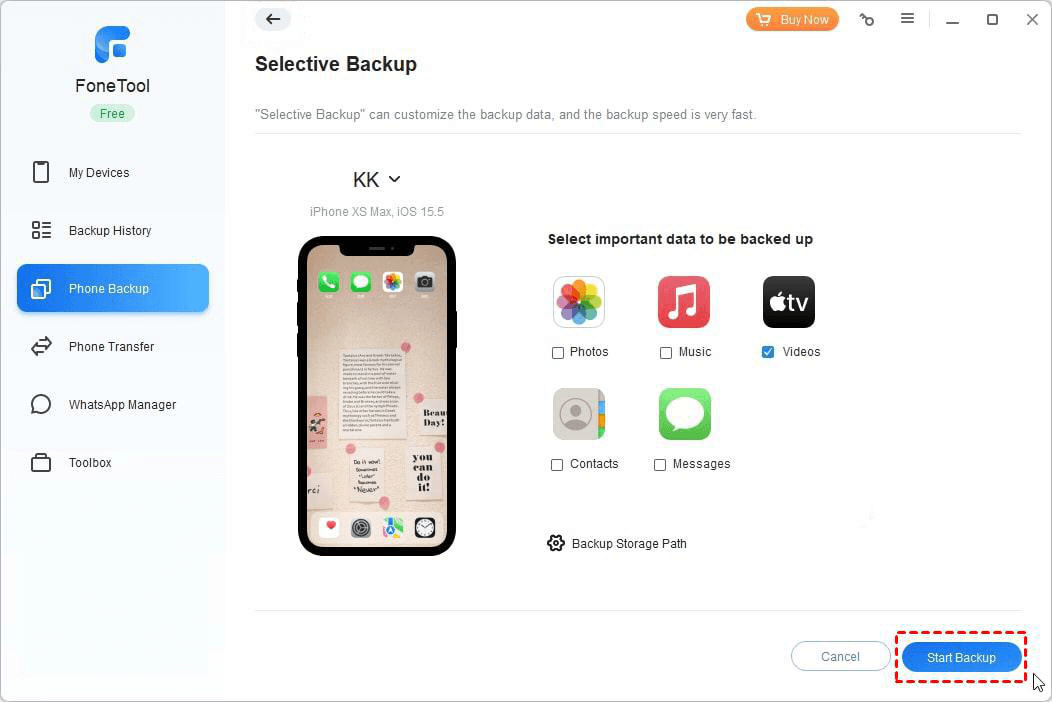
Step 3. You can click the Backup Storage Path to save a location to save the data. Then click Start Backup.
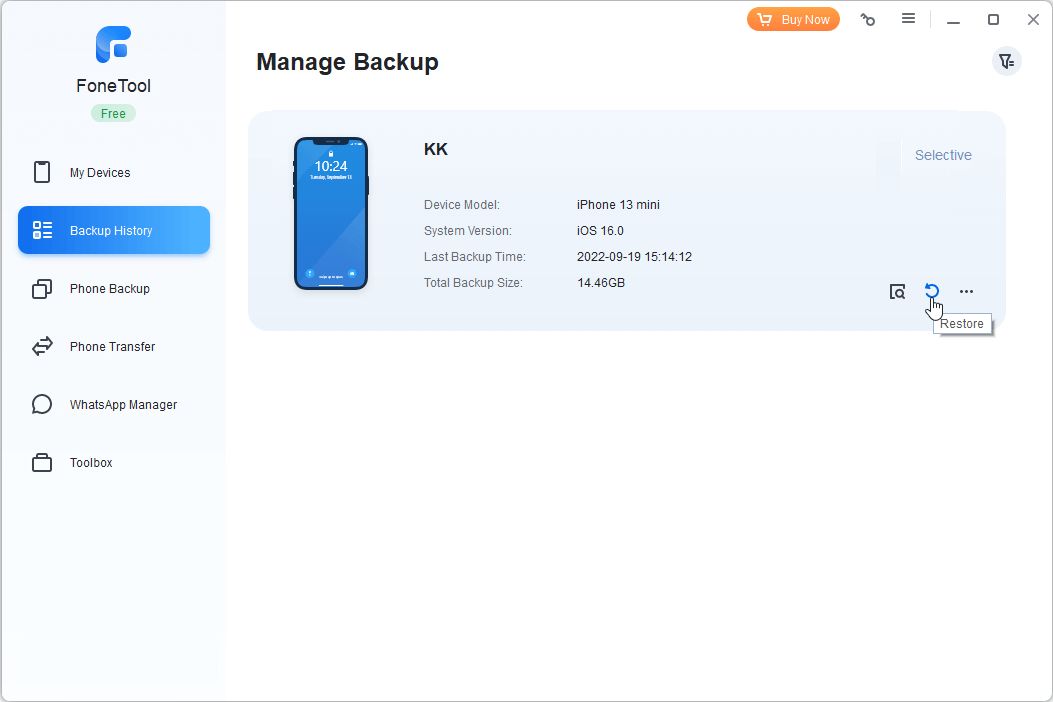
Step 4. When the backup is completed. Disconnect the current iPhone and connect your new iPhone to the computer. Go to Backup History to restore the backup you just created.
Tips for a Successful Restoration Without Erasing:
1. Regular Backups:
- Maintain a routine of regular iCloud or iTunes backups to ensure you have the most recent data available for restoration.
2. Choose the Right Backup:
- Verify the contents of your backups before initiating the restoration process to avoid potential data loss.
3. Use Reputable Software:
- When relying on third-party software for backup and restore, opt for reputable and trusted tools to ensure the safety of your data.
Conclusion
Restoring an iPhone from backup without erasing is a delicate process that requires careful consideration and the right tools. Whether you opt for iCloud, iTunes, or third-party applications, the key is to have a recent and comprehensive backup that includes the data you want to retain. By following the step-by-step methods outlined in this guide, you can navigate the restoration process seamlessly and preserve your valuable data. Remember to prioritize regular backups, choose the right backup, and use trusted software to ensure a successful restoration without compromising your existing iPhone data.
FoneTool - All-in-one iPhone Data Manager
Transfer, backup and manage data on iPhone, iPad and iPod touch in an easy way.
-
 iOS 26 Compatible
 iPhone 16 Supported
Windows 11/10/8/8.1/7
100% Secure

Demi is an editor of FoneTool group as well as an good advisor in the area of iOS-related issues. She does well in finding solutions to people's problems. She enjoys traveling, gardening, and watching movies. She spends most of her free time with her pet and family.
Read author info >>