Full Guide: How to Manage Contacts on iPhone 15/14/13/12
If you are wondering how to manage contacts on iPhone, this guide must be worth reading, which guide you to make full use of the iPhone Contacts app to put all your iPhone contacts in order.
What is the best way to manage Contacts on iPhone?
I’m struggling to manage my contacts on my iPhone Contacts app but have no idea where to start. Are there any clues or tips I can follow to make it simple to manage multiple contacts on my iPhone? Any suggestions would be appreciated.
- Question from Apple Community
One of the most critical and oldest apps - Contacts app, launched alongside the first iPhone way back in 2007. Although little has changed since that time, it plays an irreplaceable role on iPhone to save all your contact information.
![]()
Since the iPhone allows you to create as many contacts as you need, your iPhone contacts app may have become a mess for a prolonged use. Then, do you wonder how to manage contacts on iPhone?
If your answer is Yes, follow this guide to make full use of the features in your iPhone Contacts app and third-party tool, and manage all your iPhone contacts in order.
Part 1. How to manage contacts on iPhone 15/14/13/12
In this part, you will learn how to set up and manage your contacts on iPhone 15/14/13/12 to change what shows up in the Contacts app, delete contacts, and more.
Set up the Contacts app account on iPhone
The information in the Contacts app is directly taken from your email account. For most iPhone users, this is iCloud, but it may also be Gmail, Microsoft Exchange, or a variety of other services. You can follow the steps below to set up your contacts account on iPhone.
Step 1. Go to Settings on your iPhone > Contacts > Tap Accounts > Tap Add Account.
Step 2. Tap the service like Google that you have an account with. Or tap Other to set up a contacts account.
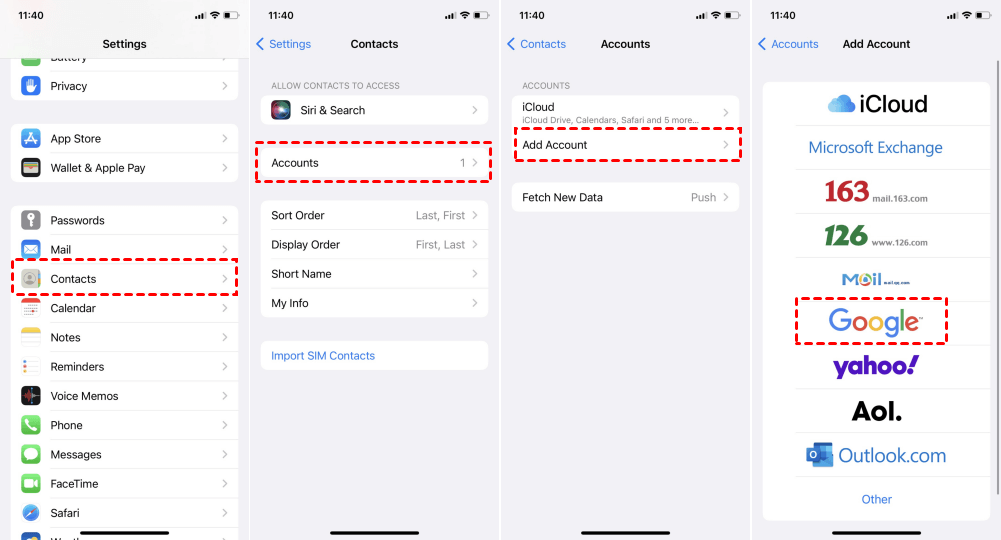
Step 3. Enter your information and password > Tap Enter to confirm.
Merge contacts from different accounts on iPhone
It is simple to save contacts to iPhone Contacts app from different email account. However, it also brings disadvantages, like you will find it difficult to transfer contacts to another iPhone/iPad. Then, you may need steps below to merge contacts from different accounts on iPhone.
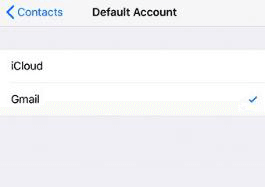
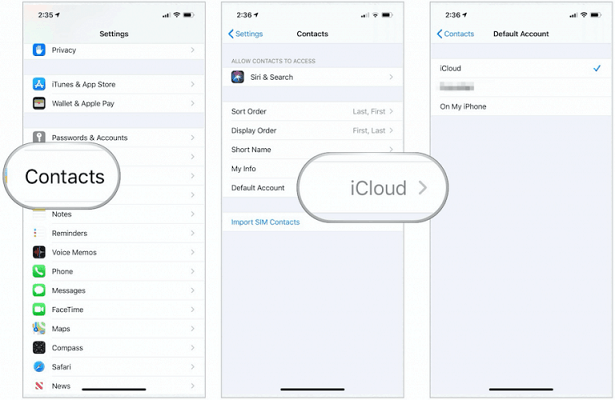
Step 1. Open the Settings app on your iPhone > Contacts > Choose Default Account > Select the account where you want the contacts to go. You can choose to sync all contacts to iCloud or any other accounts.
Step 2. Now, go to the Contacts app > Choose Groups from the upper left corner > Select the account you want to move contacts from > Tap Done to continue.
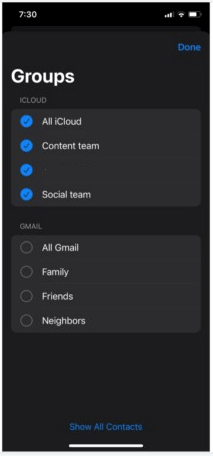
Tip: You can also create contact groups on iPhone according to your preference.
Step 3. Tap each contact one by one and choose Share Contact > Send the contact to yourself via email or message.
Step 4. Finally, open the mail/message and save the contact to your iPhone. Repeat the steps for the remaining contacts.
Warm tip: After merging contacts, please remember to remover the other accounts from your iPhone to avoid duplicates in the contacts book. If there are duplicates, click here to know how to manage duplicate contacts on iPhone.
Customize your contacts on iPhone
The functions in the Contacts app helps you better manage contacts on iPhone before and after adding contacts to the app. Keep reading to customize your contacts on iPhone.
1# Change how you sort and display contacts
You may organize your contacts in several ways, such as alphabetically by first or last name.
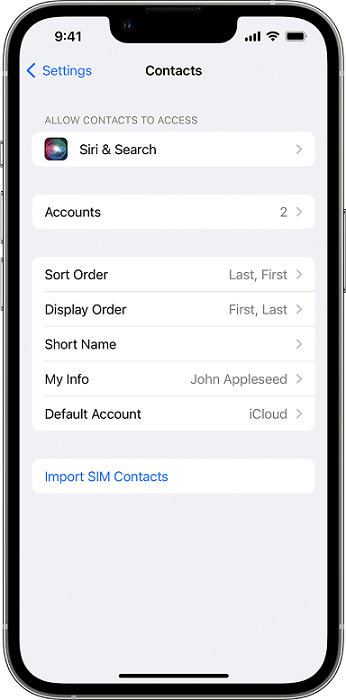
Go to Settings > Contacts and choose from the following:
• Sort Order: Sort your contacts alphabetically by first or last name.
• Display Order: Show contacts’ first names before or after last name.
• Short Name: Choose how your contact’s name appears in apps like Mail, Messages, Phone, and more.
2# Set up default account
Setting up your default account helps keep your contacts centrally located, regardless of how many email accounts you have.
Go to Settings > Contacts > Choose the Default Account > Select your default account from those listed.
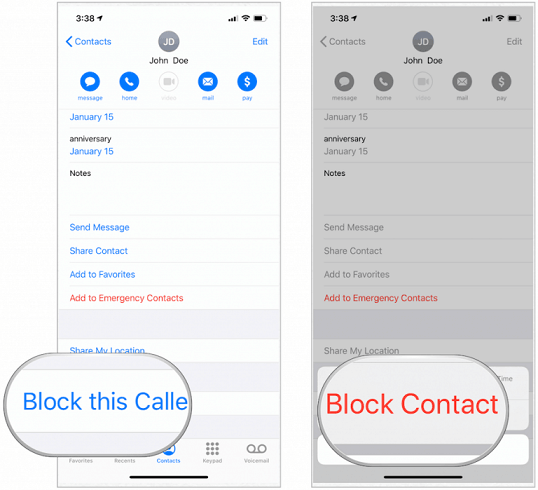
3# Block contacts
You can block someone’s phone number regardless of whether they’re listed in your Contacts app.
If the contact is listed: In the Contacts app, select the contact you wish to block > Scroll down to locate and tap Block this Caller > Confirm by choosing Block this Caller from the pop-up.
If the contact is not listed: Go to Phone app > Select the Recent tab > Choose the i icon > Select Block this Caller > From the pop-up, confirm your operation.
Delete duplicate contacts on iPhone
Your contacts list can grow significantly over the years, then, you may have got duplicate contacts on your iPhone. You can follow the steps below to manage duplicate contacts on iPhone.
Step 1. In the Contacts app on your iPhone > Using the Search box, type in the name of the person you think was duplicated.
Step 2. Select the contact you wish to delete > Tap Edit > Scroll down, then choose Delete Contact > Confirm Delete Contact in the pop-up.
Part 2. How to manage iPhone contacts on PC
If you want to keep iPhone contacts safe, and be free to browse, edit iPhone contacts on computer, then you can try the iOS data transfer and backup software - FoneTool. The professional backup tool can meet all your demands, if you need:
• selectively transfer iPhone contacts,
• transfer iPhone contacts at a super-fast speed, like 20 seconds for 2000+ contacts,
• not to lose any existing files saved on your iPhone during the transfer process.
• export iPhone contacts to PC in the format of vCard and .csv.
Get the tool right now and keep reading to see how to transfer iPhone contacts to PC via FoneTool.
Step 1. Connect your iPhone to computer via USB > You may need to tap Trust to let your computer access iPhone data.
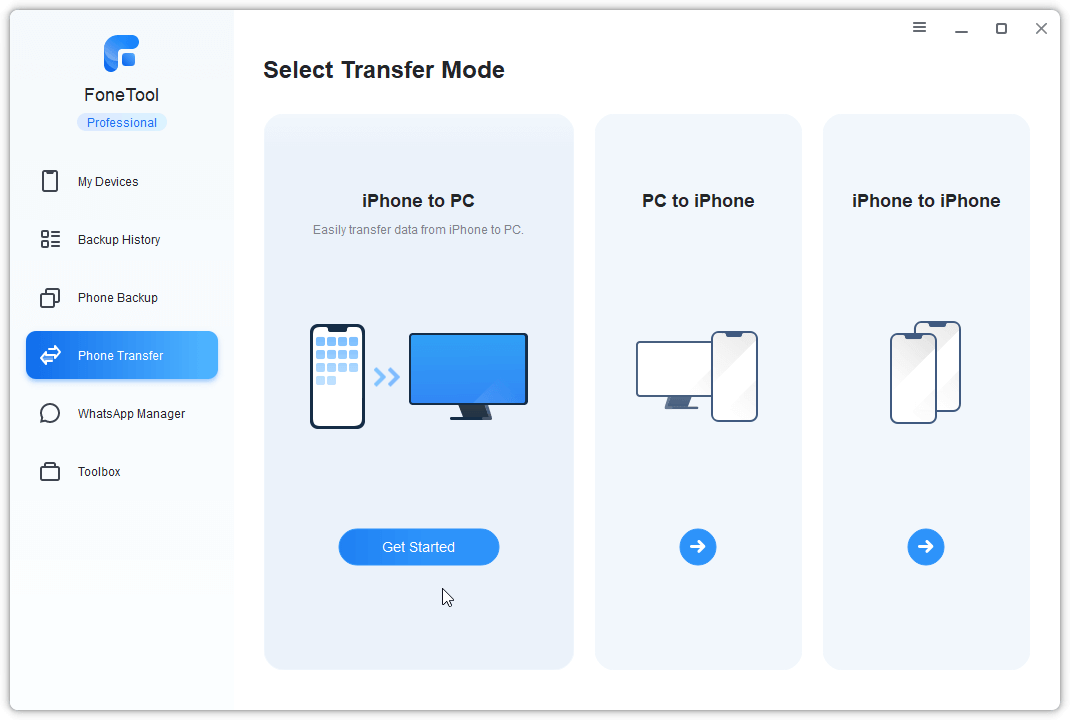
Step 2. Launch FoneTool, choose Phone Transfer > Mouse over to iPhone to PC > Click Start Transfer.
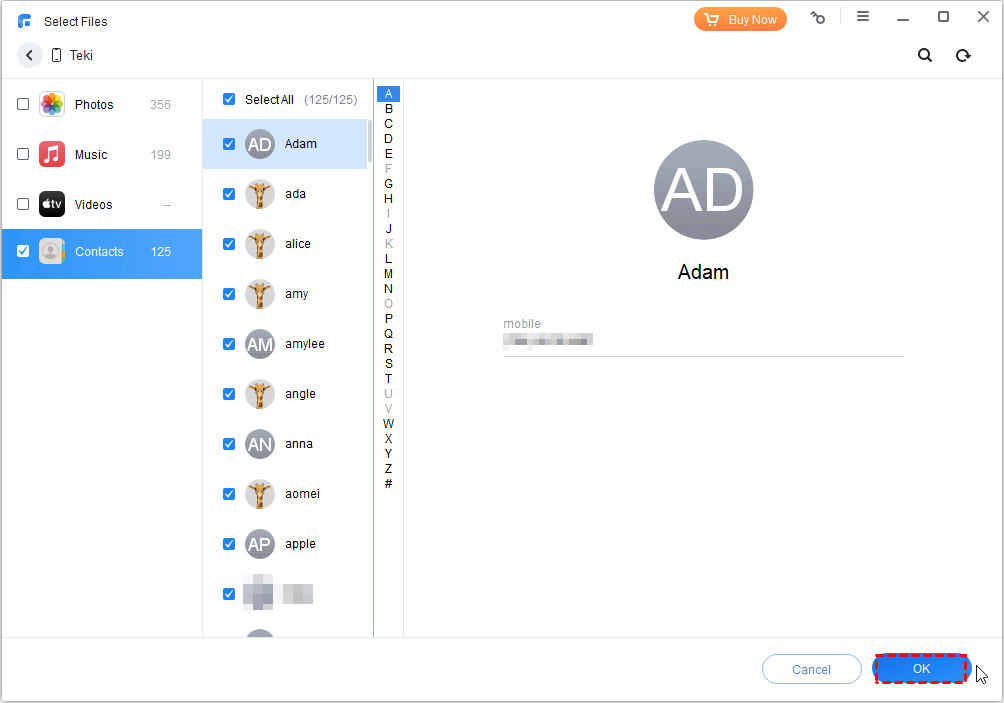
Step 3. Check Contacts > Preview and choose the contacts you’d like to transfer to PC > Click OK to confirm.
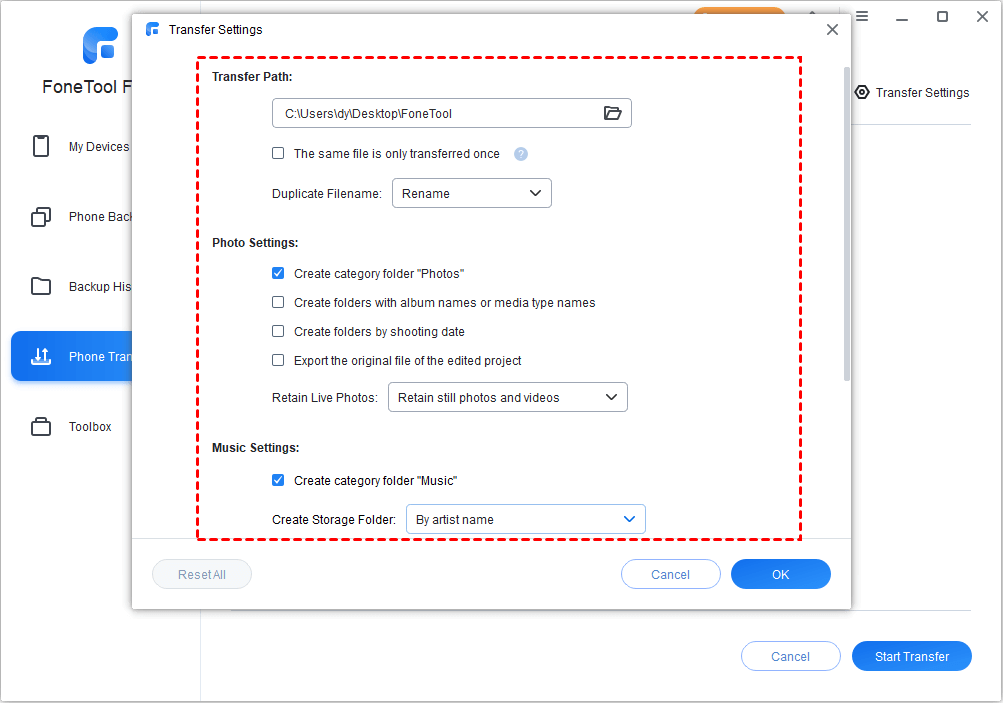
Step 4. Finally, choose a storage path from Transfer Settings to save your contacts > Click Transfer to make it.
Summary
Hope you have had a clear idea about how to manage contacts on iPhone after reading this guide. If you want to backup iPhone contacts locally, feel free to try the third-part tool - FoneTool. If this guide is helpful, share it with others.
FoneTool - All-in-one iPhone Data Manager
Transfer, backup and manage data on iPhone, iPad and iPod touch in an easy way.
-
 iOS 27 Compatible
 iPhone 17 Supported
Windows 11/10/8/8.1/7
100% Secure

Demi is an editor of FoneTool group as well as an good advisor in the area of iOS-related issues. She does well in finding solutions to people's problems. She enjoys traveling, gardening, and watching movies. She spends most of her free time with her pet and family.
Read author info >>