Move iTunes Library to External Drive: Complete 2026 Guide
Learn how to properly move your iTunes library to an external drive in 2025. Includes essential prep steps, detailed transfer instructions, and bonus tips for managing your music collection after the move.
Can I move my iTunes Library to an external hard drive?
I have my iTunes Library stored on the internal Library on my PC. I want to move the entire Library to an external hard drive. I can’t seem to figure how to do it. Any ideas on how to do this backup?
- Question from Apple Community
Why Move Your iTunes Library to an External Drive?
Running out of computer storage space? Moving your iTunes library to an external drive can free up significant space while keeping your music collection safe and accessible.
-
Free up computer storage for other files and applications
-
Safeguard your music collection from computer crashes
-
Switch between computers while maintaining your complete library
-
Organize your media in one centralized location
This comprehensive guide walks you through the entire process to move iTunes Library to external drive, from preparation to completion.
Essential Preparations Before Moving iTunes Library to External Drive
Before transferring your iTunes library, proper preparation ensures a smooth transition without data loss.
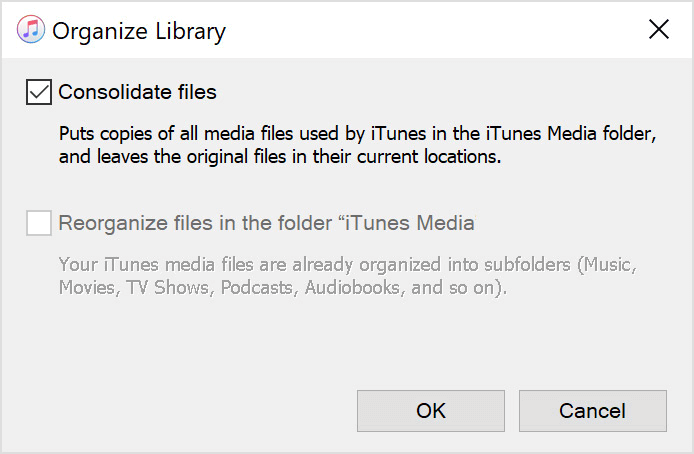
1. Consolidate Your iTunes Files
Consolidation gathers all your media files into one main iTunes folder, making the transfer process much simpler.
Step 1. Open iTunes and select File > Library > Organize Library from the menu bar.
Step 2. Check the Consolidate files option and click OK.
2. Re-download Purchased Content
Ensure all your iTunes Store purchases are available locally before the move.
Step 1. In iTunes, go to Account > Purchased (or Family Purchases if using Family Sharing).
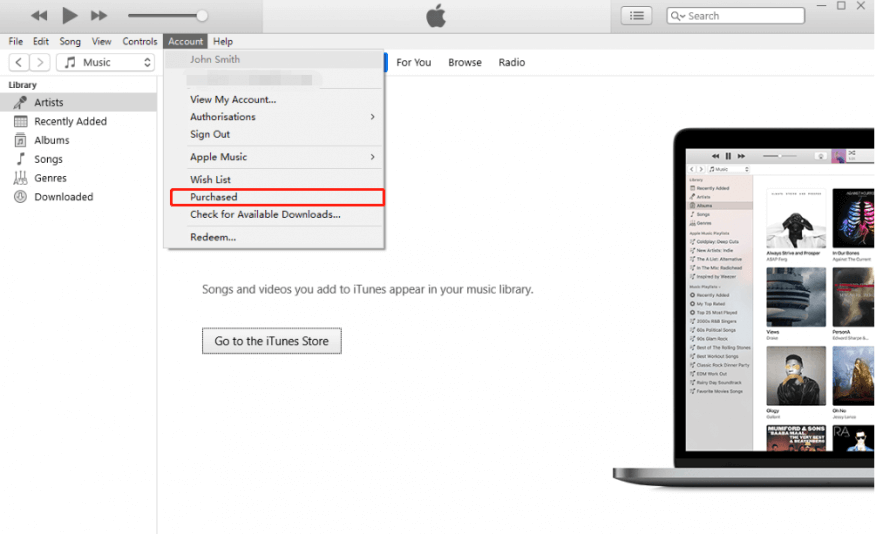
Step 2. Select Music from the left panel, choose your songs, and click the download button.
Moving iTunes Library to External Drive on Windows PC
With preparations complete, follow these steps to transfer your entire iTunes library. Follow the steps to know how to move iTunes Library to external hard drive.
Step 1. Close iTunes completely and locate your iTunes folder (typically in Music > iTunes).
Step 2. Right-click the iTunes folder and select Copy.
Step 3. Navigate to your external drive and Paste the folder.
- ★Tips:
- Ensure your external drive has enough free space for the entire library
- Use a high-speed USB connection for faster transfer
- Don't interrupt the transfer process once started
Completing the Setup After Transfer iTunes Library to External Drive
Having successfully copied your iTunes Library to external drive is not the end. After moving your files, you need to redirect iTunes to the new location.
Step 1. Open iTunes and go to Edit > Preferences > Advanced.
Step 2. Verify that the 'Keep Music Media folder organized' option is checked.
Step 3. Click Change and select the new iTunes folder location on your external drive.
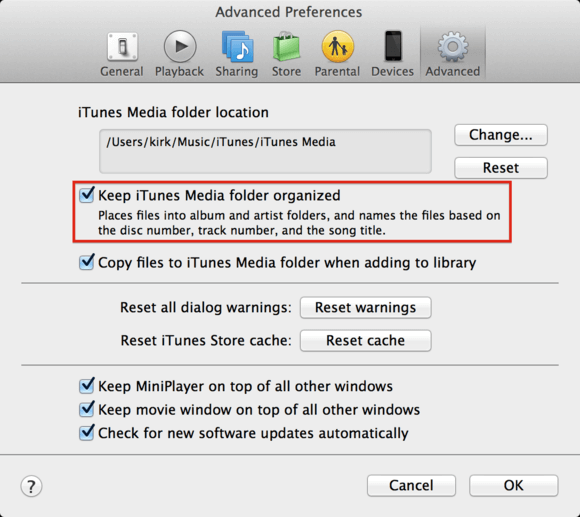
Step 4. Click OK to confirm the changes.
Bonus: Direct Music Transfer from iPhone to External Drive
If you move iTunes Library to external drive for the sake of backing up, FoneTool offers a direct method to transfer songs from your iPhone to any external drive.
This powerful iPhone data management tool is the best way to backup iPhone without iCloud or iTunes.
- Complete compatibility: Works with both purchased and non-purchased songs
- Selective transfers: Choose specific songs or entire playlists
- Flexible storage: Save to external drives, USB sticks, or computer folders
- Broad device support: Compatible with all iPhone, iPad, and iPod models
100% Secure
Free download FoneTool to your computer by clicking the icon below, and follow the steps below to transfer music from iPhone to external hard drive.
How to transfer music files from iPhone to external drive
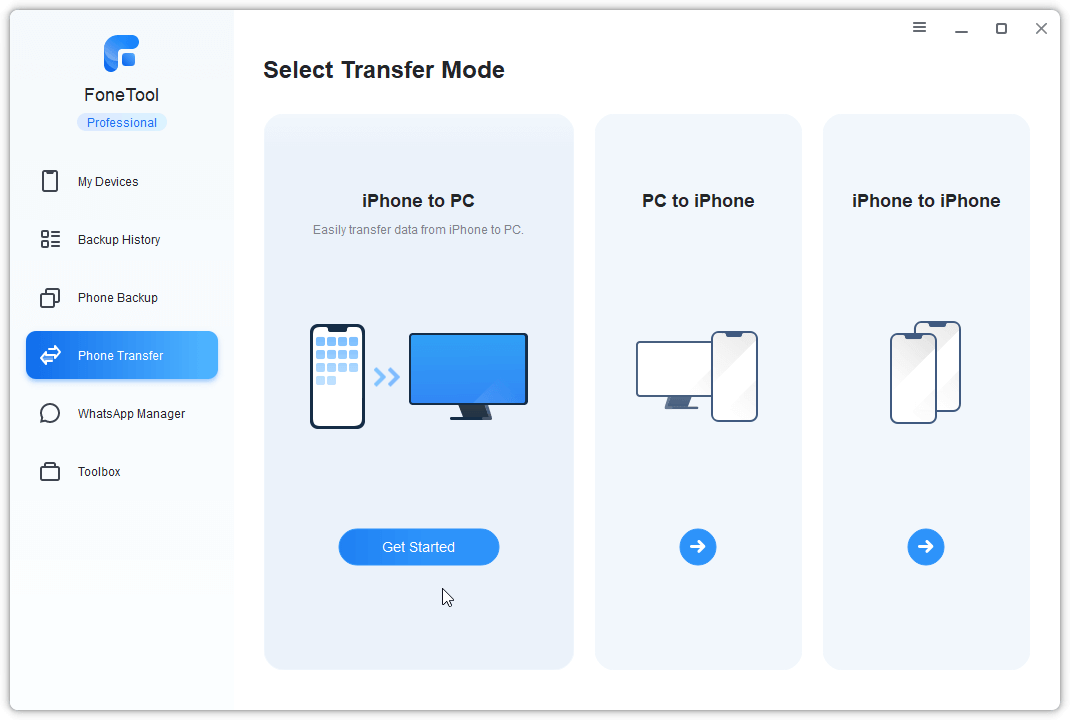
Step 1. Connect your iPhone to computer and launch FoneTool. Select Phone Transfer > iPhone to PC and click Start Transfer.
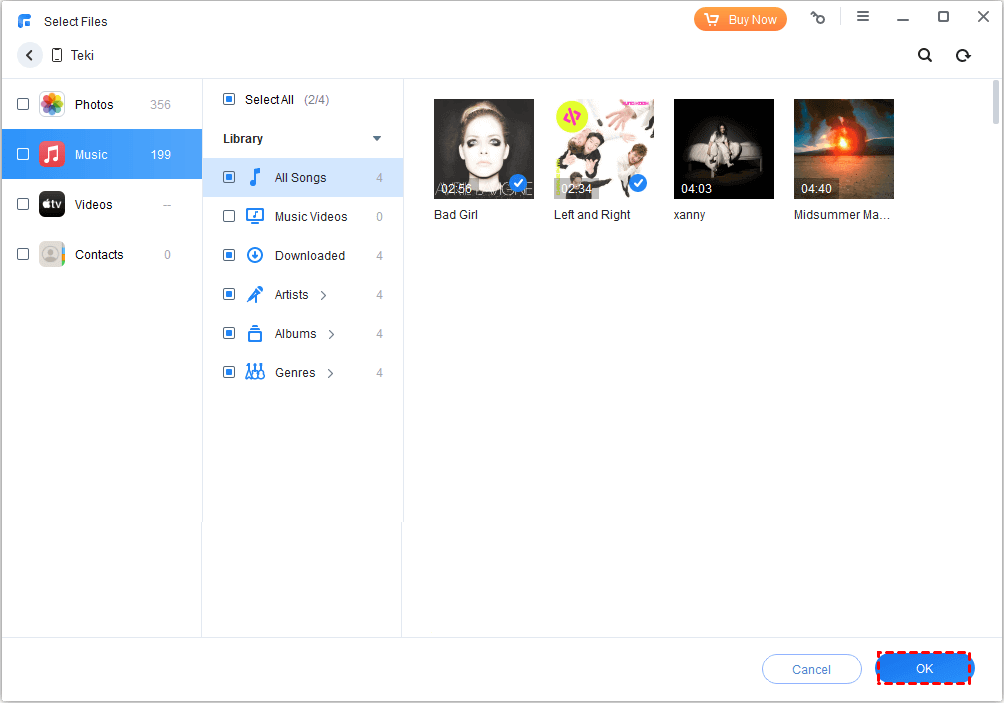
Step 2. Click the plus icon to browse and select the songs you want to transfer, then click OK.
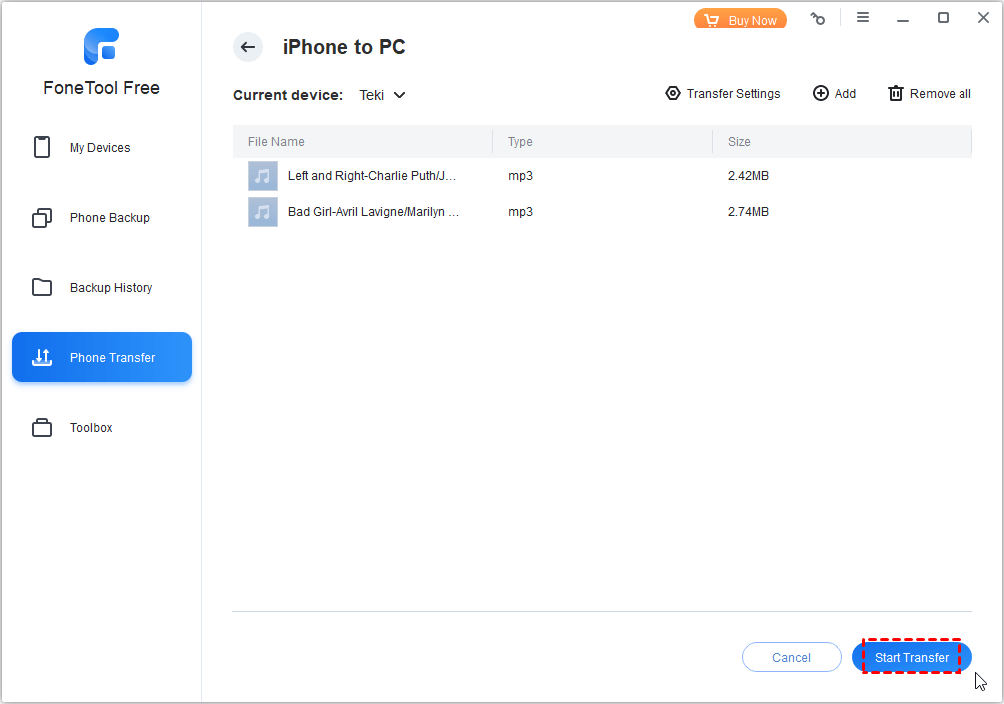
Step 3. Choose your external drive as the destination and click Start Transfer.
FAQs on Transferring iTunes Library
Summary
Moving your iTunes library to an external drive is a smart solution for managing storage space while preserving your valuable music collection. The built-in iTunes method works well for complete library transfers, while FoneTool provides excellent flexibility for selective music backups directly from your iPhone.
Ready to organize your music library? Download FoneTool today to easily transfer iPhone music to external drives or use the step-by-step iTunes method to relocate your entire media collection.
FoneTool - All-in-one iPhone Data Manager
Transfer, backup and manage data on iPhone, iPad and iPod touch in an easy way.
-
 iOS 27 Compatible
 iPhone 17 Supported
Windows 11/10/8/8.1/7
100% Secure
Kelsey is an English editor at FoneTool, passionate about helping users solve tech issues. She specializes in iPhone data management, backup, and recovery. In her free time, she enjoys learning IT skills and spending time with loved ones.
Read author info >>