How to Transfer iMovie from iPhone to PC [100% Useful]
If you need a way to tranfer iMovie from iPhone to PC, this guide will be your good helper. And FoneTool might be your best choice, especially when you need to transfer lots of high-quality videos.
As Apple's official video editing software, iMovie lets users craft home movies directly on their iPhones with professional-grade effects, transitions, and titles. Once you've finished editing your masterpiece, you might want to transfer it to a computer to watch, share, or archive. This guide details four methods, both wired and wireless to seamlessly move your iMovie projects from iPhone to PC, providing flexible solutions tailored to different scenarios.
1. How to transfer iMovie from iPhone to PC [fastest & free]
How do I move iMovie to the desktop? A wired way called FoneTool might be your best choice, especially when you need to move a large number of videos. With its fast transfer speed, you can transfer iMovie projects between devices at a super-fast speed without any data compression.
Powerful iPhone Data Transfer Software
- Transfer GBs of iMovie files from iPhone in minutes.
- Transfer unlimited files between iPhone and PC as you like.
- Various iMovie formats are supported (mp4, mov, m4v, etc.).
- You can also transfer photos, contacts, music and ringtones.
- Various iOS devices and versions are compatible, including the latest ones.
Windows 11/10/8/8.1/7
100% Secure
Now you can click the download button to get FoneTool, and follow the guidance below to export iMovie from iPhone to PC.
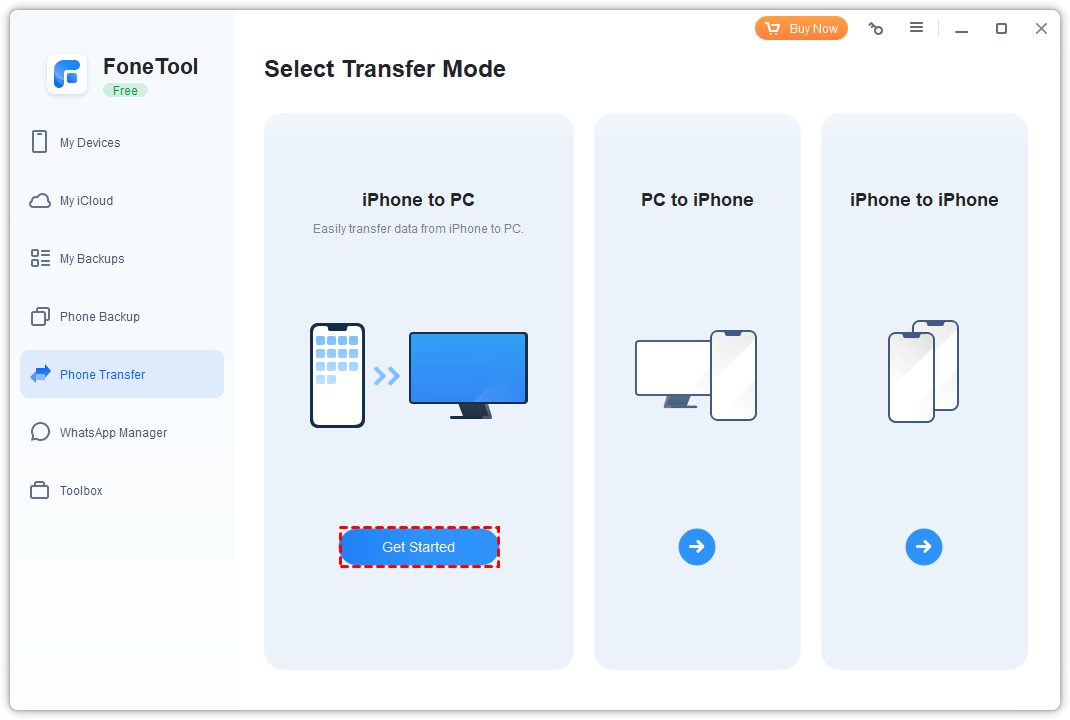
Step 1. Connect your iPhone to the PC with a USB cable > Launch FoneTool go to Phone Transfer > Click iPhone to PC and tap on Get Started.
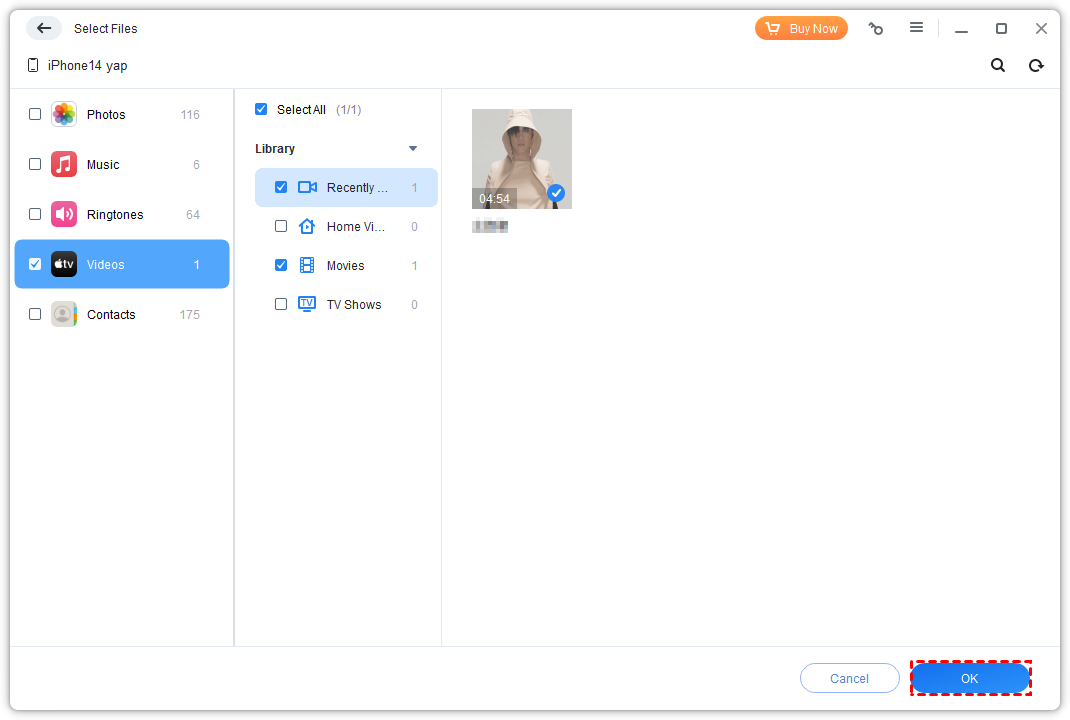
Step 2. Check the icon to preview the iMovie file and choose the specific items you need > Click OK to continue.
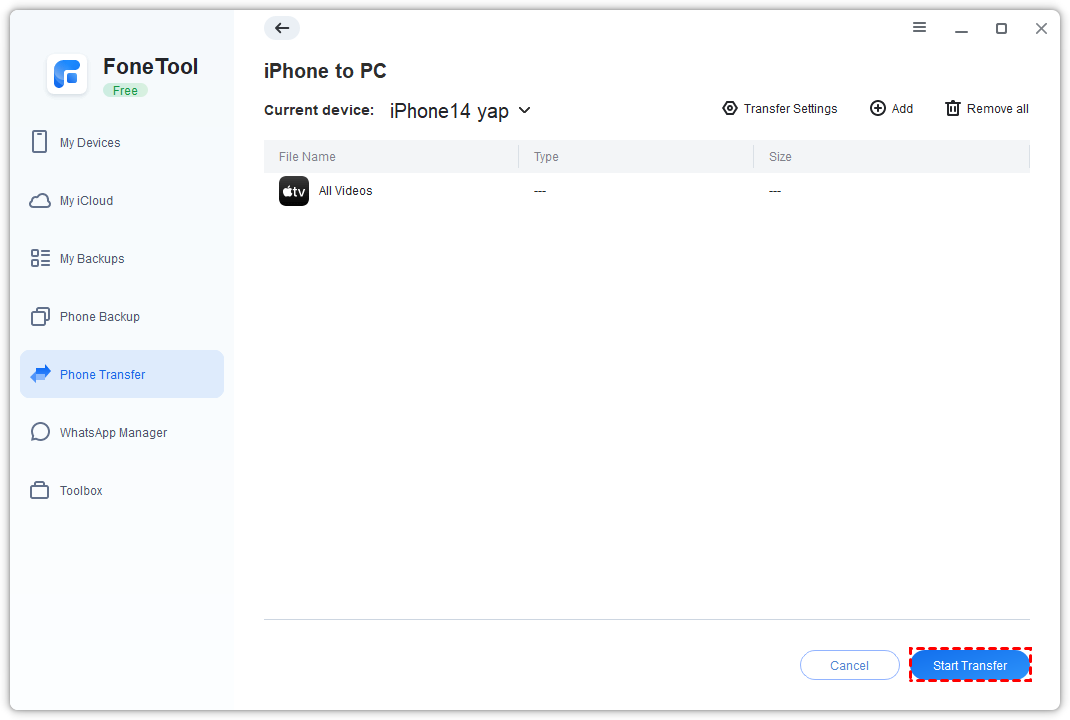
Step 3. Select a storage path from the Transfer Settings and click Start Transfer to begin the task.
2. How to save iMovie on iPhone to PC with File Explorer
Except for third-party software, Windows also offers a built-in program named File Explorer to help users access their iPhone videos and photos. You can also rely on this way to transfer your iMovie files, although its transfer speed is much slower than FoneTool.
⚠️ Notes:
· You can only move iMovie videos stored in the DCIM folder via this way, while FoneTool mentioned in Method 1 allows you to get all your iPhone videos saved in different folders.
· All your iMovie videos are stored in different subfolders under the DCIM folder based on their timestamps. So you need to search them and choose to transfer them one by one, while FoneTool allows you to preview and transfer all videos at one time.
Step 1. Connect your iPhone to the PC via a reliable USB cable > Then the File Explorer should auto-launch or you can tap the Start Menu to launch it manually.
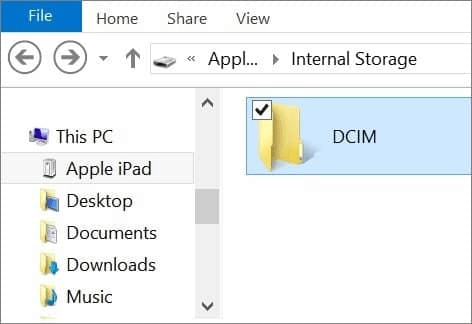
Step 2. Go to This PC and you can see your iPhone is listed here as a Portable Device. Click it to continue > Go to the Internal Storage folder > Drag and drop the iMovie videos from iPhone to computer.
3. How to add iMovie videos from iPhone to PC wirelessly - iCloud
In addition to wired methods, you can opt for wireless cloud services to handle your transfers. Apple’s iCloud—an official cloud service—is a strong choice, providing each user with 5GB of free storage. Simply upload your videos to iCloud and download them later on your PC via iCloud client.
Step 1. Go to Settings on iPhone > Choose Photos > Enable the iCloud Photos option.
Step 2. After all videos are uploaded, now you can download and install iCloud for Windows on your computer and log in with your iCloud account.
Step 3. Click Options > Choose iCloud Photo Library. Then other two options (Download new photos and videos to my PC and Upload new photos and videos from my PC) will be checked automatically.
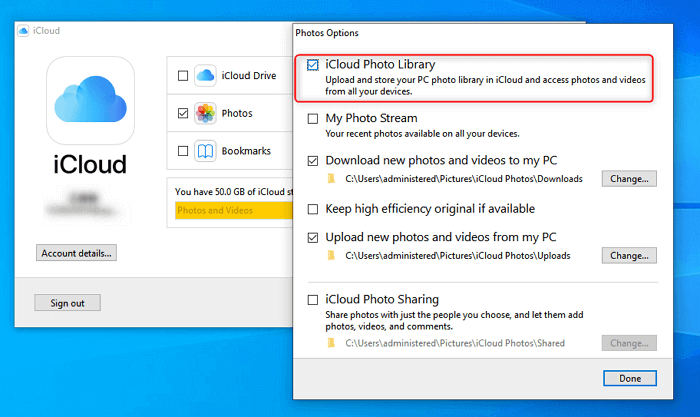
Step 4. Click Done > Apply. Once your videos are downloaded, you can go to This PC > iCloud Photos > Choose Downloads to view all the downloaded files.
4. How to move iMovie videos from iPhone to PC with Google Drive
Besides using iCloud, you can also opt for Google Drive to transfer videos. Google Drive offers 15GB of free storage per user, providing ample space to store a wide range of files.
Step 1. Download Google Drive on your iPhone > Launch the app and log in with your Google account.
Step 2. Choose the + icon > Tap Upload > Find and tap the targeted iMovie videos to upload > Follow the on-screen guidance to begin the task.
Step 3. Visit the Google Drive website from your Windows PC > Sign in with the same account > Choose the data you need to download to your computer.

FAQs on how to transfer iMovie project from iPhone to PC
1. How to transfer iMovie from iPhone to Mac?
To transfer an iMovie project from your iPhone to your Mac, you can export the project from iMovie on your iPhone and then import it into iMovie on your Mac.
Open the iMovie app on your iPhone > Select the project > Tap the Share button > Tap Export Project and tap AirDrop and select your Mac from the list to finish the transfer.
2. How to convert iMovie to MP4 on iPhone?
To export an iMovie project as an MP4 file on your iPhone, you need to open iMovie > Select your project > Tap the Share button > Choose Export File, and select the desired quality (not "Best" for MP4) before saving.
Conclusion
How to transfer iMovie from iPhone to PC? This guide gives you 4 ways to finish the process via a USB cable or wirelessly. To transfer a large number of videos, you can choose FoneTool mentioned in Method 1. Its powerful features and fast transfer speed will never let you down. If you prefer a wireless transfer, iCloud or Google Drive is available.
FoneTool - All-in-one iPhone Data Manager
Transfer, backup and manage data on iPhone, iPad and iPod touch in an easy way.
-
 iOS 27 Compatible
 iPhone 17 Supported
Windows 11/10/8/8.1/7
100% Secure

Kathy is an editor of FoneTool, who prefers to help more users address a series of iOS-related problems. She likes traveling and being close to nature makes her relax. She is also keen to engage in social activities and spend much free time with her friends.
Read author info >>