Transfer Files from iPhone to PC | 4 Easy & Fast Ways
Need to move photos, videos, or documents from your iPhone to a Windows PC? This definitive guide explains 4 reliable methods. Get step-by-step instructions and fix common issues.
Moving photos, videos, and documents from your iPhone to a Windows PC is a common task, but it can feel clunky. Whether you're backing up memories, freeing up space, or needing files for work, you want a method that is fast, reliable, and gives you control.
This guide cuts through the confusion. We'll start with the most flexible solution and compare all popular methods, so you can choose the best one for your needs.
|
Method |
Best For |
File Types |
Speed |
Ease of Use |
|
🏆FoneTool |
Selective transfer & full backup |
Photos, videos, contacts, messages, etc. |
Very Fast(USB direct) |
Very Easy |
|
📂File Explorer |
Quick photo/video dump |
Photos & videos only |
Fast (USB direct) |
Simple |
|
🌐iCloud Drive |
Wireless sync & access |
Files in iCloud Drive/Photos |
Depends on internet |
Moderate |
|
💻iTunes/Finder |
Creating a full backup |
Entire device (as one file) |
Slow (full backup) |
Complex |
Method 1.Transfer iPhone Files to PC with FoneTool (Fast & Selective)
For users who want the ultimate combination of speed, simplicity, and selective control, dedicated software is the best solution. FoneTool is a powerful iPhone data manager that transforms file transfer from a chore into a quick, intuitive process.
- Experience lightning-fast transfers over a direct USB connection.
- Manage your files with an intuitive, point-and-click interface.
- Select specific files or back up your entire device with ease.
- Access and transfer photos, videos, messages, contacts, and app data.
- Your data stays private with 100% local and secure transfers.
100% Secure
Step 1.Get FoneTool and install it on your Windows PC. Connect your iPhone using a USB cable, tap "Trust" on your iPhone when prompted.
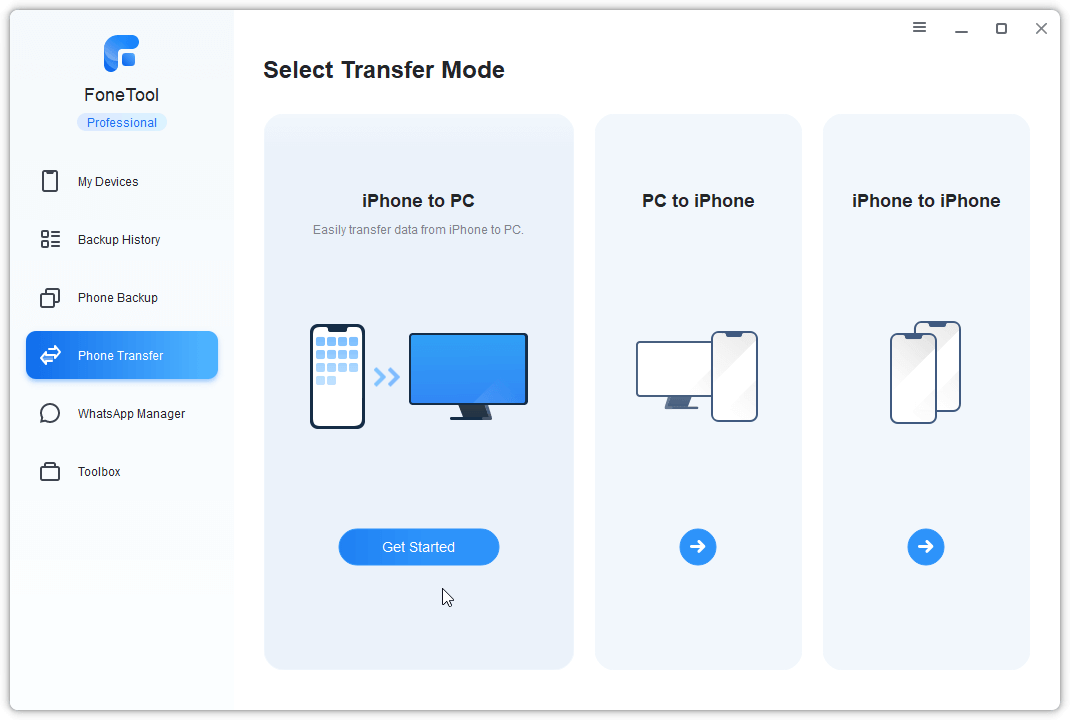
Step 2. Launch FoneTool, in the main interface, choose "Phone Transfer" and then "iPhone to PC".
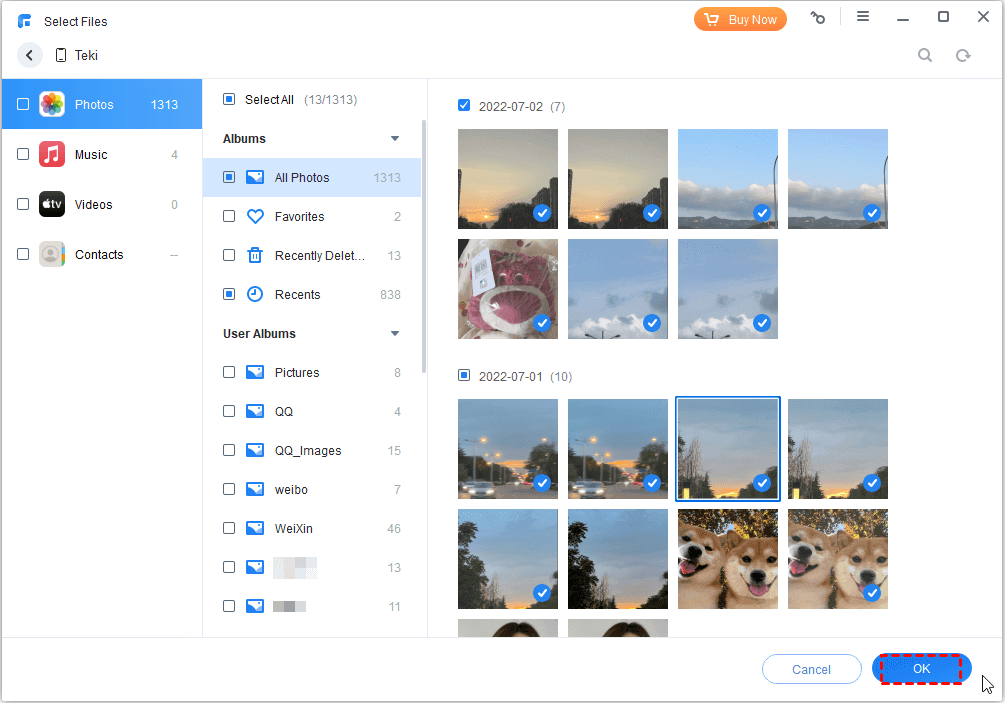
Step 3. You can browse file categories (Photos, Music, etc.) and check the specific items you want.
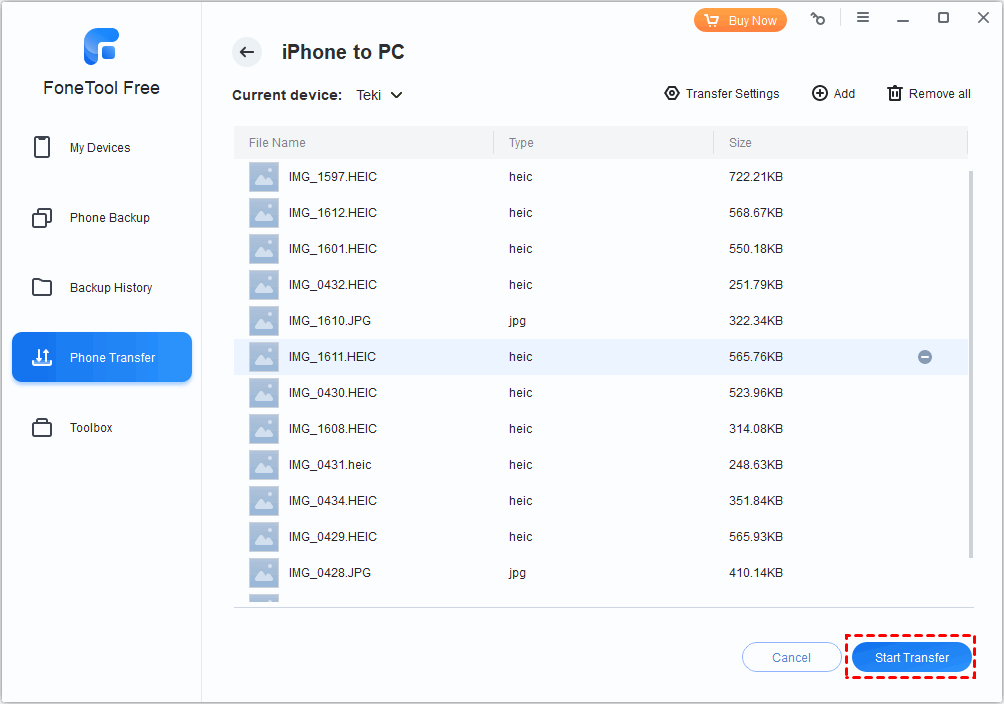
Step 4. Choose a destination folder on your PC and click "Start Transfer". Your selected files will copy over quickly and safely.
Method 2. Move iPhoen Data with File Explorer (Only Photos & Videos)
The built-in File Explorer can access your iPhone like a digital camera, useful for simple media transfers.
Step 1. Connect your iPhone to your PC with a USB cable. Unlock it and tap "Trust This Computer" if asked.
Step 2. Open File Explorer (press Windows key + E) and find your iPhone under "This PC".
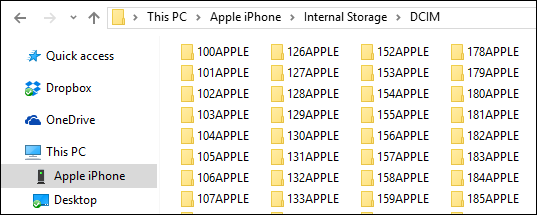
Step 3. Double-click to open it, then navigate to Internal Storage > DCIM. This folder contains your camera photos and videos.
Step 4. Select the files or folders, copy them (Ctrl + C), and paste (Ctrl + V) to any location on your PC.
Method 3. Sync Files from iPhone to PC Wirelessly via iCloud
iCloud offers a hands-off, wireless way to sync files between your Apple devices and PC.
Step 1. On iPhone: Ensure your files are in iCloud. For documents, save them to iCloud Drive in the Files app. For photos, enable iCloud Photos in Settings > [Your Name] > iCloud.

Step 2. On PC: Download and install iCloud for Windows from Apple. Open it and sign in with your Apple ID.
Step 3. Check the boxes for iCloud Drive and iCloud Photos. Click Apply.
Step 4. Access Files: Your synced files will appear in new iCloud Drive and iCloud Photos folders within your PC's File Explorer.
- ★Important:
- This requires a good internet connection and uses your iCloud storage space (5GB free). Initial sync of a large photo library can take a long time.
Method 4. Create a Full iPhone Backup to PC with iTunes
Use iTunes (Windows) or Finder (Mac) to create a complete, encrypted backup of your entire iPhone—useful for disaster recovery.
Step 1. Connect your iPhone and open iTunes (on Windows) or Finder (on a Mac with macOS Catalina or later).
Step 2. Click the device icon that appears.
Step 3. Under the Summary tab, find the Backups section.
Step 4. Select "This computer" and click "Back Up Now." You can check "Encrypt local backup" to include passwords and Health data.
FAQs on iPhone to PC Files Transfer
Final Words
Transferring files from your iPhone to a PC is straightforward once you select the appropriate tool for your needs. Use File Explorer for a quick photo offload, iCloud for seamless wireless document access, or iTunes for a comprehensive system backup.
For the most efficient and user-friendly experience- combining high-speed transfers, selective file control, and support for all data types- a dedicated manager like FoneTool is the optimal solution. It effectively addresses the core need for a simple and powerful iPhone to PC file transfer, putting you in complete control of your content.
FoneTool - All-in-one iPhone Data Manager
Transfer, backup and manage data on iPhone, iPad and iPod touch in an easy way.
-
 iOS 26 Compatible
 iPhone 17 Supported
Windows 11/10/8/8.1/7
100% Secure
Kelsey is an English editor at FoneTool, passionate about helping users solve tech issues. She specializes in iPhone data management, backup, and recovery. In her free time, she enjoys learning IT skills and spending time with loved ones.
Read author info >>