9 Easy Methods to Fix Erase iPhone Verification Failed
Looking for a comprehension guide on how to solve the Verification failed when trying to erase iPhone? Click to fix it in 9 easy methods.
I want to do a factory reset, but it always gives me a pop-up that says “Verification failed". I also can’t log out of my Apple ID. The option to do so is grayed out.
- Question from Reddit
Got an “iPhone won’t let me erase all content and settings verification failed” error when trying to erase your iPhone? This common problem can prevent factory reset due to Apple ID conflicts, network issues, or software glitches.
In this guide, learn 9 proven methods, including Apple's official methods and advanced troubleshooting, to quickly and safely fix errors.
Why does my iPhone keep saying verification failed?
The knowledge of these reasons will help you fix the verification failure when trying to erase iPhone.
- Incorrect Apple ID or Password
The most common reason is entering the wrong Apple ID or password. Your credentials are not correct.
- Network Issues
Poor internet can prevent your iPhone from contacting Apple’s servers, leading to verification failure.
- Apple System Status Issue
Apple’s servers may have temporary bugs or downtime, causing verification issues.
- Find My Feature
If the Find My feature is enabled, the erase process will be interrupted.
- Device Glitches
Temporary software glitches on your iPhone can sometimes lead to verification failures.
9 methods to fix erase iPhone verification failed issue
Don’t worry about the “trying to erase iPhone verification failed” issue. You can easily fix the issue by the methods below one by one, and then you can erase your iPhone quickly.
#1. Fixing iPhone verification failed issue without password
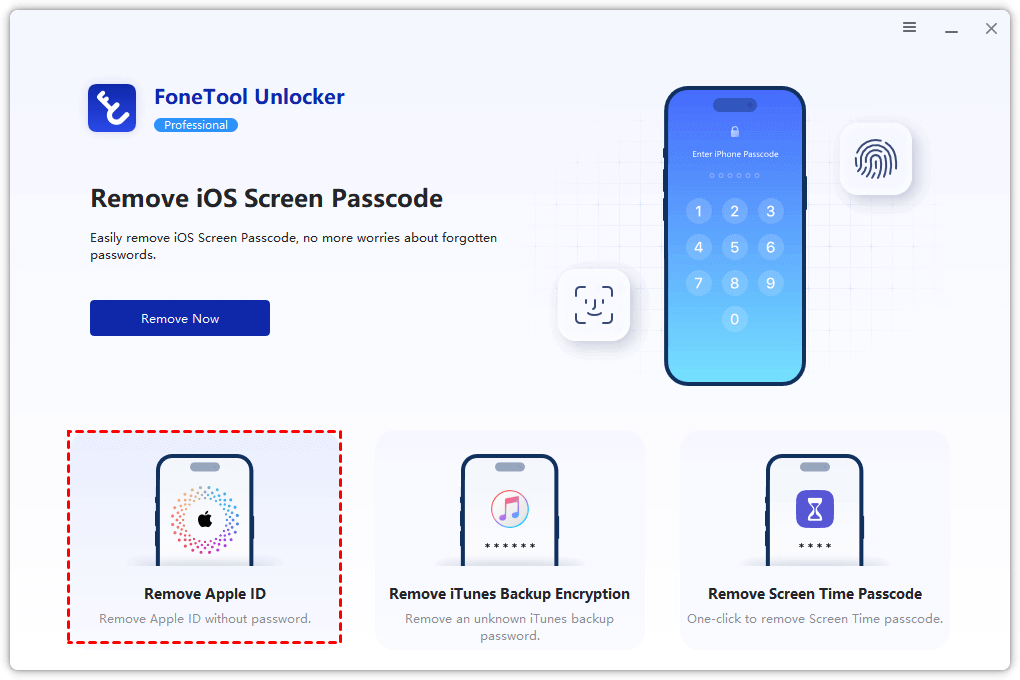
The best and easiest way is to use a powerful tool like FoneTool Unlocker under some stubborn conditions. With FoneTool Unlocker, you can easily remove your Apple ID. Then you can erase the iPhone without the need for verification and without compromising security.
- ★Highlights of FoneTool Unlocker:
-
- Remove Apple ID from iPhone, no tech knowledge is required.
- A high success rate of up to 99.99%.
- Bypass all types of passcodes with simple clicks.
- Remove the restriction on Screen Time.
- The latest iOS devices/versions are supported.
Now, free download the FoneTool Unlocker and follow the steps to bypass Apple ID verification safely.
Step 1. Launch FoneTool Unlocker on your computer > Turn off the Find My feature on your iPhone.
Step 2. Connect your iPhone to computer with a USB cable > Go to the Remove Apple ID option.
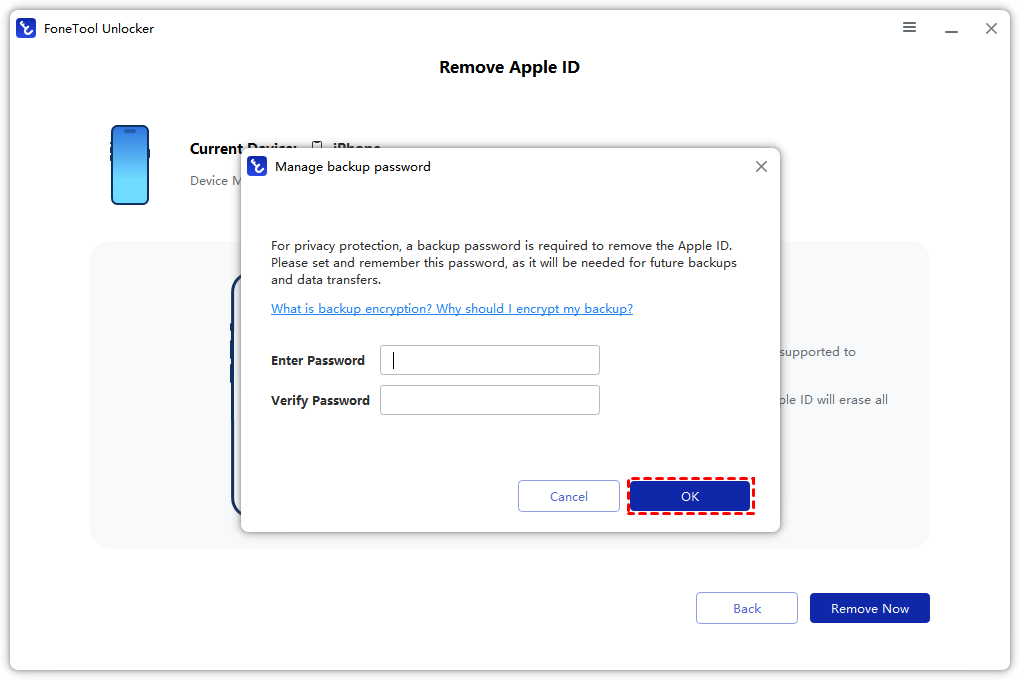
Step 3. Read the on-screen instructions > Set a backup password and remember it > Click OK.
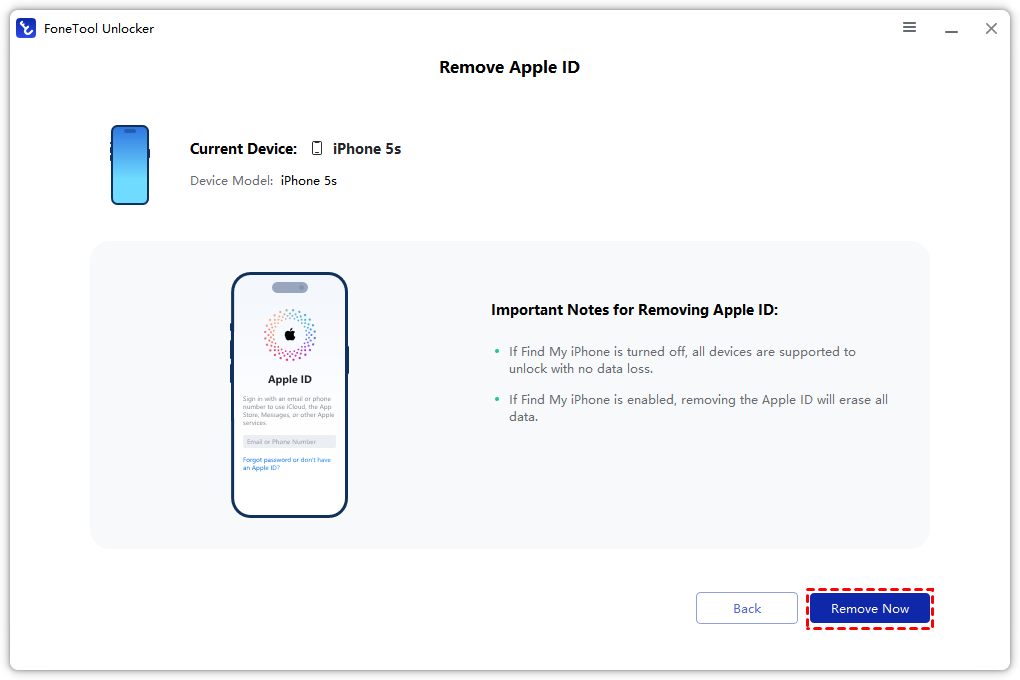
Step 4. Click Remove Now to remove the Apple ID.
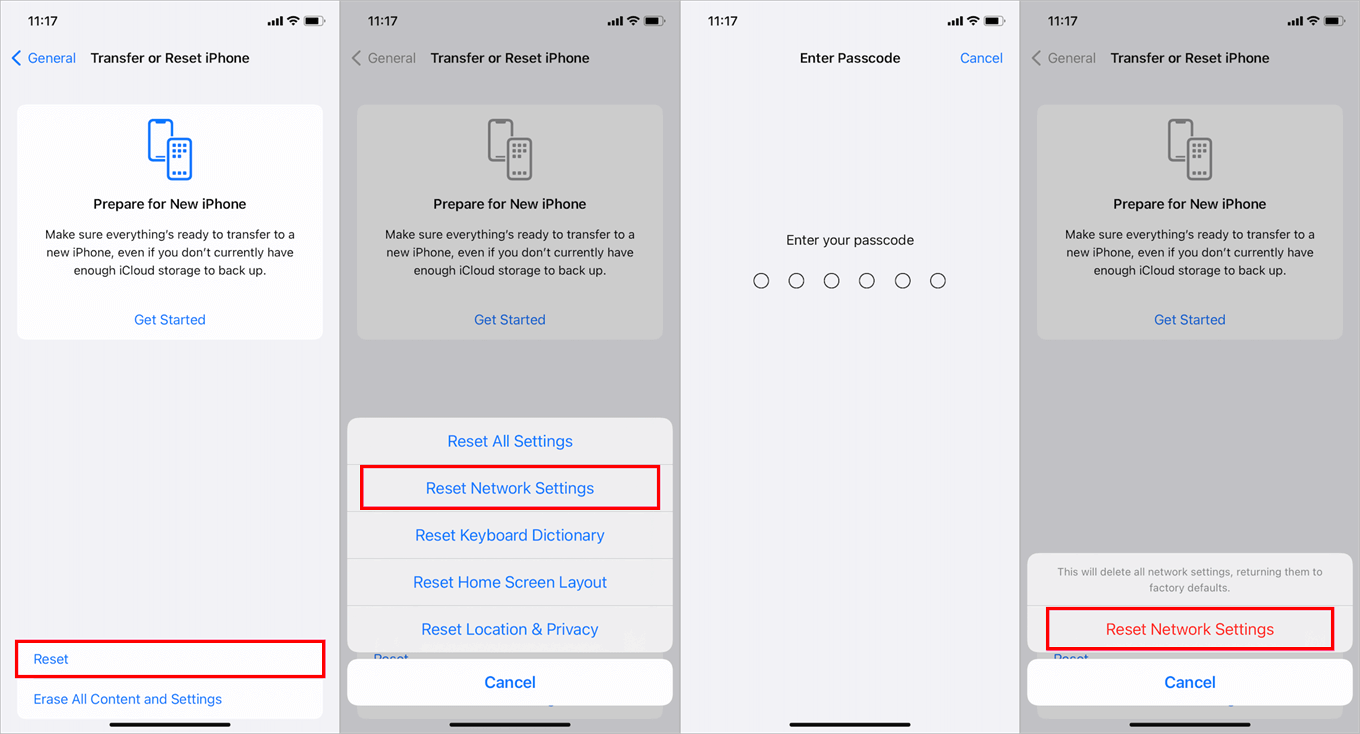
#2. Check internet connection & Reset network settings
Poor internet can prevent your devices from connecting to the server, too. So you can check your internet first and then reset your network settings to fix the issue.
Step 1. Go to Settings on your iPhone > General.
Step 2. Choose Transfer or Reset iPhone > Click Reset.
Step 3. Choose Reset Network Settings and enter your passcode when prompted.
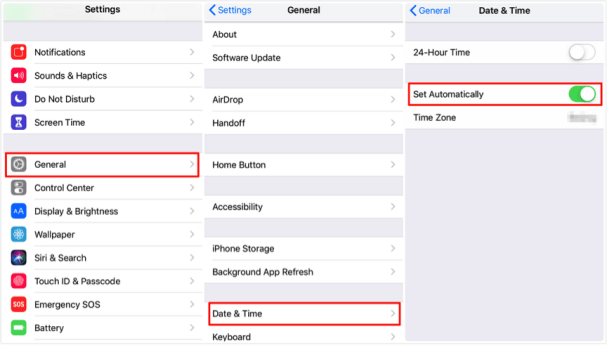
#3. Correct Date & Time Settings
The date and time should accurately match when you try to keep your iPhone synced with iCloud. If not, the Apple ID Verification will fail.
Step 1. Go to Settings on your iPhone > General.
Step 2. Tap Date & Time.
Step 3. Turn on Set Automatically to make sure the data, time, and time zone are correct.
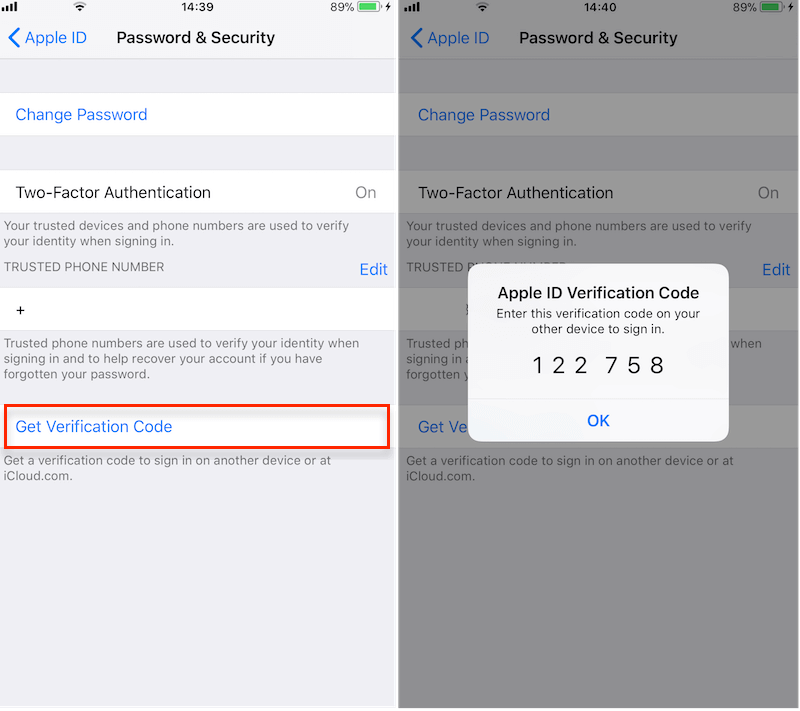
#4. Get a new Verification Code
There may be a security issue if you find that you get a notification that verification failed. You can get the new verification through the following steps.
Step 1. Go to Settings on your iPhone > User’s name.
Step 2. Choose Sign-In & Security.
Step 3. Tap on Get Verification Code and use the code to fix the Apple ID Verification error.
#5. Sign out of Apple ID
According to the reasons above, you may enter the wrong Apple ID or password. Your credentials are not correct, so you cannot erase your iPhone directly. You can sign out of the Apple ID first, then you may erase the iPhone.
Step 1. Go to Settings and then tap on General.
Step 2. Tap your Apple ID name > Scroll down and tap on Sign Out.
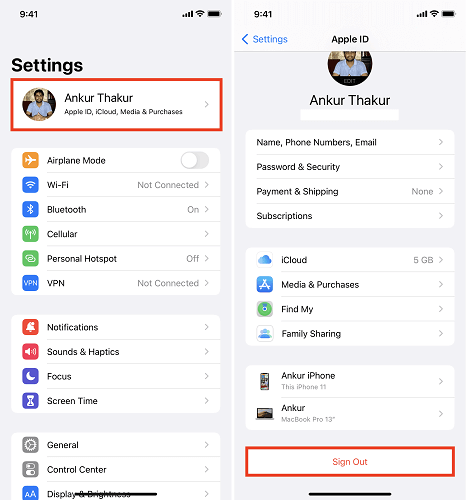
Step 3. Enter your current password to turn off Find My > Tap on Turn Off.
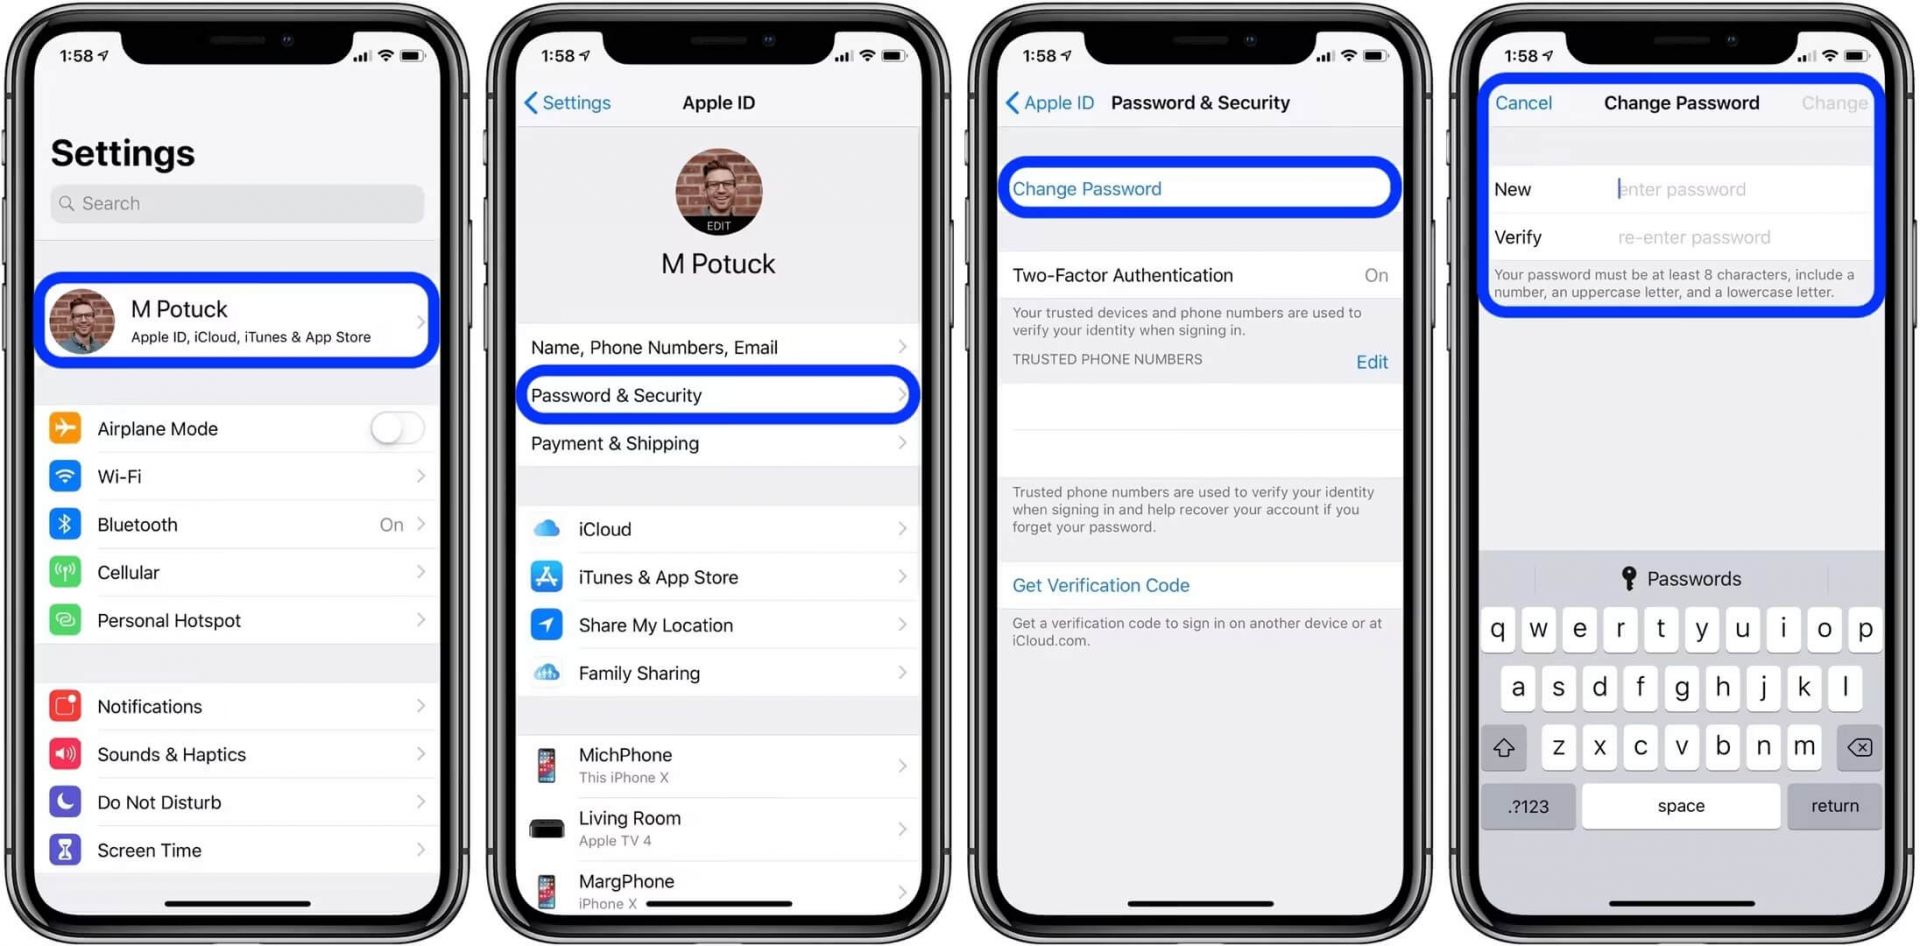
#6. Change Apple ID password
Changing your Apple ID password could check whether it is correct. You can change your Apple ID password when it is wrong.
Step 1. Go to Settings on your iPhone and tap on your Apple ID name.
Step 2. Tap on Passcode & Security and then Change Password.
Step 3. Follow the on-screen instructions to reset your Apple ID password.
#7. Turn off Find My
The Find My feature can sometimes interfere with the erase process.
Step 1. Go to Settings on your iPhone and Tap on the User’s name.
Step 2. Choose Find My > Find My iPhone.
Step 3. Toggle off the Find My iPhone > Enter your current password when prompted.

Then you can try to erase the content again.
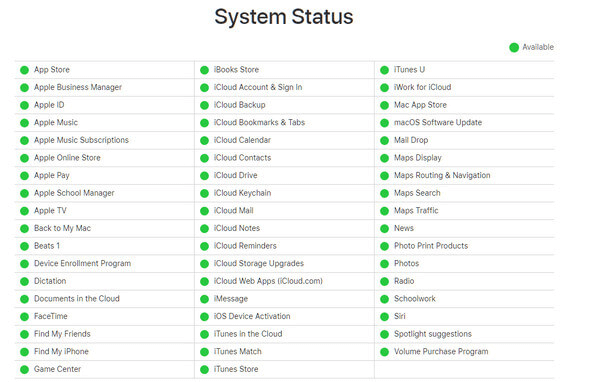
#8. Check System Status page for Apple
It’s possible that your device can’t connect to the server when erasing iPhone. Then you will meet Verification Failed. Please check the Apple ID status from Apple’s System Status page. Look for a green circle to see if there are any software update issues or notifications.
#9. Restart or force restart the iPhone
A simple restart can solve temporary software glitches that might cause verification failure. You can restart your iPhone as usual or go to Settings > General > Shut Down to restart your iPhone.
Or you can Force Restart iPhone by following the steps below if you can’t restart iPhone.
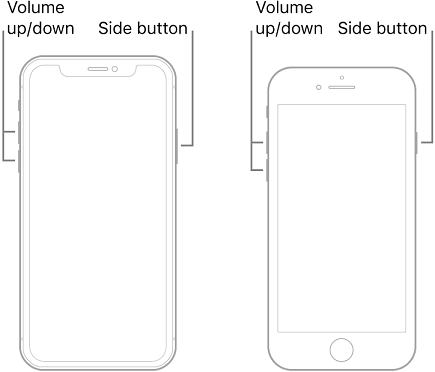
For iPhone 8 and later
Step 1. Press and release the Volume Up button > Volume Down button.
Step 2. Press and hold the Side button. Release the button until you see the Apple logo.
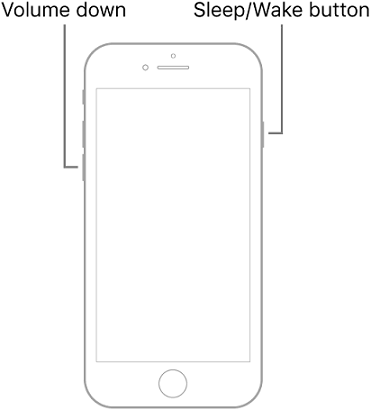
For iPhone 7 or 7 Plus
Step 1. Press and hold the Volume Down button > The Wake/Sleep button.
Step 2. Hold both buttons and release them when you see the Apple logo.
For iPhone 6 and earlier models
Step 1. Press and hold the Home button and the Wake/Sleep button.
Step 2. Hold both buttons and release them when you see the Apple logo.

FAQs on iPhone verification
Conclusion
When “iPhone won't let me erase all content and settings verification failed” happens, this comprehensive guide can help you know the reasons and how to fix the issues. If you can’t solve the issue by the methods in this guide, you can try FoneTool Unlocker to help you easily and safely remove your Apple ID.
FoneTool Unlocker - 1-Click iPhone Unlock Software
Easily unlock all passcodes and restrictions on your iPhone, iPad, and iPod Touch.
-
 iOS 27 Compatible
 iPhone 17 Supported
100% Secure

Scarlett is an editor of FoneTool, with years of experience in the field of mobile data backup, transfer, recovery, and data management in solving iOS-related issues. She hopes her writing can help people out of their current problems.
Read author info >>