How to Transfer Photos from PC to iPad Without iTunes
When you need to edit, view or share photos stored on PC from your iPad, how can you do to copy them from computer to your device? Get useful tools in this passage to make it efficiently!
When you get useful pictures from the internet on your PC, or after you edit some photos as you like, you may need to move them from your computer to your iPad to share, view, or save as a backup.
As the official iOS data synchronization software, most users are probably accustomed to using iTunes for data transfer. However, during use, unknown issues may frequently cause transfer failures. Additionally, the complex and illogical user interface can also be frustrating for many users.
Therefore, you might need an alternative software to replace iTunes for data transfer. How to put Photos on iPad from computer without iTunes? Find ways in this latest guide!
1. How to transfer photos from PC to iPad without iTunes [Free & Fast]
When you have a large number of full-resolution photos need to be sent, a wired connection will be more reliable and fast. Then a powerful iPad/iPhone data transfer tool named FoneTool might be your best choice!
Professional & Safe iPad Data Transfer Software
- Directly transfer unlimited photos to iPad without data loss.
- Preview and choose all the pictures you need from a computer.
- 100 high-quality images can be moved within seconds.
- USB connections ensure all processes are safe & stable.
- Unlike iTunes, it doesn’t overwrite any data on your device.
- Supports all iPad/iPhone models (iPad 10/iPad Air 6/iPhone 16).
Windows 11/10/8/8.1/7
100% Secure
Now just click the download button to get FoneTool to efficiently transfer files from PC to iPad via USB, including photos, videos, music, ringtones and contacts!
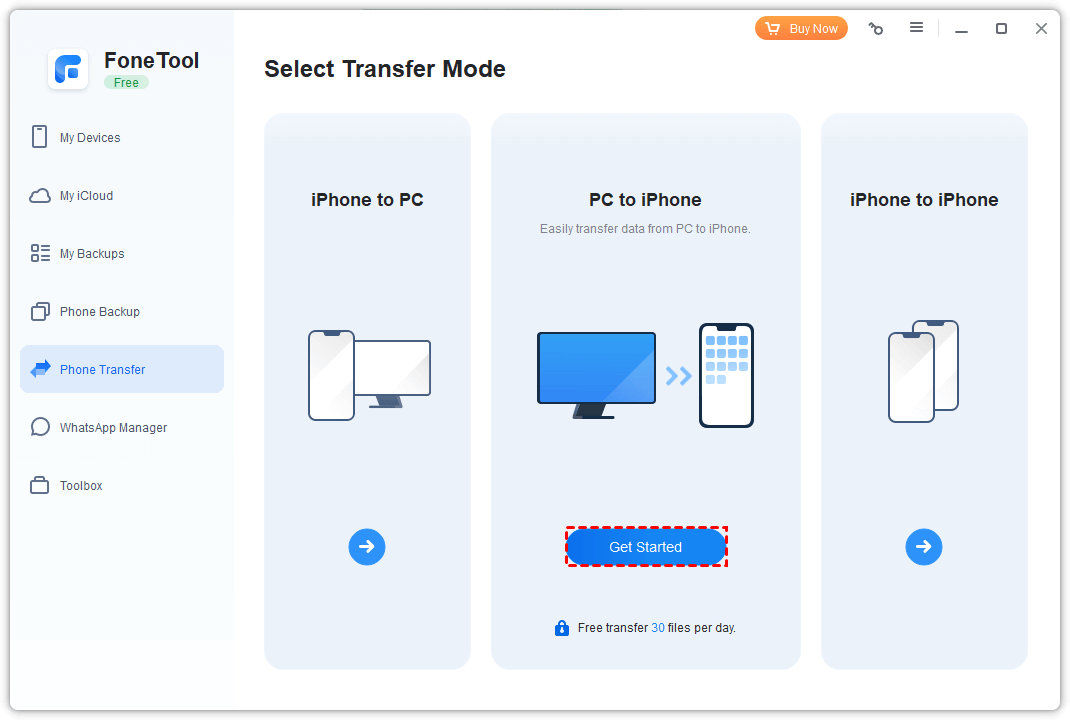
Step 1. Connect your device to the computer with a USB cable > Tap Trust on iPad to continue if asked > Launch FoneTool and go to Phone Transfer > Choose PC to iPhone and click Get Started.
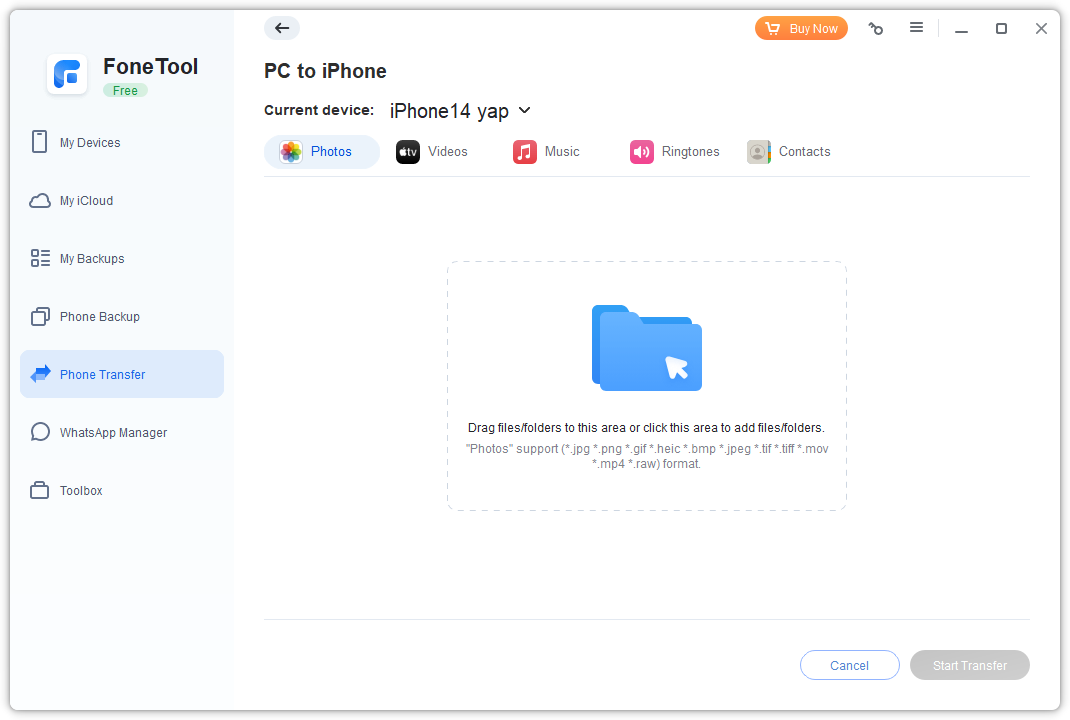
Step 2. Click the box as prompted to add photos/videos as you like or drag the files and drop them into it to select them.
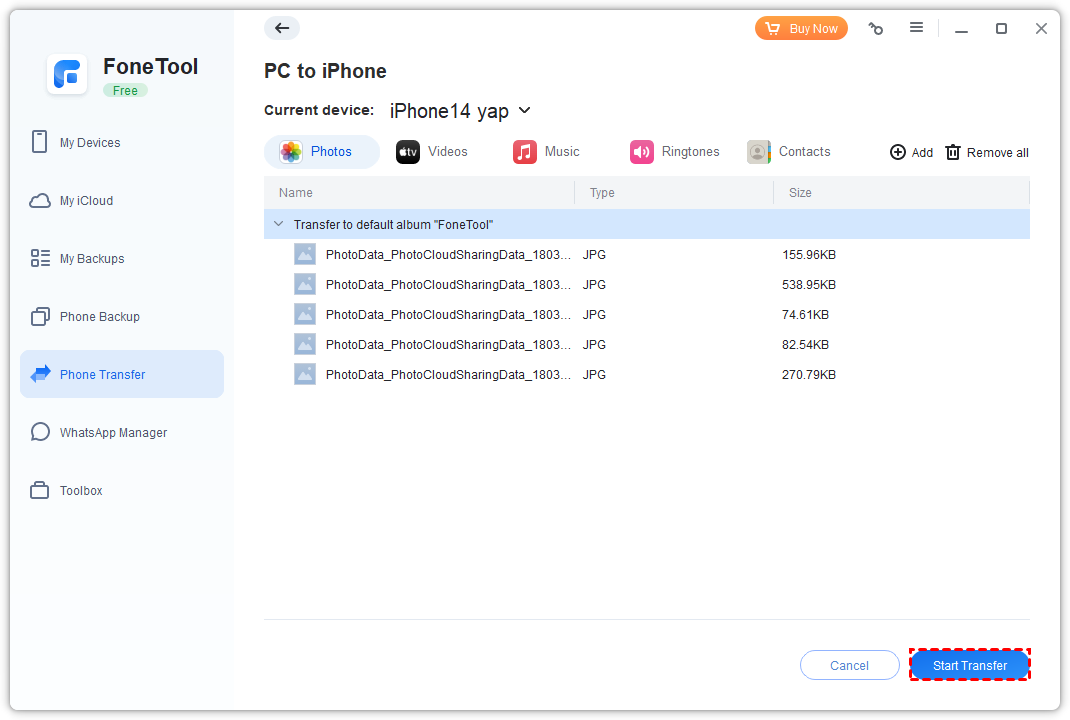
Step 3. Confirm all the data you need and click the Start Transfer button to begin this iPad file transfer without iTunes.
You can also go to Phone Transfer > Choose iPhone to PC to transfer your iPad photos to Windows PC.
2. How to transfer photos from computer to iPad with Windows File Explorer
If you don’t want to rely on any third-party software, then Windows File Explorer might be another available wired choice. It allows you to add photos/videos on PC to your iPad DCIM folder.
Step 1. Connect your iPad to the computer > Tap Trust on iPad if asked.
Step 2. Go to This PC from your PC > Find your device named XX iPad > Click Internal Storage and go to DCIM to view your iPad data.
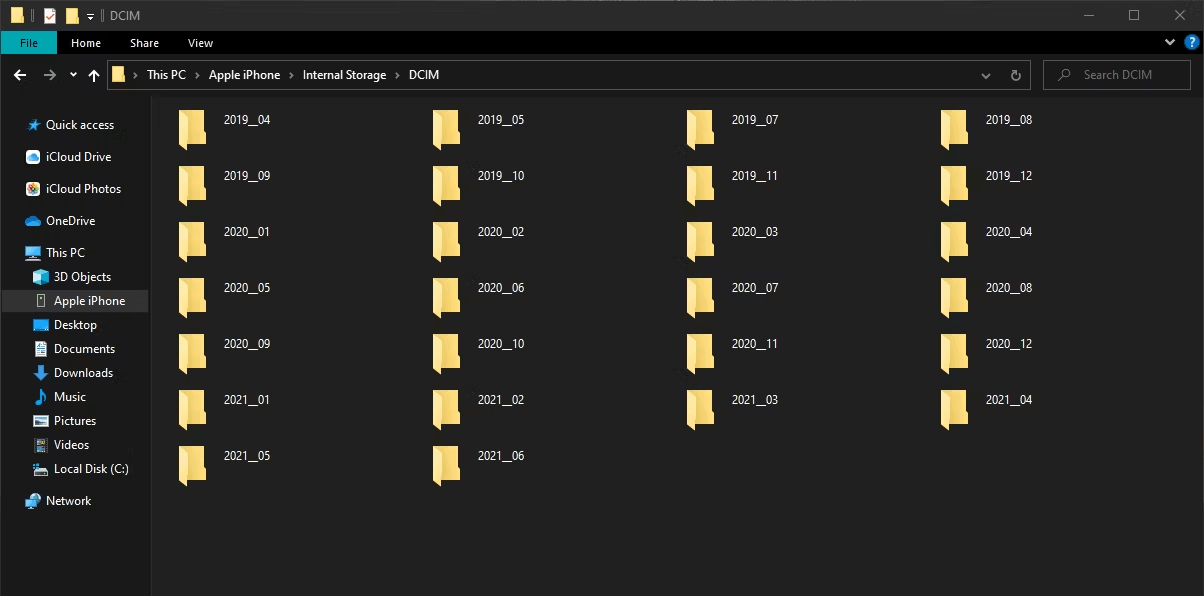
Step 3. Choose a folder on your iPad or create a new one to save the photos you need > Select the data you need from PC > Drag and drop them into the designated folder.
Once all pictures are moved successfully, you go to the Photos app on your iPad to check them.
3. How to copy photos from PC to iPad with iCloud
Except for a wired connection, you can also use a wireless way like iCloud to make it, especially when you just want to move a few photos. You need to upload photos from PC to iCloud, then download them to your iPad.
Here we give you 2 options to upload photos from PC, for a large number file transfer, you can use a professional iCloud manager mentioned in Option 2.
Part 1. How to upload photos to iCloud with iCloud web
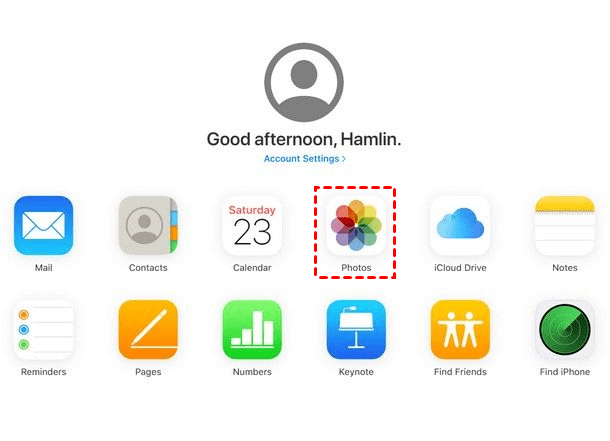
Just go to https://www.icloud.com/ from your computer > Log in with your Apple ID > Click the Photos option > Click the Upload button to choose the photos you need from your PC.
Part 2. How to upload photos from computer to iCloud via professional tool
Or you can also rely on a powerful iCloud manager named FoneTool to upload files from PC to iCloud in simple steps.
- Highlights:
- · You can efficiently upload, download, or delete iCloud (Drive) data from Windows PC as you like.
- · 1,000 photos can be uploaded in just 40 minutes, far surpassing the capabilities of the official iCloud client and other similar software.
- · FoneTool uses professional SSL encryption and it will never access any information on your account.
- · Its iCloud Sync feature allows you to easily transfer photos from one iCloud account to another.
Click the button to get FoneTool on your PC and learn from the detailed steps to upload photos to iCloud.
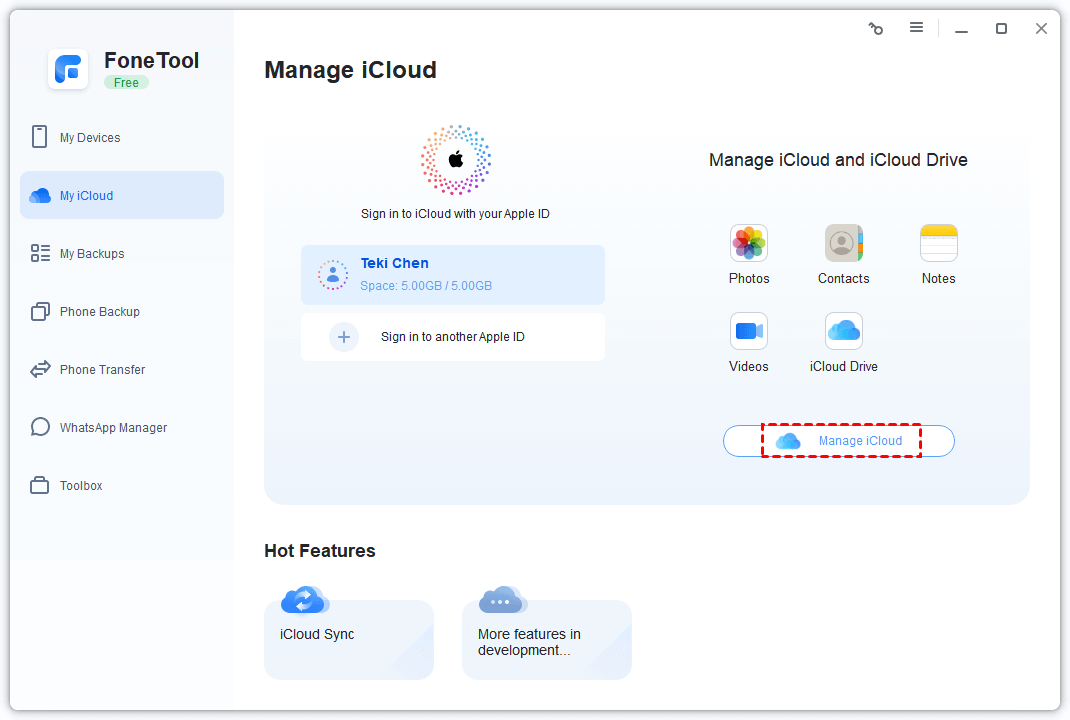
Step 1. Launch FoneTool > Go to My iCloud > Log in with your Apple ID > Choose Manage iCloud.
Step 2. Click the Photos icon > Choose Upload.
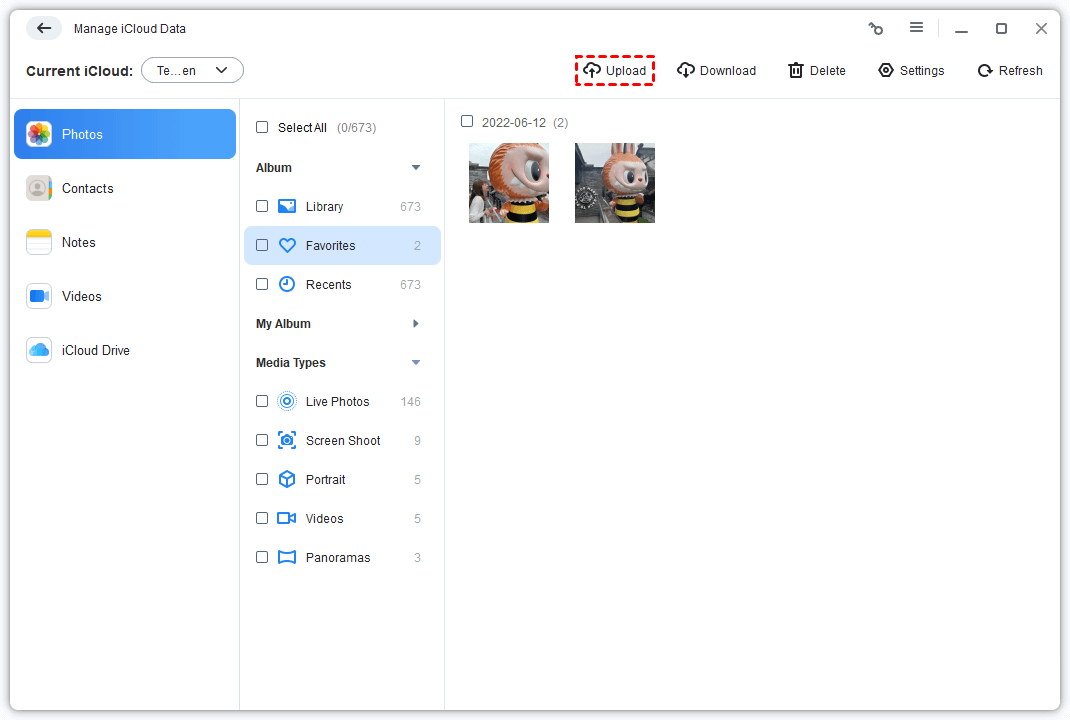
Step 3. Choose the photos you need from pop-up windows > Click Open to begin the task.

Now all photos are uploaded to your iCloud, and you can launch the Settings app on your iPad > Tap [your name] > Choose iCloud > Tap on Photos > Choose Download and Keep Originals or Optimize iPad Storage to save pictures to your device.
4. How to transfer pictures from computer to iPad without iTunes - Google Photos
In addition to iCloud, Google Photos is another wireless choice. It gives 15 GB of free storage to help you store your data.
Step 1. Just open a browser from your computer > Go to the https://photos.google.com/ website > Log in with your Google account.
Step 2. Click the Upload icon > Click Import Photos from the options > Choose the pictures you need from the pop-up window > Click Open to start the transfer.

Step 3. After all photos are uploaded, get the Google Photos app on your iPad > Sign in with the same account > Go to the Photos tab and browse your pictures > Choose the uploaded pictures to download.
5. How to get pictures from computer on iPad via email
Alternatively, you can transfer photos from your computer to your iPad by using email. Here we take sending a Gmail as an example.
Step 1. Log in to your Gmail account > Choose to compose an email from the top left corner.
Step 2. Click the Attachment or Attach files option > Choose the photos you need from the pop-up window > Click Open to confirm the choice > Click Send.
Now you can get the sent email on your iPad and download the attachments to your device.
Conclusion
Here you can know how to transfer photos from PC to iPad without iTunes. If you need to transfer lots of full-resolution photos, using a wired connection is better, then FoneTool can be your best choice. If you just want to transfer a few photos, you can use iCloud, Google Photos or sending an email to make it.
FoneTool - All-in-one iPhone Data Manager
Transfer, backup and manage data on iPhone, iPad and iPod touch in an easy way.
-
 iOS 27 Compatible
 iPhone 17 Supported
Windows 11/10/8/8.1/7
100% Secure

Kathy is an editor of FoneTool, who prefers to help more users address a series of iOS-related problems. She likes traveling and being close to nature makes her relax. She is also keen to engage in social activities and spend much free time with her friends.
Read author info >>