How to Transfer Files from iPad to PC in 5 Ways [Hot!]
How to transfer files from iPad to Windows PC via USB or wirelessly? Find methods in this passage and choose the most suitable one to make it.
After using your iPad for a while, it will likely store a large number of files related to work, study, or daily life, such as photos, videos, music, and more. Sometimes, you may need to access these files on your computer for browsing, sharing, or backup purposes. When transferring a large number of files, wired transfer can help you complete the process with ease. If you only need to transfer a small number of files, wireless options are also available. No matter which transfer method you prefer, this article will help you efficiently meet your needs.
1. How to transfer files from iPad to PC via USB [Hot & Free]
When there are lots of files that need to be moves, people may want to know: How do I export files from my iPad? Then the professional iPad/iPhone data transfer software, FoneTool might be the best answer!
Professional & Free iPad to Windows File Transfer Software
- Preview and move photos, videos, music, contacts and ringtones on iPad.
- Transfer unlimited files between iPad and PC without data loss.
- 46 GB of iPad files can be exported to PC in 39 mins (tested).
- Safe & stable USB connections ensure the process is seamless.
- Various iOS devices/versions are supported (iPad 10/Air 6/iPadOS 18).
Windows 11/10/8/8.1/7
100% Secure
Now you can download FoneTool on your PC and follow the steps to copy files from iPad to PC.
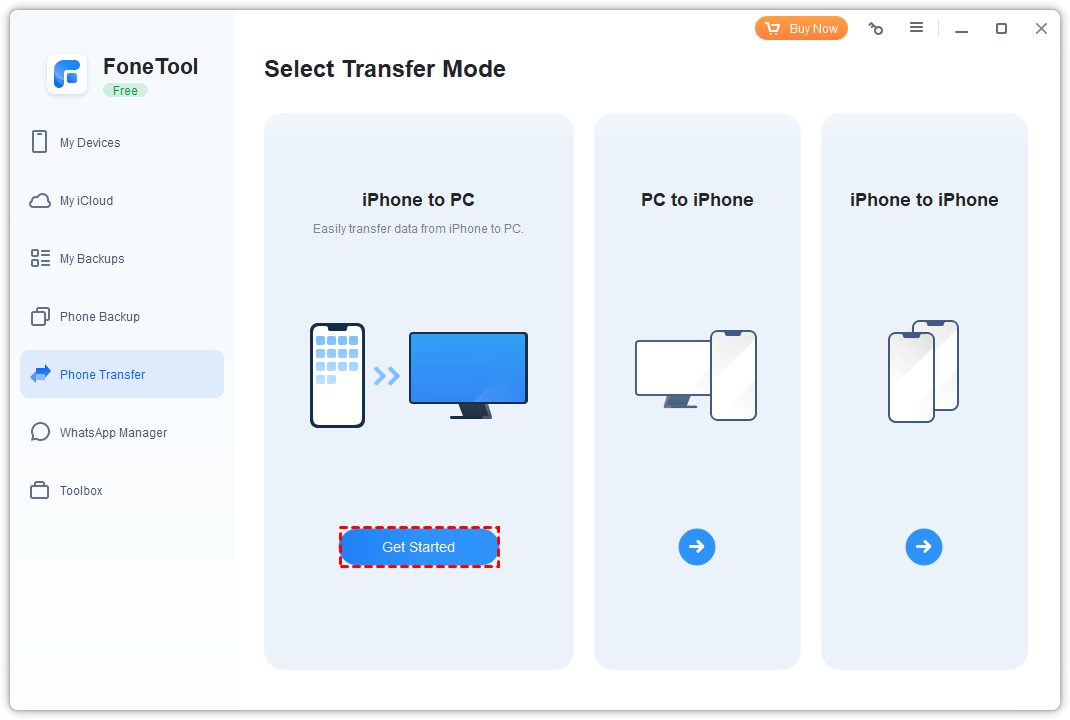
Step 1. Connect your iPad to the Windows PC with a USB cable. Launch FoneTool > Go to Phone Transfer > Choose iPhone to PC and click Get Started.
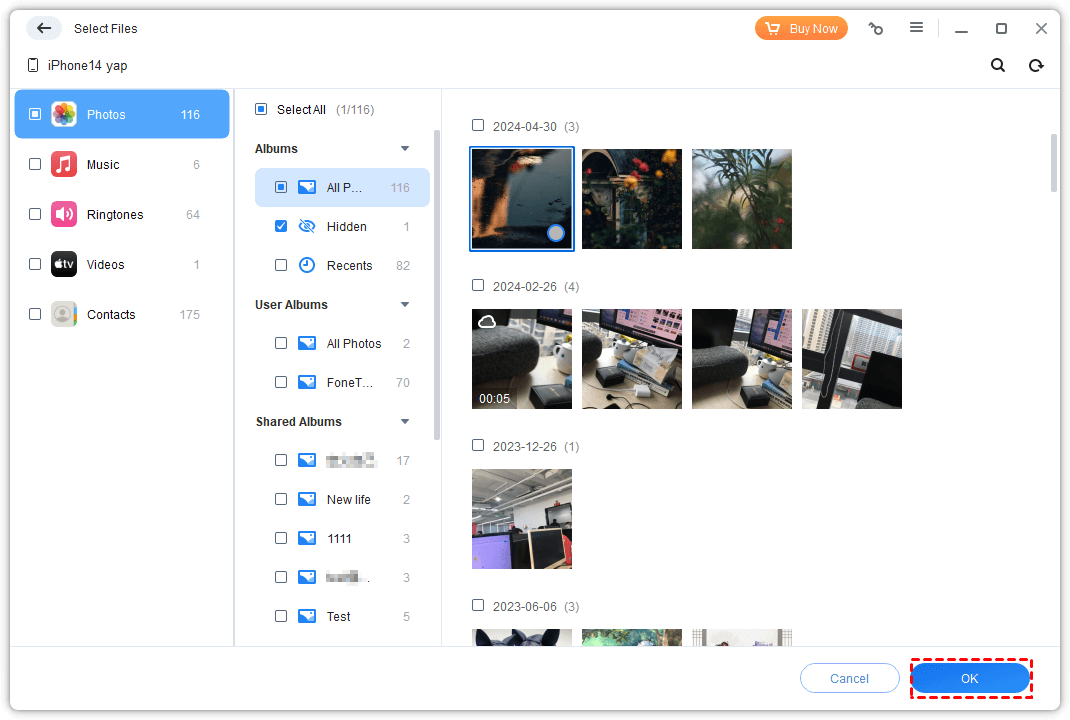
Step 2. Choose the file's icon you need > Select the data to transfer and click OK.
Step 3. Change the file storage location from the Transfer Settings to store your data on PC > Click Start Transfer to begin.

- ★Tip:
- How to transfer files from PC to iPad using USB? FoneTool can also be a useful wired way to help you transfer files from PC to iPad without iTunes (Phone Transfer > PC to iPhone).
2. How to download files from iPad to PC with iTunes
If you want to use an official tool to add iPad files to Windows PC, iTunes will be available. Before the process, confirm that you have installed the latest version of iTunes on your computer.
Step 1. Launch iTunes and connect your iPad to your PC using a USB cable. Tap Trust on iPad to authorize the connection. iTunes will detect the connected iPad, then your device will appear in the left sidebar of the iTunes screen.
Step 2. Click the iPad icon in the upper-left corner of the iTunes window, and then choose the Summary option.
Step 3. Check the This Computer option under the Backups section on the right-side panel.
Step 4. Click Back Up Now and then Apply to begin free iPad file transfer with iTunes.
3. How to transfer file from iPad to laptop/desktop with File Explorer
If you are asking for a wired way to finish the iPad to laptop file transfer and don’t want to rely on any third-party software, then Windows File Explorer can be another useful choice.
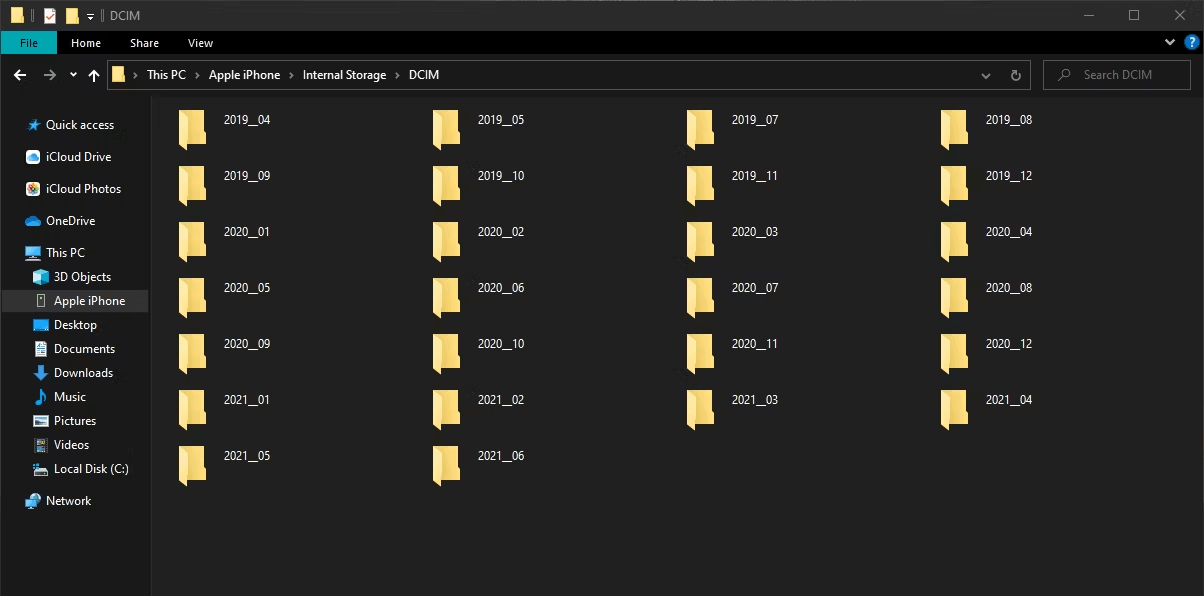
Step 1. Connect your iPad to the computer with a USB cable > Go to This PC, and now you’ll find a new device named xxx iPad.
Step 2. Double-click the device and open the Internal Storage > Go to the DCIM folder > Browse your photos and videos here and choose data the specific items you need > Drag them to your PC.
4. How to send files from iPad to Windows PC with Bluetooth
If there are only a few files that need to be moved, then using a wireless way like Bluetooth might be more convenient.
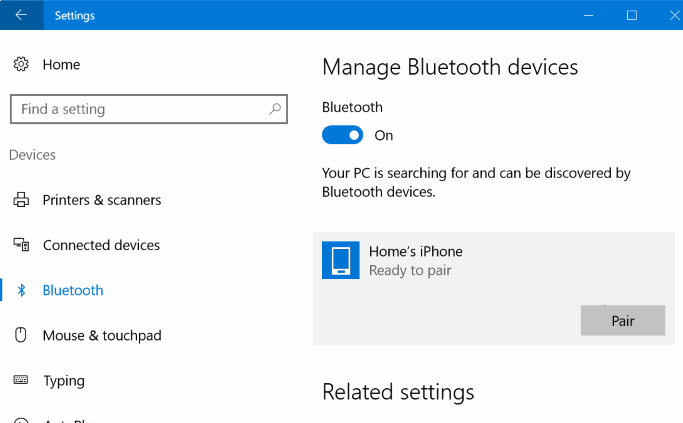
Step 1. Open the Settings or Connectivity on Windows PC, and set the Bluetooth as discoverable.
Step 2. Go to the Settings app on your iPad and achieve the same action mentioned in Step 1.
Step 3. Search for your computer in devices and click on it > Connect 2 devices by following the on-screen instructions.
Step 4. Once 2 devices are connected, go to Bluetooth file transfer and select Send files > Tap the name of the PC > Select Browse to search the files on iPad > Click on the Next or Send button to import iPad data to PC.
5. How to share files between iPad and PC with iCloud Drive
Except for Bluetooth, you can also consider using a cloud service like iCloud Drive to transfer files from iPad to computer wirelessly. Firstly, you should upload iPad files to iCloud Drive, then download them to your PC.
Part 1. How to upload files from iPad to iCloud Drive
Step 1. Go to Settings app on your iPad > Tap [your name] > iCloud > Turn on iCloud Drive.
Step 2. Open the Files app > Click On My iPad > Choose the items you need to add to iCloud Drive > Go to the iCloud Drive, and long press to paste the files to iCloud Drive.
Wait for a while and all files will be uploaded. Now you can go to iCloud Drive from your PC to save the iPad files you need.
Part 2. How to access iPad files on PC without iTunes
To access your iCloud Drive data from PC directly, you can rely on the iCloud official web.
Step 1. Go to iCloud.com from the browser > Log in with your Apple ID.
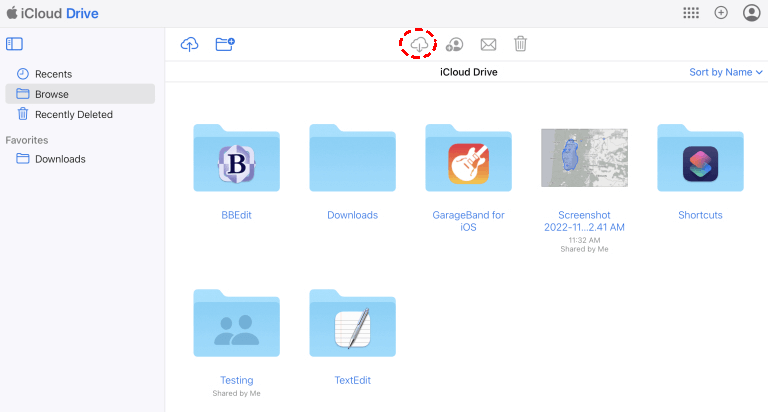
Step 2. Click the Drive icon > Click the download icon to download the files you need to your computer.
- ★Tip:
- Tip: To speed up the iCloud data download process, you can rely on the professional iCloud manager - FoneTool to access iCloud Drive from PC. Its powerful features allow you to download 1, 000 photos in 15 mins (My iCloud > Manage iCloud).
Conclusion
Here you can know how to transfer files from iPad to PC. To move lots of high-quality photos, videos or other large files, FoneTool mentioned in Method 1 might be the best way. Its fast transfer speed helps you a lot. To send a few iPad files, use Bluetooth or iCloud Drive to make it.
If this guide is useful for you, share it with more people!
FoneTool - All-in-one iPhone Data Manager
Transfer, backup and manage data on iPhone, iPad and iPod touch in an easy way.
-
 iOS 27 Compatible
 iPhone 17 Supported
Windows 11/10/8/8.1/7
100% Secure

Kathy is an editor of FoneTool, who prefers to help more users address a series of iOS-related problems. She likes traveling and being close to nature makes her relax. She is also keen to engage in social activities and spend much free time with her friends.
Read author info >>