Transfer Photos from iPhone/iPad to Flash Drive [Quickly]
This article discovers easy ways to transfer photos from iPhone to flash drive. You can find the method that suits your needs to download photos from iPhone/iPad to flash drive.
Whether you want to free up storage space on your iPhone/iPad or want to back up your photos, transferring photos from iPhone/iPad to flash drive is a safe and effective way. In this article, we will provide 5 efficient methods and steps to transfer photos. Let's take a look!
Here is a quick guide of below 5 options to download photos from iPhone to flash drive.
| Method | Suitable Situation |
|---|---|
| FoneTool | Best for fast, reliable transfers with no data loss |
| Windows Explorer | Ideal for users with a PC and who prefer a manual method |
| iCloud | Suitable for users who rely on cloud storage and syncing |
| Photos App | Great for macOS users looking for an easy drag-and-drop method |
| Image Capture | Ideal for users on a Mac who want control over file selection |
Option 1. Easiest Way to Transfer Photos from iPhone to Flash Drive
FoneTool is a professional and free iOS transfer software that supports custom settings for file saving paths. You can easily transfer iPhone data such as transferring photos, videos, music, contacts, etc. to another destination including flash drive/USB/external hard drive/Windows PC and so on. It has a simple interface and does not require any computer expertise to transfer iPhone photos to flash drive.
- ★ FoneTool combines more features in one:
- ♦ Support previewing and transferring all photos or selected photos.
- ♦ No compression required and no quality loss.
- ♦ Quickly transfer more than 100 photos from iPhone to computer in seconds.
- ♦ Safe and stable USB connection to avoid data leakage.
- ♦ Customize transfer settings to save photos to various external hard drives you need.
- ♦ Perfectly compatible with various iPhone/iPad models and iOS versions.
Now, you can download FoneTool and follow the below guide to transfer photos from iPhone to flash drive with FoneTool.
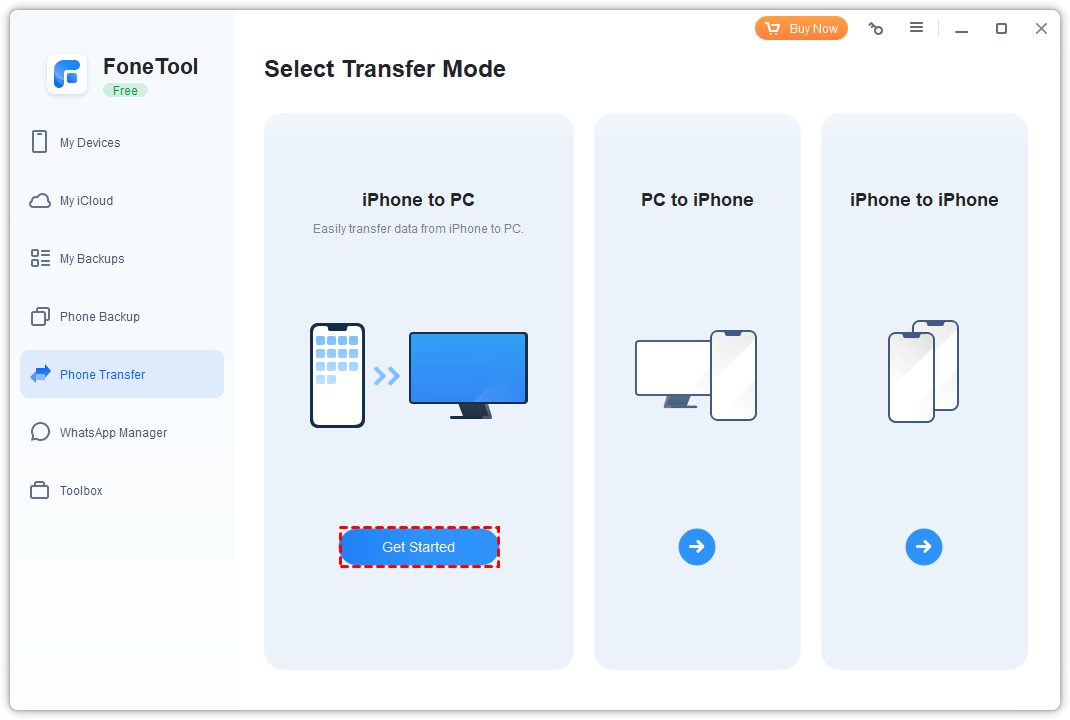
Step 1. Connect your iPhone and flash drive to your computer with USB cables > Run FoneTool and go to Phone Transfer > Choose the iPhone to PC option > Click Get Started.
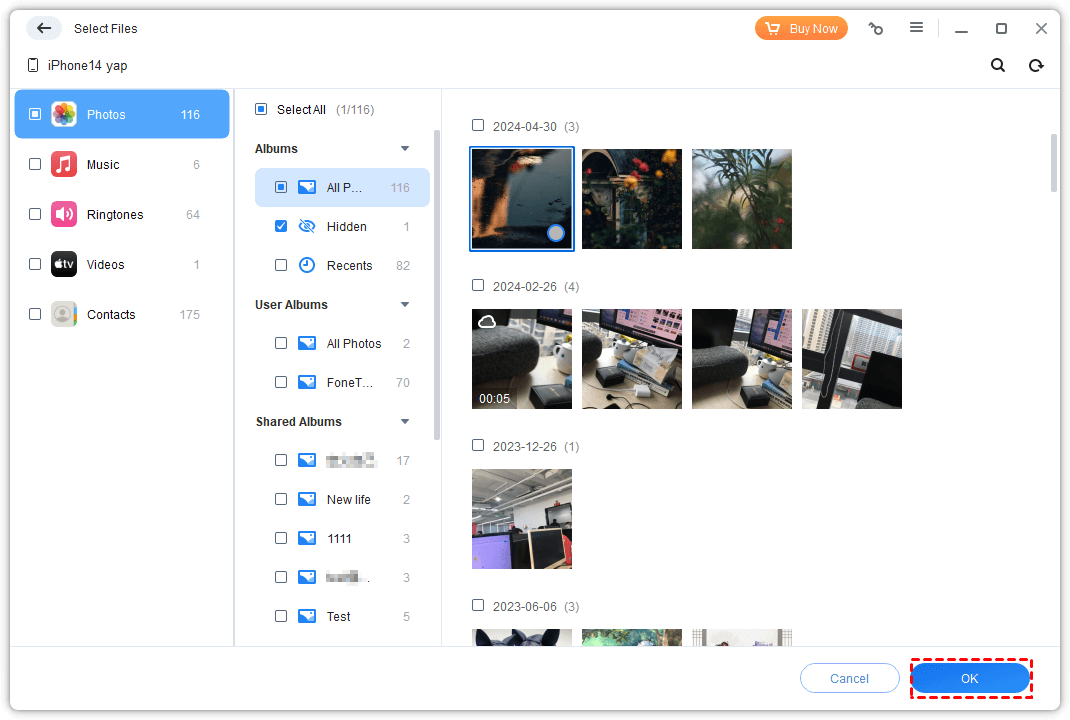
Step 2. Tap the Photos tab > Preview and choose pictures you need to connect to flash drive to transfer photos from iPhone/iPad > Click OK.
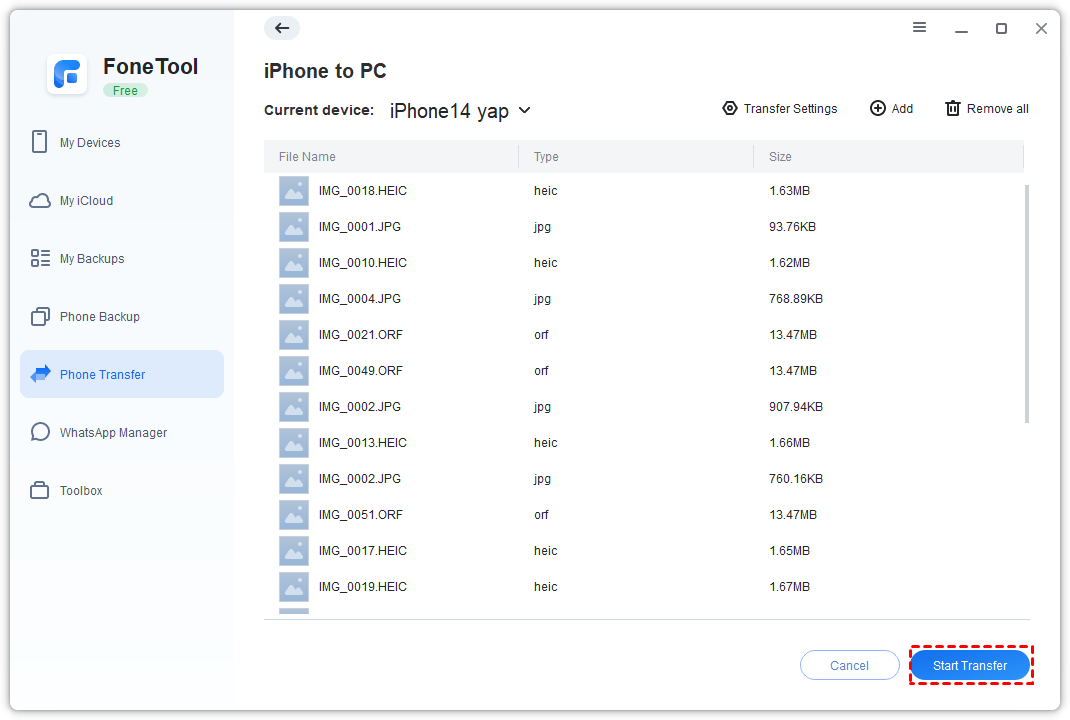
Step 3. From the Transfer Settings, set your USB drive as the destination to save photos > Then click Start Transfer to begin the task.
Option 2. Download Photos from iPhone to Flash Drive by Windows Explorer
For those who use Windows PC, Windows Explorer provides a direct way to transfer photos from iPhone to flash drive. Without using any tools, the built-in file explorer can help you transfer pictures from iPhone to flash drive.
Although this method has a slower transfer speed, if you don't mind, please check out the detailed steps below.
Step 1. Connect the iPhone and the flash drive to the computer > Click Trust on iPhone to allow the computer to access your iPhone photos.
Step 2. On your PC, moved to Computer or This PC > Here, you will see a device named xxx iPhone.
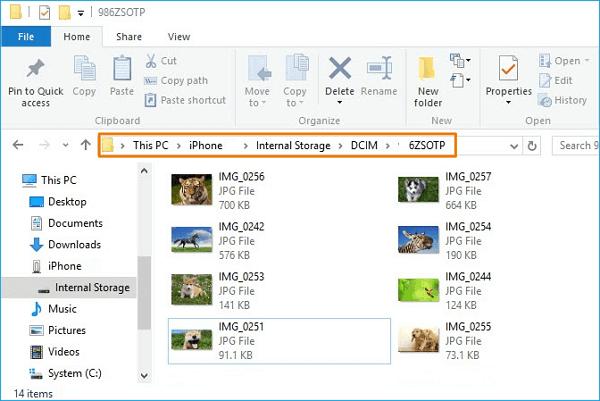
Step 3. Double-click this iPhone to open Internal Storage > Located DCIM folder > Preview your pictures and select images you want to send to the flash drive.
Step 4. Then Copy these photos and Paste to your flash drive.
Option 3. Sync Photos from iPhone to USB Drive via iCloud
Alternatively, if you prefer cloud storage or can't connect your iPhone directly to your PC, syncing photos via iCloud is a convenient method. You can then use your computer to download the photos to a flash drive.
![]() Note:
Note:
- Internet connection required
- Requires logging into the same iCloud account
- Syncing may take some time, depending on the number of photos.
Follow the guide to learn how to transfer photos from iPhone to USB.
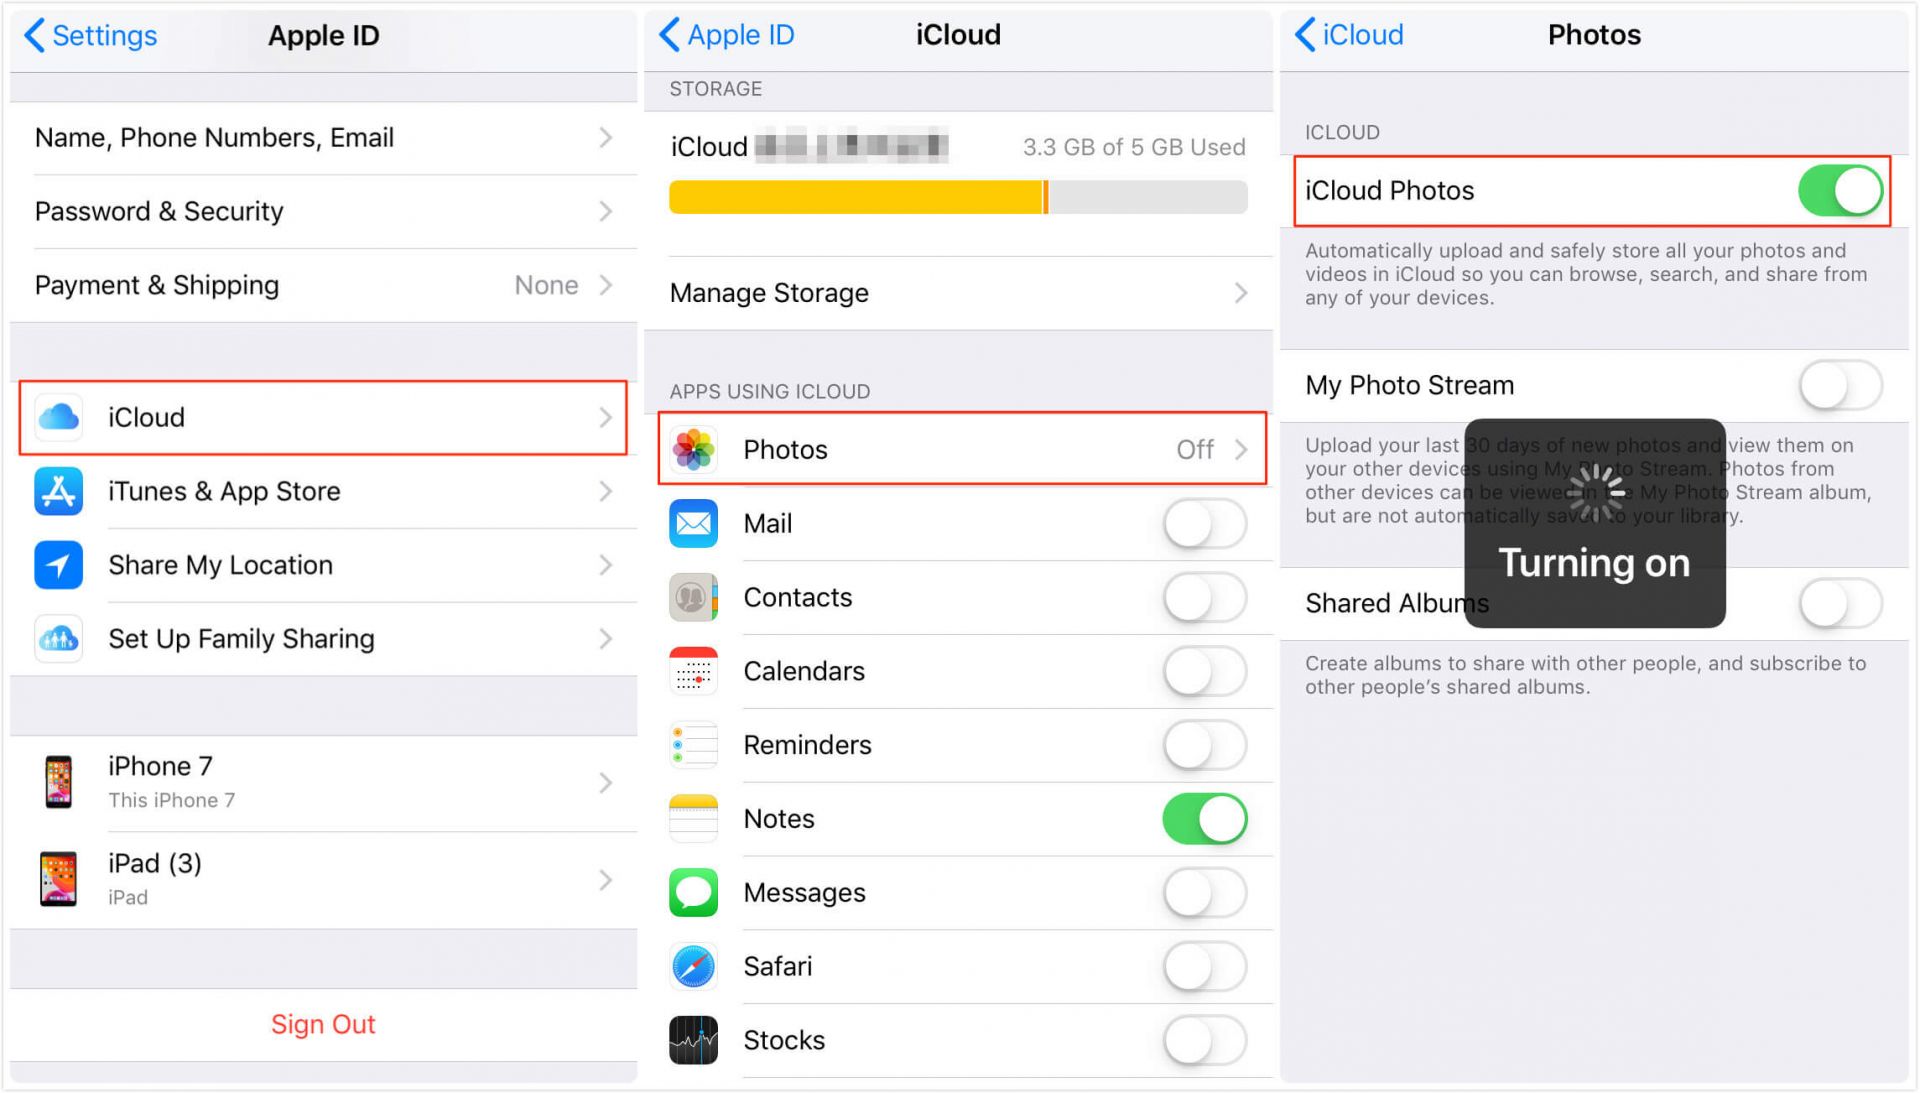
Step 1. First, you need to upload photos to iCloud. On your iPhone, open the Settings app > Click the profile > Choose iCloud > Photos > Turn on the iCloud Photos or iCloud Photo Library option.
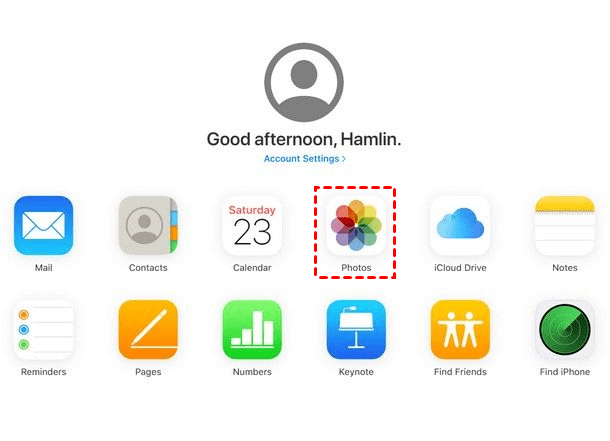
Step 2. Visit to icloud.com on your PC > Log in with your account that use on your iPhone.
Step 3. Tap the Photos icon from the page > Then you can view all uploaded iCloud photos from iPhone > Select the pictures you want to move.
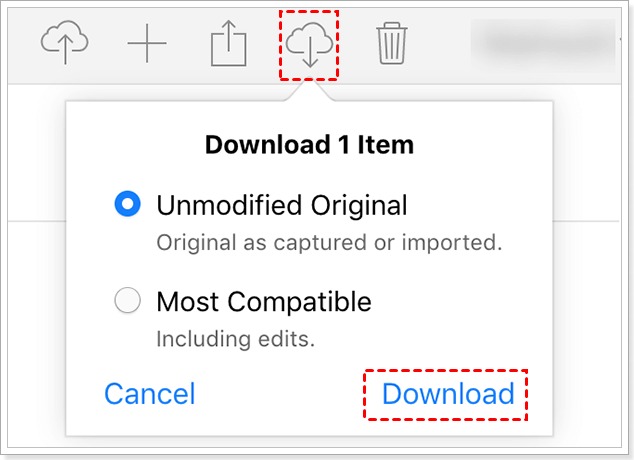
Step 4. Tap the download icon to save photos to your flash drive.
By the way, if you are not satisfied with the transfer speed of the web page, you can also use a professional iCloud manager. In addition to helping you transfer photos directly, FoneTool also provides convenient iCloud data management services. You can easily upload, download or delete iCloud data on computer.
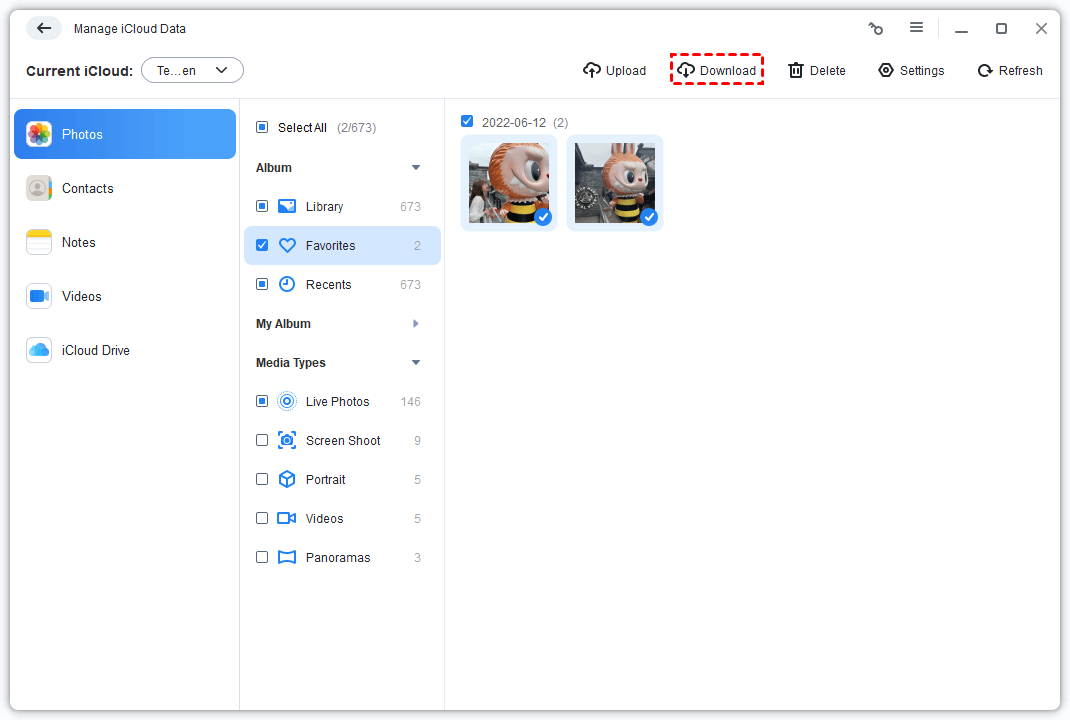
Step 1. Just open FoneTool > Navigate to My iCloud > Log in with your account > Choose Manage iCloud to continue.
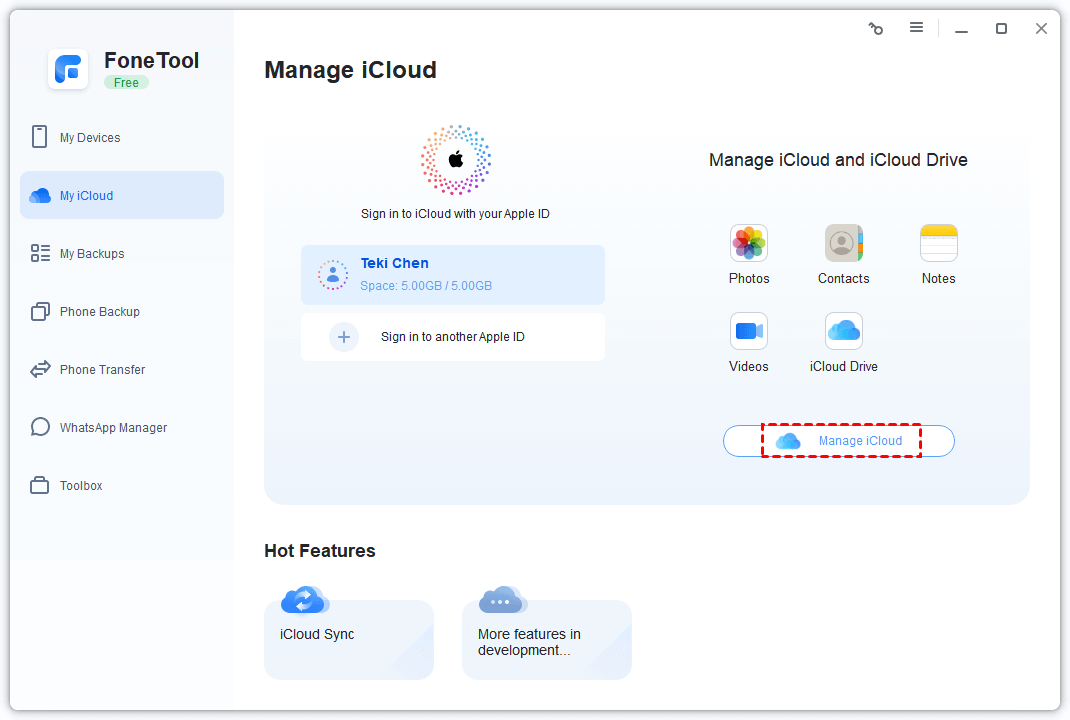
Step 2. Click the Photos tab > Choose the files you want to copy to flash drive > Click the Download button.
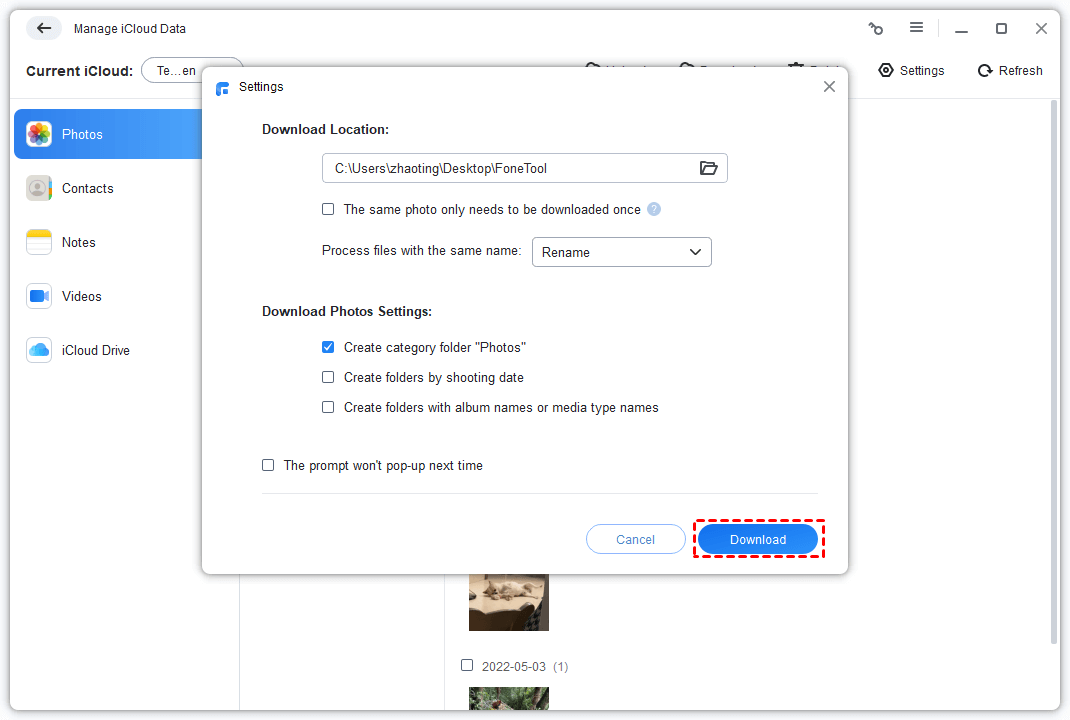
Step 3. Then set your flash drive as the Download Location > And tap Download to confirm your choice.
Option 4. Send Pictures from iPhone to Flash Drive with Photos App
If you're using a Mac, the Photos app allows you to easily transfer photos from your iPhone to a flash drive.
However, it's important to note that the app only supports transferring photos from your Camera Roll to your Mac. Other photo types, such as iCloud-shared photos, iTunes-synced photos, and Live Photos, cannot be exported using this method.
Step 1. Use a USB cable to connect your iPhone to your Mac.
Step 2. Launch the Photos app > Your iPhone will appear under Devices.
Step 3. Select the photos you want to transfer > Then click Import.
Step 4. Once imported, simply drag the photos from the Photos app to your flash drive.
Option 5. Transfer Pictures to Flash Drive from iPhone by Image Capture
For Mac users, here's another handy method. The built-in tool on Mac - Image Capture, allows you to transfer photos from iPhone to computer and then to a flash drive.
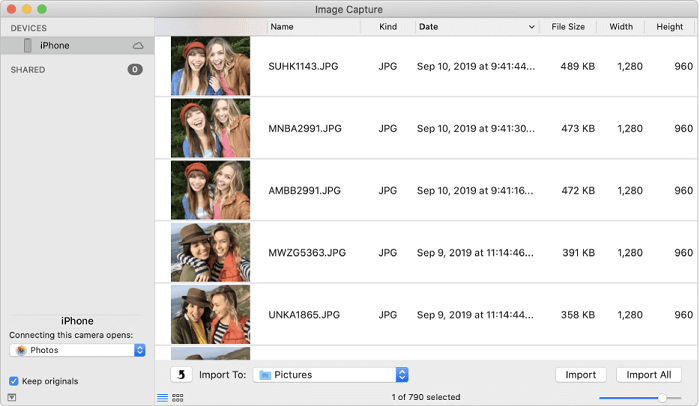
Step 1. Connect your iPhone and flash drive to your Mac > Open Image Capture on the Mac.
Step 2. On the left side, tap your iPhone > Then click the Import To pop-up menu > Choose to save photos to your flash drive.
Step 3. You can tap Import All to transfer all images at once, or click Import to select specific photos as you like.
Conclusion
That’s all about how to transfer photos from iPhone to flash drive. The above article provides multiple ways to transfer photos from iPhone to flash drive, you can choose according to your preference. As a versatile iOS data management tool, FoneTool not only supports you to transfer files to computer or other hard drives, but also helps you manage iCloud data. Download it and find more!
FoneTool - All-in-one iPhone Data Manager
Transfer, backup and manage data on iPhone, iPad and iPod touch in an easy way.
-
 iOS 27 Compatible
 iPhone 17 Supported
Windows 11/10/8/8.1/7
100% Secure

Clara is an editor of FoneTool, she helps people with issues related to the area of iPhone, including iPhone data backup & restore & transfer & erase and so on. Helping people solute to their problems makes her happy. She loves her family and enjoys going to the movies.
Read author info >>