How to Transfer Audio Files from iPhone to PC [4 Easy Ways]
Here are 4 effective ways to transfer audio files from iPhone to Windows PC, suitable for people with different needs.
How Do I Export Audio from iPhone to Computer?
Whether you're a podcaster, musician, or someone who just wants to save important voice memos, transferring audio files from your iPhone to your PC can give you a lot of convenience:
•Back up important recordings
•Edit audio on your PC (using software such as Audacity or Adobe Audition)
•Share large audio files that cannot be sent by email
• Free up iPhone storage space
However, Apple's ecosystem may make it tricky to transfer these audio files directly to a Windows PC. In this guide, we will explore four effective ways to transfer audio files from iPhone to PC without losing audio quality.
| Method | Best For | Pros | Cons |
| File Explorer (USB) | Direct & fast transfer | No Internet needed | Limited folder access |
| iTunes | Synced music & purchased files | Good for Music app files | Outdated & slow |
| iCloud Drive | Automatic sync | Wireless & seamless | Requires iCloud storage |
| Small & quick transfer | Easy for sharing | File size limits |
Way 1. Copy Audio Files from iPhone to PC via File Explorer
If you want to transfer files directly without using extra software, transferring iPhone data directly through the file manager of your Windows PC is the easiest way to do this. Here is how to transfer audio files from iPhone to Windows PC without iTunes.
Step 1. Connect your iPhone to your PC using the data cable, unlock your iPhone, and click "Trust this computer".
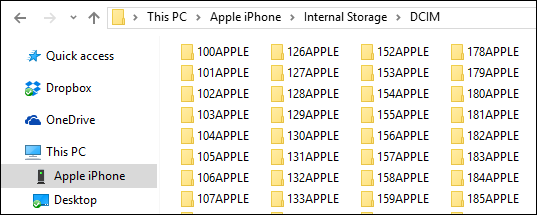
Step 2. Open File Explorer on your PC and select your iPhone folder on this computer.
Step 3. Go to Internal Storage > Select Voice Memo or folder where you store the audio files, and copy and paste the required files to a location on your PC.
-
😃Pros:
•No Internet or cloud storage required
• Quickly transfer large files
😣Cons:
• Manual transmission
Way 2. Transfer Audio Files from iPhone to PC Using iTunes
If your audio files are stored in the music app, you can use iTunes to transfer them directly to your PC.
Step 1. Download and install iTunes, and connect your iPhone and PC with a data cable.
Step 2. Open iTunes and select your iPhone icon.
![]()
Step 3. Click File Sharing and select an application that contains audio files, such as Voice Memos.
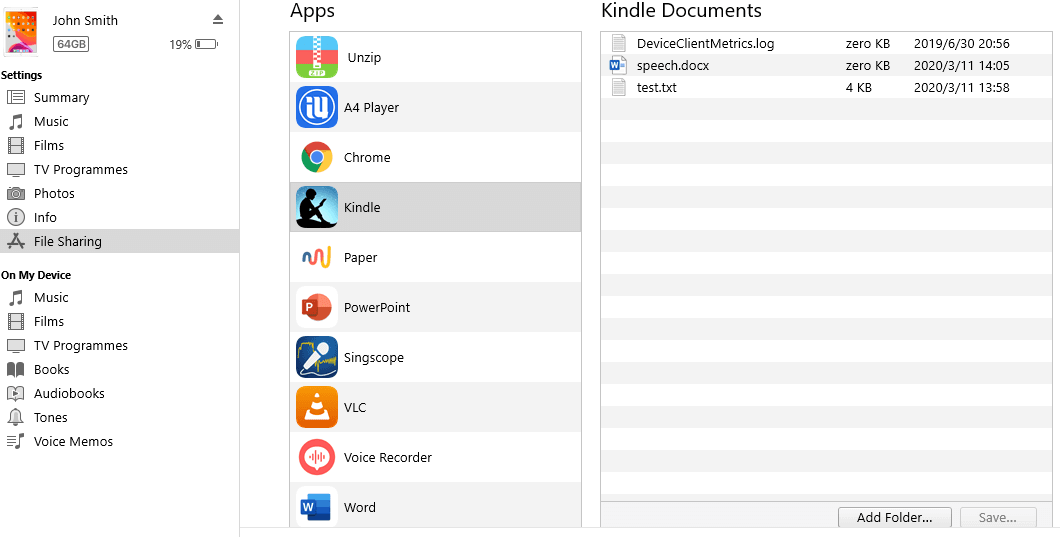
Step 4. Select the audio file you need and click Save to confirm the transfer of audio to your PC.
-
😃Pros:
• Suitable for synchronized music and purchased audio
😣Cons:
•iTunes can be slow and outdated
Way 3. Sync Audio Files from iPhone to PC with iCloud
Don't worry, even if there is no data cable. You can choose cloud services such as iCloud to sync files, including audio, between different devices. Learn how to transfer audio files from iPhone to Windows PC.
Step 1. On your iPhone, go to Settings > [Your Name] > iCloud.
Step 2. Open iCloud Drive and make sure Voice Memos or other audio applications are enabled to sync.

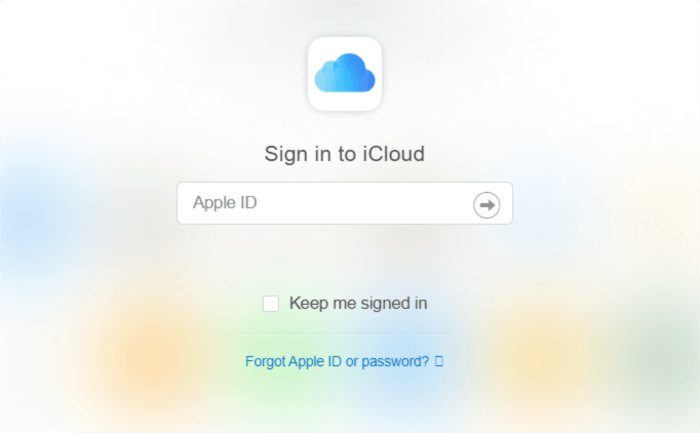
Step 3. Visit iCloud.com from any browser on your computer and log in to your account.
Step 4. Open iCloud Drive or Voice Memos and select the required audio file to download to your Windows PC.
-
😃Pros:
•No cable required
• Automatic sync across devices
😣Cons:
•iCloud free storage is only 5GB, upgrade for transferring more files
Way 4. Send Audio Files from iPhone to PC with Email
If you only need to transfer single or small-sized audio files, email can help you easily move audio files from your iPhone to your computer.
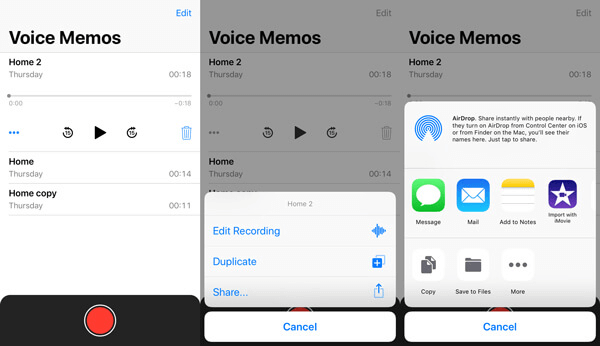
Step 1. Open an app that stores audio files, such as voice memos, on your iPhone.
Step 2. Click the Share button (⬆️ icon) and select Email to upload or send the file.
Step 3. Go to your Windows PC and go to your email account that receives the file, and then download your audio file.
-
😃Pros:
•No cable required
•Easy and fast transmission
😣Cons:
• Email attachments are usually limited to 25MB
Bonus Tip: Backup Audio Files in Advance to Avoid Loss
To avoid losing precious audio files during transfer, you can back them up in advance. The professional iOS data manager FoneTool provides a quick and simple backup method. Now you can back up your iPhone data with one click and then transfer audio to your PC.
- Completely or selectively backup all or part of iPhone data.
- You can back up GBs of data within a few minutes.
- No data or privacy will be leaked during transfer.
- Backup and restore data on iPhone to PC with one click.
- Directly backup iPhone data to external hard drive.
- Supports all models of iPhone/iPad/iPod and the latest iOS versions.
Windows 11/10/8/8.1/7
100% Secure
Step 1. Start FoneTool, connect your iPhone to your PC using the data cable, and then go to Phone Backup > Selective Backup on FoneTool.
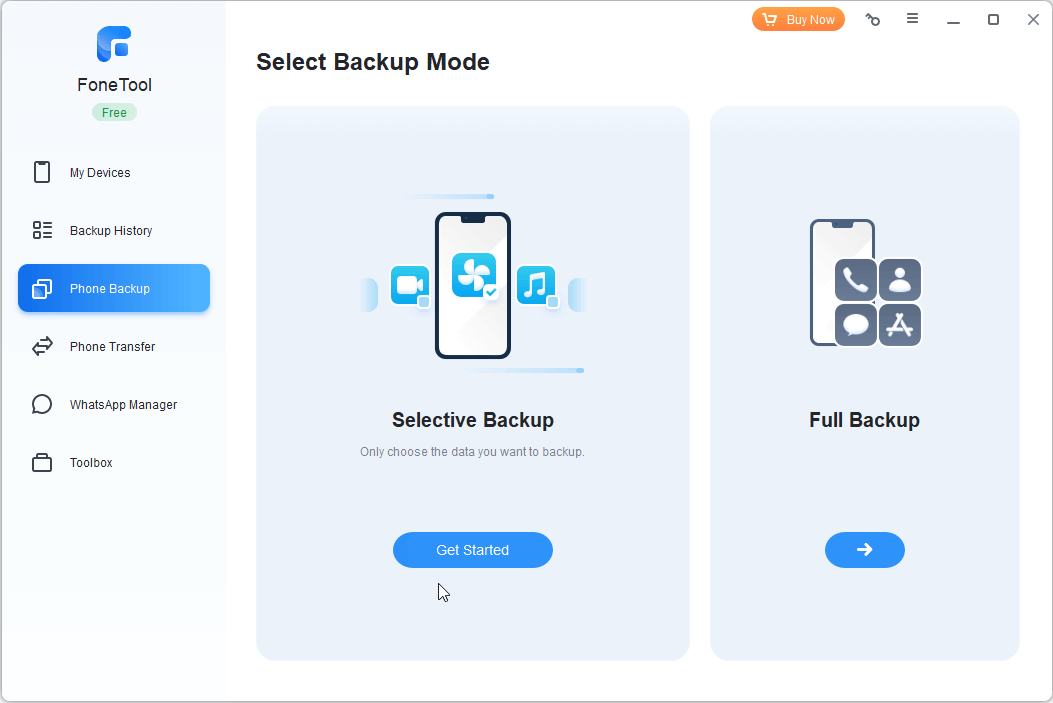
✨Tip: You can also choose Full Backup to back up all iPhone data with one click.
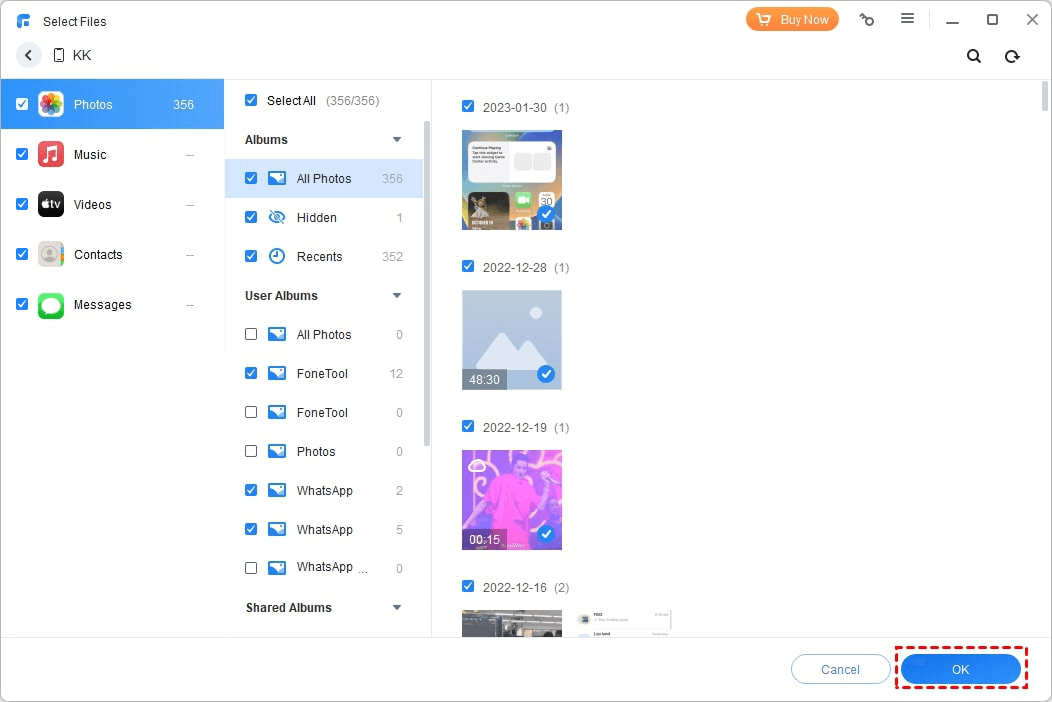
Step 2. Check the data category and file you want to back up and click OK to confirm.
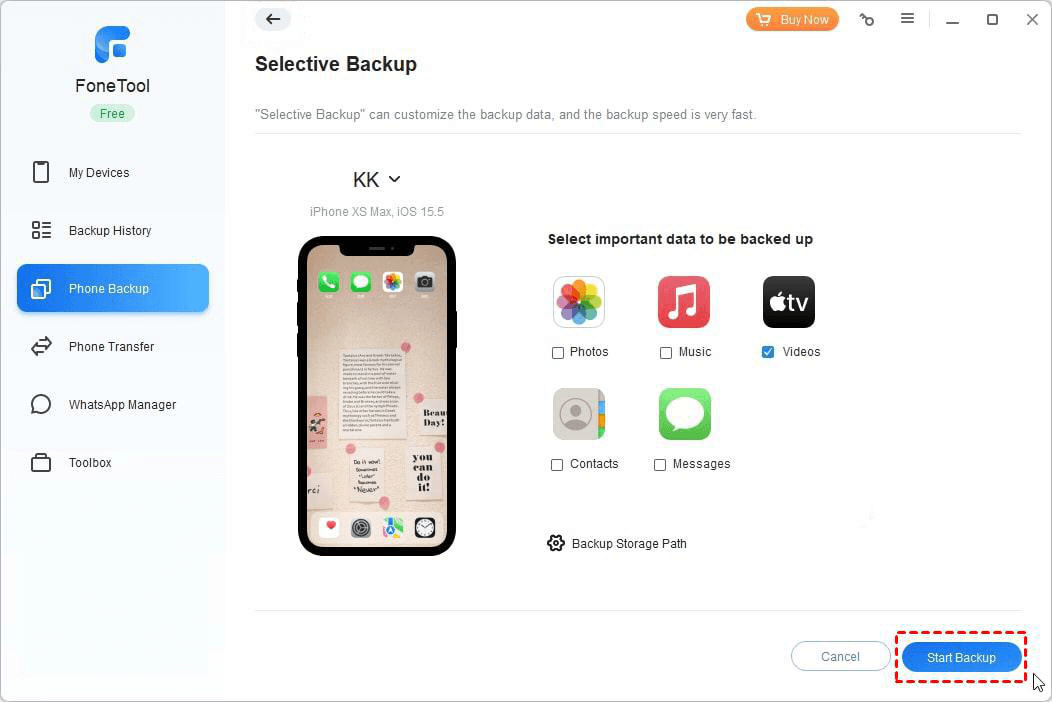
Step 3. If necessary, check Enable backup encryption to protect your privacy, and finally click Start Backup.
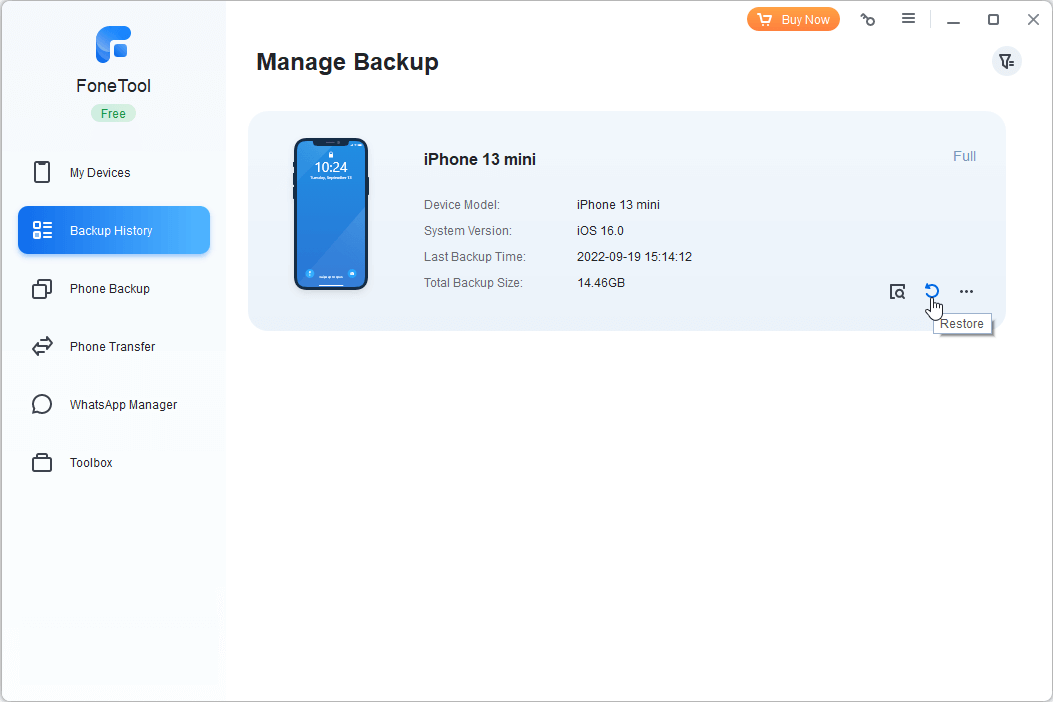
When you need to restore data to your iPhone, go to My Backups, locate your backup project, click Restore and select the data you want to transfer to your iPhone.
Conclusion
Through the 4 methods compiled in the article, you can learn how to transfer audio files from iPhone to PC. Please choose the method that suits your needs based on your actual situation. Don't forget to back up your important iPhone data before transferring files!
If this article is helpful to you, I hope you can share it with your family and friends.
FoneTool - All-in-one iPhone Data Manager
Transfer, backup and manage data on iPhone, iPad and iPod touch in an easy way.
-
 iOS 27 Compatible
 iPhone 17 Supported
Windows 11/10/8/8.1/7
100% Secure
Kelsey is an English editor at FoneTool, passionate about helping users solve tech issues. She specializes in iPhone data management, backup, and recovery. In her free time, she enjoys learning IT skills and spending time with loved ones.
Read author info >>