How to Transfer Photos from USB to iPhone: 6 Ways 2026
When you need to move photos stored on USB to your iPhone, which way will be the best? Find answers in this detailed guide can you can easily get the pictures on iPhone.
Your USB drive may contain a large number of photos used for backup, or your friend might have shared photos with you by saving them to a USB drive. When you need to view, edit, or have instant access to these photos, you may want to transfer them from the USB to your iPhone.
This is the purpose of this article. The following six methods cater to different user needs, whether you prefer to transfer with or without a computer.
Method 1. How to transfer photos from USB to iPhone [Easiest]
How to transfer pictures from a USB stick? For iPhone users, a professional iOS data transfer tool named FoneTool will be your good helper. You just need to connect your USB drive and iPhone to the Windows PC via 2 USB cables, and photos will be easily moved in simple clicks.
Best USB to iPhone Photo Transfer Software
- 46 GB of photos are moved in 39 minutes without limitation (tested).
- Common photo formats are supported (jpg, jpeg, png, bmp, gif, heic, raw, etc.).
- Preview and select photos stored in different folders to transfer at one time.
- Total USB connections ensure the transfer process is safe and stable.
- Various USB drives are supported (HDD, SSD, CD, etc.).
- All iOS devices and versions are OK (iPhone 16/iOS 18).
Windows 11/10/8/8.1/7
100% Secure
How to transfer photos from hard disk to iPhone? Now download and install FoneTool on your PC to explore the handy transfer software.
Step 1. Connect your iPhone and USB drive to your PC via 2 USB cables at the same time > If asked, tap Trust on iPhone to continue.
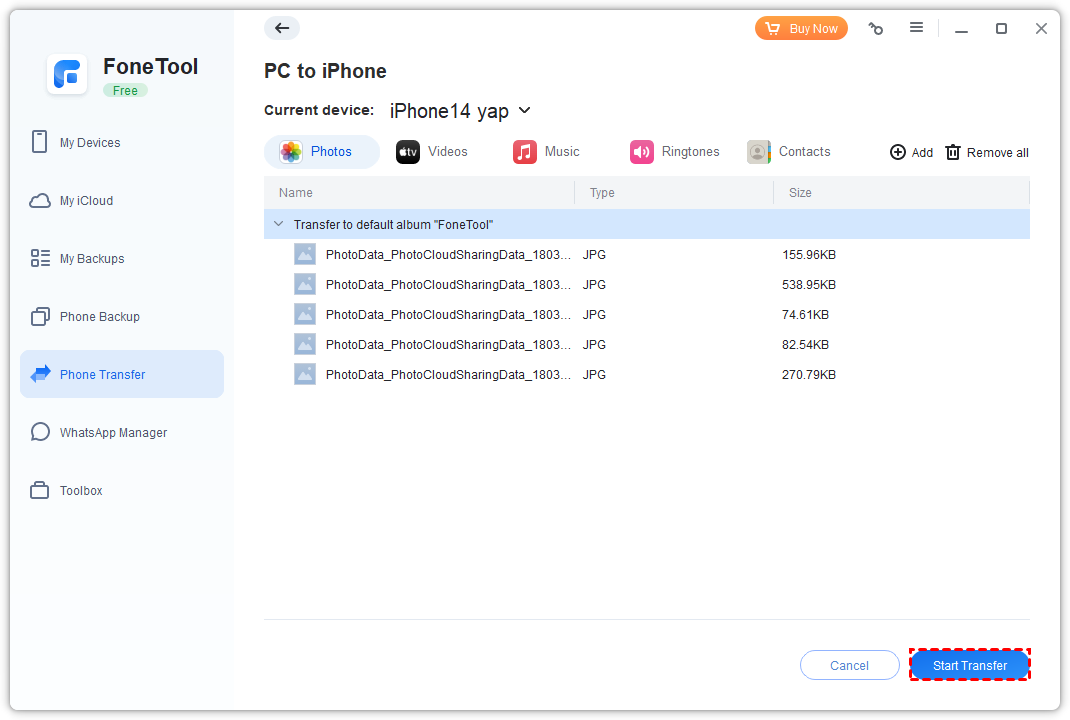
Step 2. Launch FoneTool > Go to Phone Transfer > Choose PC to iPhone and click Get Started.

Step 3. Choose the Photos button > Click the box and choose your wanted files from the USB drive > Click Open from the pop-up window to add them.
Step 4. Confirm your targeted data and click Start Transfer to begin.
- Tip:
- How to transfer photos to hard drive from iPhone? FoneTool also allows you to transfer photos from iPhone to flash drive, USB, etc. Just connect 2 devices to the PC as mentioned above > Go to iPhone to PC and set your USB drive as the storage location from the Transfer Settings > Click Start Transfer and all photos will be moved.
Method 2. How to transfer photos from hard drive to iPhone - File Explorer
Except for FoneTool, using the built-in Windows File Explorer is also useful. With this way, you don’t need to install any third-party software. However, compared to FoneTool, the transfer speed is much slower, and it’s not very convenient to use.
Step 1. Connect your iPhone and USB drive to your computer via 2 reliable USB cables. If necessary, tap Trust on iPhone.
Step 2. Open the File Explorer from the PC > Click This PC and find your hard disk from the list > Click it and locate your targeted photos to copy them.
Step 3. Click your Apple device named XXX iPhone > Go to the Internal Storage folder > Choose DCIM > Find the folder you need or create a new subfolder to save your photos > Paste them to it to finish the transfer.
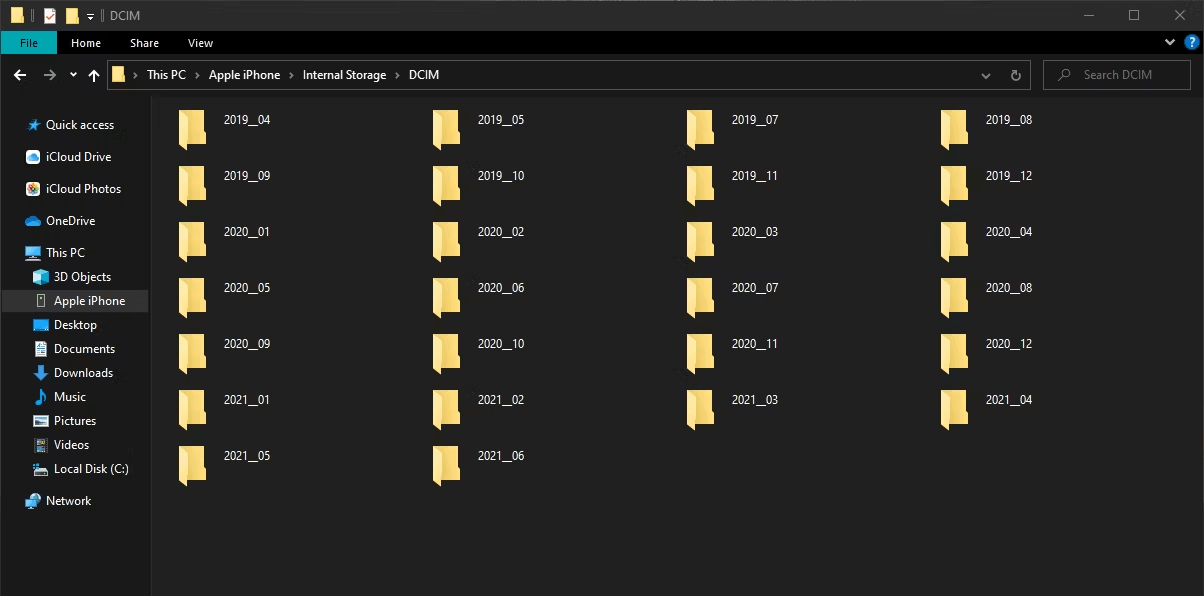
Once the process is complete, you can unplug your iPhone and external hard drive, then go to the Photos app on iPhone to view your photos.
Method 3. How to transfer photos from external drive to iPhone without computer
If your USB flash drive is equipped with a Type C hub, then you can connect it to your iPhone directly without a computer. Of course, you need to install an app that helps you to access photos stored on USB.
The application required for the transfer depends on the USB flash drive you choose. For example, if you are using a SanDisk iXpand flash drive, you need to download and install the iXpand Drive app on your iOS device. However, the transfer steps are similar. And here’s how:
Step 1. Download and install the data transfer app on your iPhone > Connect your USB flash drive to your iPhone directly.
Step 2. Choose to copy files from the USB stick once the options to transfer data appear.
Step 3. Select the type of content you need to move, here is photo > Choose the pictures you want to operate and tap on Copy to iPhone to transfer photos from hard drive to iPhone.
Method 4. How to transfer photos from flash drive to iPhone - iTunes
If the latest version of iTunes is installed on your computer, you can also use it to transfer photos from a USB to your iPhone.
Step 1. Connect your iPhone and USB device to the computer together and iTunes will launch automatically. If not, open it manually.
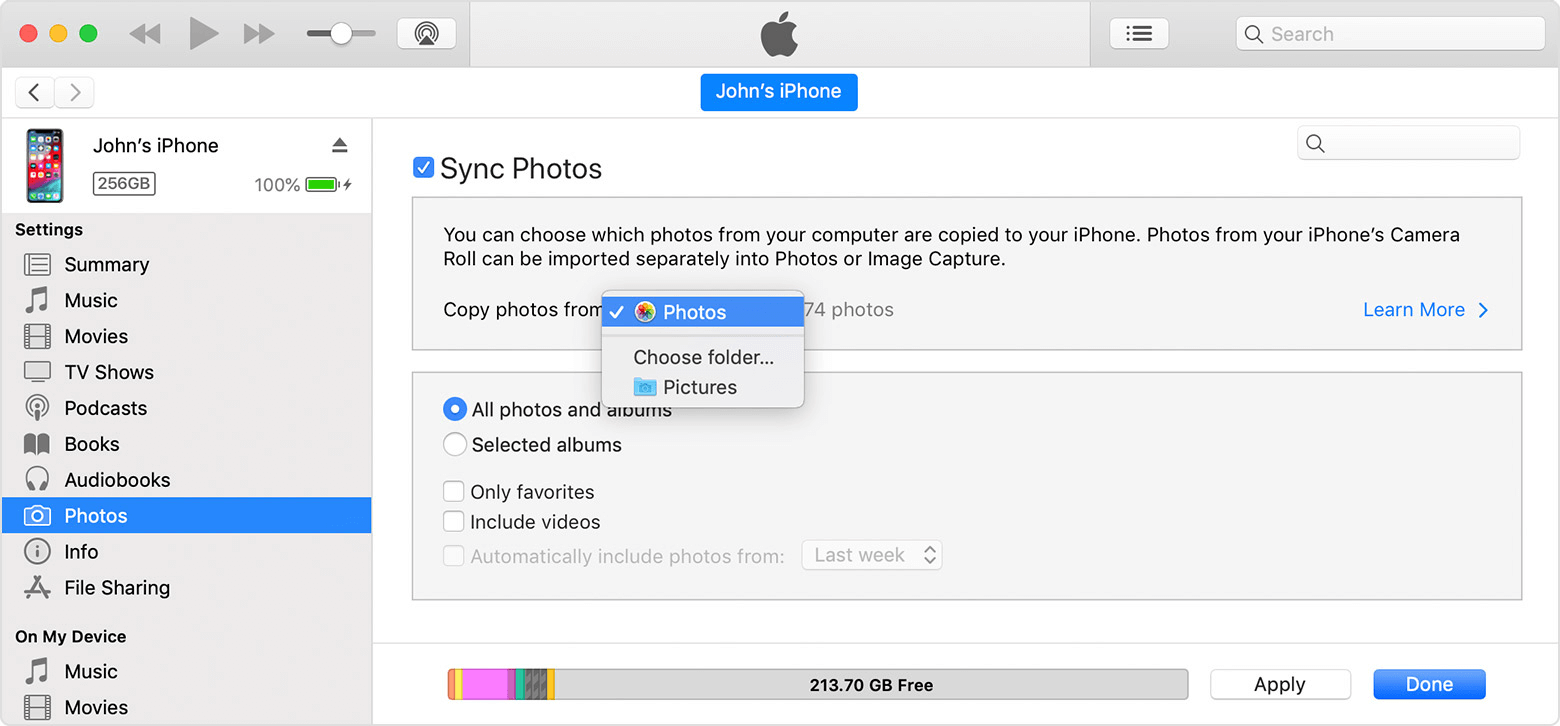
Step 2. Click the Device icon within iTunes > Click Photos, followed by checking the Sync Photos option.

Step 3. Select the photos you want to transfer from your USB by clicking the Copy photos from option > Click Apply to begin the task.
Method 5. How to transfer photos from SSD to iPhone - iCloud
In addition to the methods mentioned above, you can also transfer files through cloud services such as iCloud, Google Drive, Dropbox, and others. Here, we will focus on how to use iCloud to move photos.
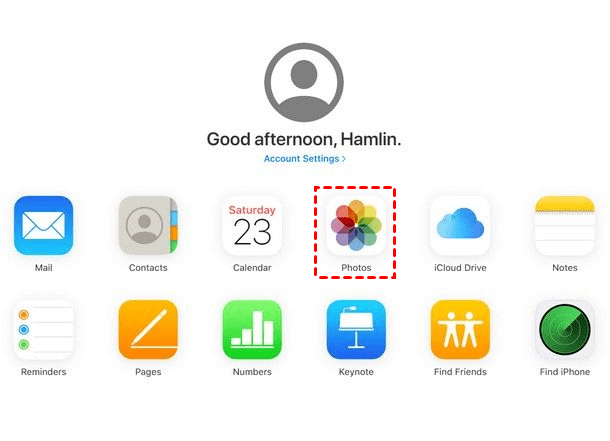
Step 1. Connect your USB drive to the computer and go to https://www.icloud.com/ from the browser > Log in with your Apple ID > Click the photos option > Click the Upload button to choose the photos from your USB device.
- Tip:
- If you need an easier way to upload photos to iCloud, FoneTool is the best answer! It will help you upload 1, 000 photos to iCloud within 40 minutes, while iCloud.com will take 6-8 hours. Just launch FoneTool > Go to My iCloud and log in with your Apple ID > Choose Manage iCloud and go to Photos to start the upload.
Step 2. Once all pictures are uploaded, launch Settings on your iPhone > Tap [your name] > iCloud and turn on the iCloud Photos option. When all the uploaded photos have finished syncing on your iPhone, you will be able to view them directly in the Photos app.
Method 6. How to transfer photos from external hard drive to iPhone - Email
If you only need to transfer a small number of photos, using email is also a good option. Here we take sending a Gmail as an example.
Step 1. Connect your USB drive to the computer > Log in to your Gmail account > Choose to compose an email from the top left corner.
Step 2. Click the Attachment or Attach files option > Choose images saved on your USB from the pop-up window > Click Open to confirm the choice > Click Send.
Now you can view the sent email on your iPhone and download the attachments to your device.
Conclusion
Here you can know how to transfer photos from USB to iPhone with or without computer. You can choose the most suitable one to meet your needs. If you need to transfer a large number of photos, FoneTool mentioned in Method 1 will be a nice choice. If you only need to move a few pictures, connecting iPhone to the USB drive directly or sending an email might be better.
FoneTool - All-in-one iPhone Data Manager
Transfer, backup and manage data on iPhone, iPad and iPod touch in an easy way.
-
 iOS 27 Compatible
 iPhone 17 Supported
Windows 11/10/8/8.1/7
100% Secure

Kathy is an editor of FoneTool, who prefers to help more users address a series of iOS-related problems. She likes traveling and being close to nature makes her relax. She is also keen to engage in social activities and spend much free time with her friends.
Read author info >>