Fix Cellular Update Failed on iPhone - Complete Guide
This guide provides unique solutions for iPhone cellular update failures. Learn hardware checks, carrier reset, iTunes restoration, and FoneTool Repair methods. Includes detailed FAQs and prevention tips.
Are you seeing the frustrating "Cellular Update Failed" alert on your iPhone? This common iOS issue typically appears after a system update or restart and can leave you without call, text, or data services. In this comprehensive guide, we'll explore what causes this error and provide step-by-step solutions to get your iPhone back online.
What Triggers the "Cellular Update Failed" Error?
The "Cellular Update Failed" message typically indicates a malfunction in the iPhone’s cellular modem firmware, which manages communication with network towers. Common triggers include:
- Incomplete iOS update - Corrupted files during the update process can break the cellular software.
- Insufficient storage space - Insufficient space on your iPhone can prevent critical carrier updates from being installed.
- Unstable network - Weak Wi-Fi or cellular signal during the update process can cause verification failure.
- Hardware issues -rarely but possible, like a broken cellular modem. Understanding these reasons helps in applying targeted fixes, which we will explore below.
Effective Solutions to Fix Cellular Update Failed on iPhone
If your iPhone displays this error, don’t panic. Follow these methods sequentially, starting with simple checks before moving to advanced repairs.
Solution1. Basic Troubleshooting Methods
Before attempting advanced solutions, try these simple fixes first:
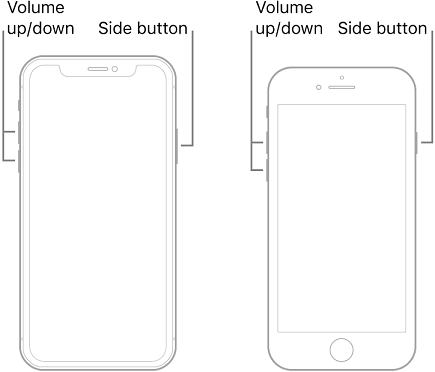
Step 1. Restart Your iPhone
A simple restart can resolve many temporary software glitches. Press and hold the side button along with either volume button, then slide to power off. Wait 30 seconds, then turn your iPhone back on.
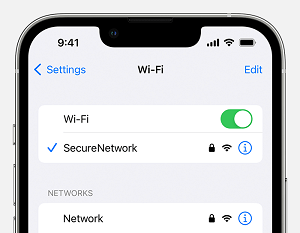
Step 2. Check Network Connection
Ensure you have a stable internet connection, preferably Wi-Fi, as cellular updates often require internet access to complete verification processes. Download times depend on update size and your internet connection speed.
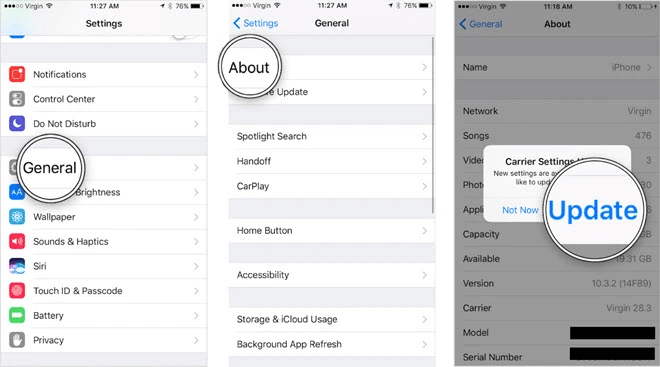
Step 3. Update Carrier Settings
Go to Settings > General > About. If a carrier update is available, you'll see a prompt to install it.
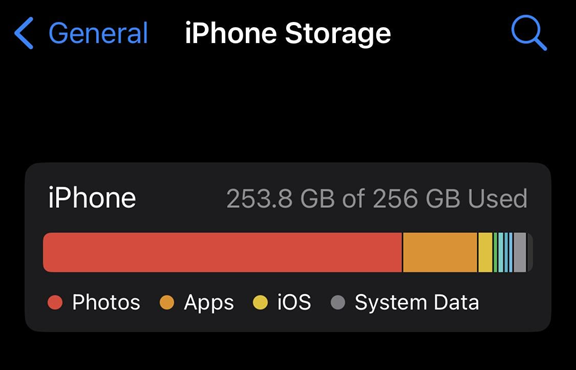
Step 4. Check Storage Space
Your iPhone needs adequate storage to complete updates. Navigate to Settings > General > [Device] Storage to monitor your available space and remove unused apps or content if necessary.
Solution2. Reset Network Settings
If basic methods don't work, resetting network settings can resolve deeper configuration issues:
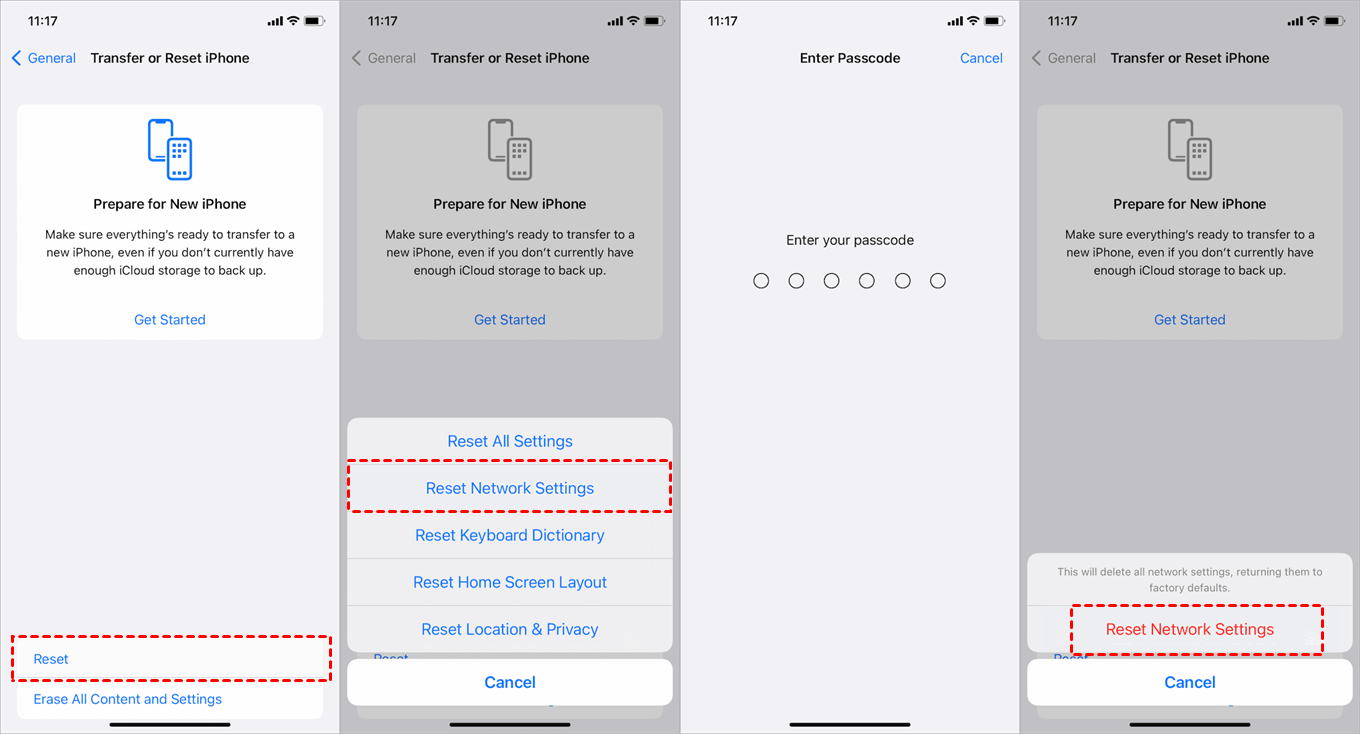
Step 1. Open Settings > General > Transfer or Reset iPhone.
Step 2. Tap Reset, and select Reset Network Settings.
Step 3. Enter your passcode and confirm. This clears saved Wi-Fi passwords and cellular settings without affecting personal data.
Solution 3. Update iOS Version Using a Computer
If wireless methods fail, updating through a computer often succeeds:
Step 1. Connect your iPhone to a computer using a USB cable, open Finder (on Mac) or iTunes (on Windows).
Step 2. Select your device when it appears.
Step 3. Click Check for Update. If an update is available, click Download and Update.
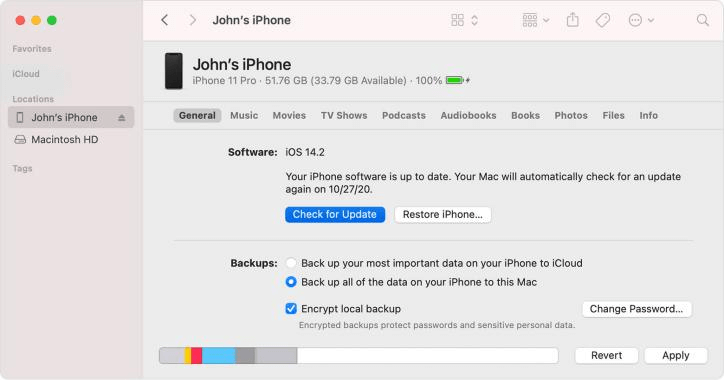
Step 4. Keep your device connected until the process completes.
Solution4. Easily Fix Cellular Issue on iPhone without Data Loss
When standard methods fail, FoneTool Repair provides a comprehensive solution for persistent iOS system issues. This specialized tool can fix over 160 different iOS system problems, including cellular update failures, without requiring technical expertise.
This powerful iOS system repair tool is the best way to fix iOS/iPadOS issues without data loss
Let’s learn how to use FoneTool Repair to fix cellular update failure on iPhone:
Step 1. Download and install FoneTool Repair on a Windows computer.
Step 2. Launch the software and connect your iPhone via USB, and click iOS System Repair.
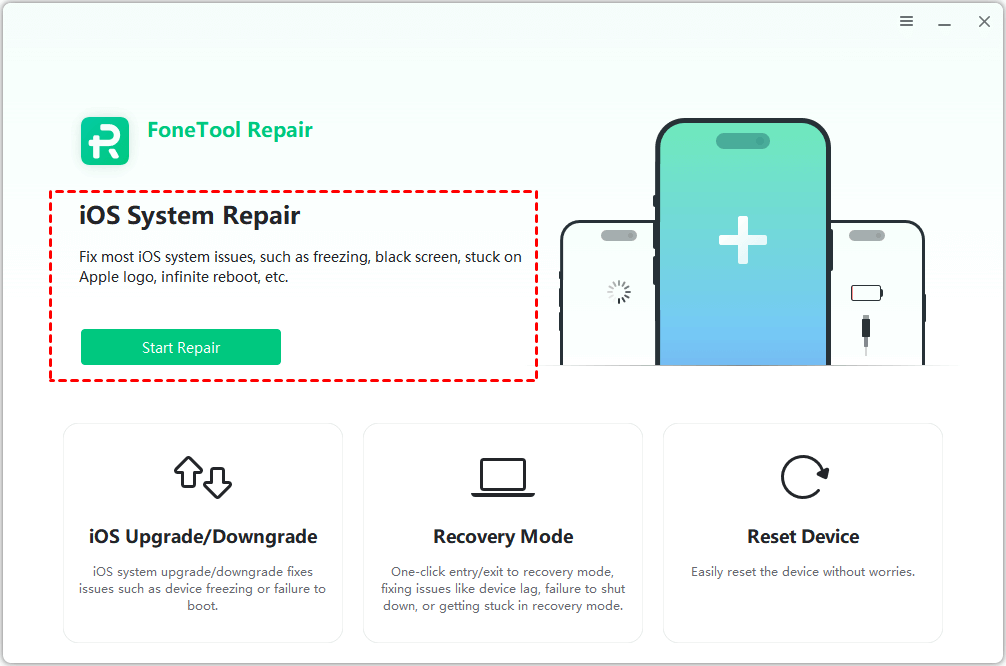
Step 3. Choose Standard Mode (recommended for data retention).

Step 4. The tool will automatically download firmware. Click Start Repair to begin.
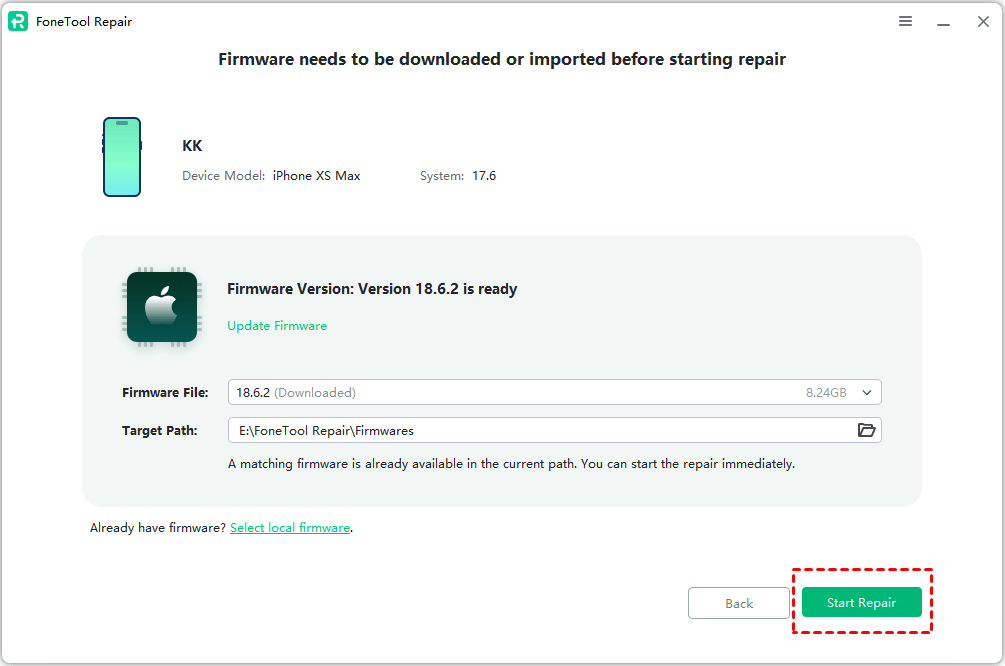
The software will automatically repair the underlying iOS system problems causing the cellular update failure, typically within 10-30 minutes, depending on your internet speed and issue severity.
Frequently Asked Questions on iPhone Cellular Issue
Conclusion
The "Cellular Update Failed" error can disrupt your iPhone’s connectivity, but it’s often resolvable with systematic troubleshooting. Start with simple restarts and network resets, then progress to computer-based updates or specialized tools, such as FoneTool Repair, for more stubborn cases. By following this guide, you can restore your iPhone’s cellular functions quickly and safely. For more iOS solutions, explore the FoneTool website.
Fixes 160+ iOS/iPadOS issues, boot loops, crashes, failed updates, with no data loss.
-
 iOS 26 Compatible
 iPhone 17 Supported
100% Secure
Kelsey is an English editor at FoneTool, passionate about helping users solve tech issues. She specializes in iPhone data management, backup, and recovery. In her free time, she enjoys learning IT skills and spending time with loved ones.
Read author info >>