Recover Photos after Factory Reset with/Without Backup
After you factory reset your mobile phone, you can read this passage to learn how to recover your photos with or without backup, and use FoneTool to selectively back up your photos after recovery.
Can you restore photos after factory reset?
Resetting your cell phone can help clear data and improve device performance, but for users who accidentally reset their phones, recovering photos becomes a significant concern.
This article provides you with 5 methods to recover photos from your phone after factory reset.
-
 For iPhone users, you can recover photos from iTunes, Finder or iCloud backup mentioned in part 2 or recover them without backup using the professional tool mentioned in part 3.
For Android users, you can recover photos through the Google Photos mentioned in part 4.
Recover photos after factory reset with backup on iPhone
Now you can keep on reading to get how to get your iPhone photos back with the previous backup.
Method 1. Retrieve photos after factory reset with iTunes backup on Windows
Restoring iPhone from the previous iTunes backup can be an available approach for Windows PC.
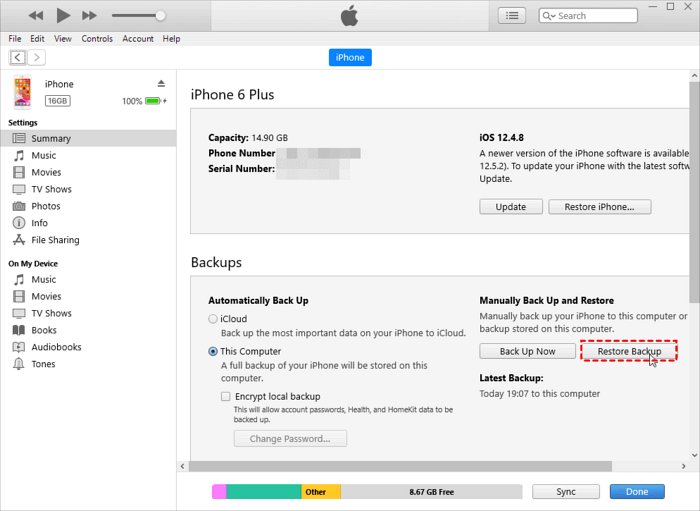
Step 1. Run the latest iTunes on the computer and connect your iPhone to your PC via a USB cable. Click the iPhone icon in the top left corner.
Step 2. Go to Summary, and tap the Restore Backup button under the Backups section. Then select the targeted backup and click Restore in the pop-up window to finish the process.
Method 2. Retrieve photos after factory reset with Finder backup on Mac
For Mac users, using Finder to back up an iPhone is a more common choice. You can follow the instructions below to get your iPhone photos.
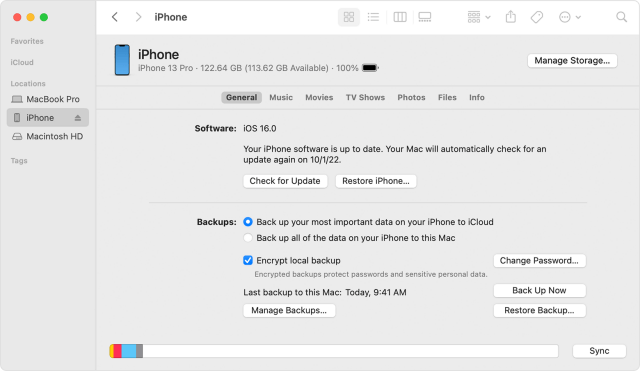
Step 1. Open your Mac and connect your iPhone to it > Launch the latest version of Finder.
Step 2. Click the iPhone in the left panel and then click Restore Backup > Choose an iPhone backup you want to restore and click the Restore button to accomplish the action.
Method 3. Get photos back after factory reset with iCloud backup
After the factory reset, if you have already backed up your iPhone with iCloud, then you can follow the steps below to restore your photos.
Step 1. Turn on your iPhone, then a Hello screen will display on your device.
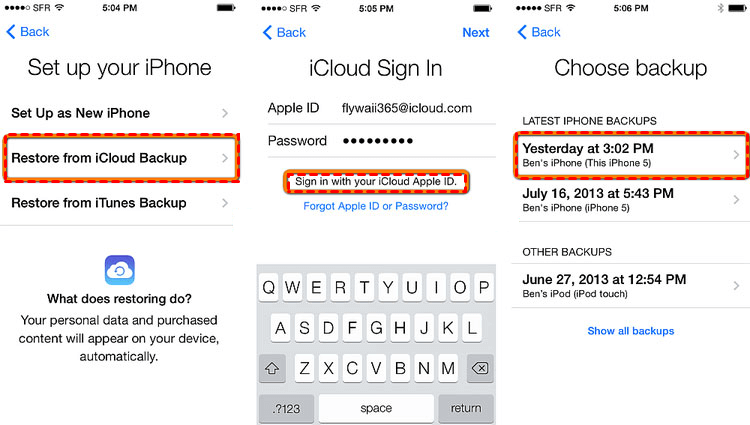
Step 2. Follow the on-screen instructions to set up your iPhone and connect your iPhone to a Wi-Fi network. And you will receive a reminder to ask if you want to restore data, then choose Restore from iCloud Backup on the App & Data screen.
Step 3. Sign in to iCloud account with your Apple ID and select the latest backup from the list to recover the iPhone photos.
Recover photos after factory reset on iPhone without backup on Windows
If you haven’t backed up your iPhone previously, then FoneTool can be your ideal choice to finish the task without backup.
With this useful tool, you can selectively preview and recover lost or deleted iPhone data within only 3 steps. In addition to photos, you can also recover over a dozen types of data, including videos, contacts, Safari Bookmarks, call history, etc.
Now you can follow the instructions below to get how to recover photos after factory reset without backup.
Step 1. Download FoneTool on your Windows PC > Connect your iPhone to the Windows PC > If asks, click Trust to let the computer access your data.
Step 2. Launch FoneTool > Go to Toolbox > Choose iOS Data Recovery.
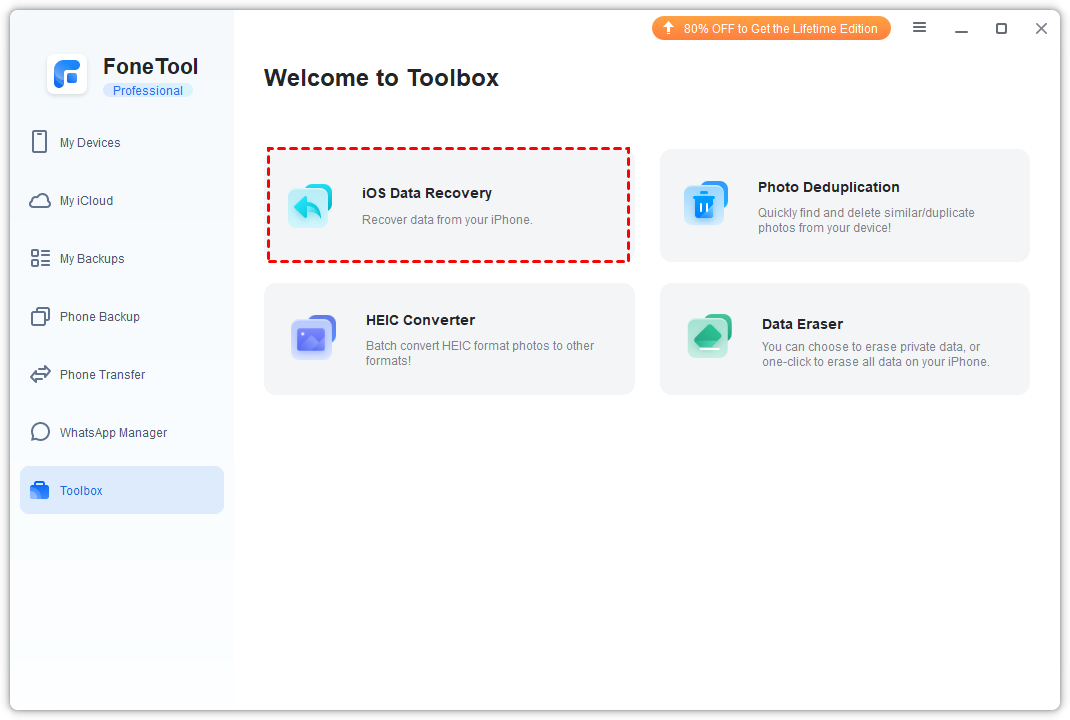
Step 3. Click the Photos icon > Tap on Start Scan to continue.
Step 4. Choose the photos you need and click Recover to PC to retrieve them to your computer.
Now you can know why FoneTool is the best app to recover photos after factory reset from the easy steps.
Retrieve photos after factory reset on Android device
Google Photos is indeed a popular choice for backing up photos on Android. If you've previously used Google Photos to back up your data, you can easily recover them after a factory reset. Here's how:
Step 1. Open the Google Photos app on your Android device and sign in with the Google account where your photos are stored.
Step 2. Tap on the Photos tab at the bottom of the screen > Locate and select the photos you wish to restore > Tap on the three-dot menu icon in the top-right corner > From the dropdown menu, select Save to device and wait for the selected photos to be downloaded to your device.
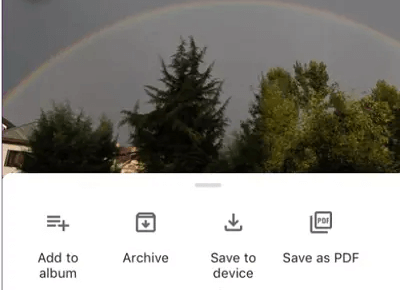
Once the download is complete, you can find the recovered photos in your phone's Gallery app.
The Best way to selectively back up iPhone photos
To avoid sudden data loss, regularly making an iPhone backup can be a wise choice. For Windows users, iTunes and iCloud are the most commonly used tools for backing up iPhone photos.
However, iTunes frequently encounters errors such as backup not being listed in iTunes, which can interrupt your usage. iCloud's wireless transfer speed entirely depends on network quality, which may require a significant amount of time to back up your iPhone.
Additionally, iCloud only offers 5 GB of storage for free users, which is often insufficient for heavy iPhone users. Then FoneTool can also give you an ideal way to back up your iPhone data.
-
Preview and selective backup: FoneTool allows you to fully back up iPhone like iTunes/iCloud or preview the files to choose which you want to selectively back up on iPhone.
Super-fast backup speed: You can quickly transfer lots of large files from iPhone to PC. For example, 1000 photos can be moved in minutes.
No file size/number limitation: The number and size of files you can and back up only depend on the capacity of your target device (PC, iPad, or external drive). FoneTool doesn’t have any limitations.
Wide compatibility: Unlike the frequent errors in iTunes, FoneTool can operate stably on various iOS devices, including iPhone 4 to iPhone 16, as well as the latest iOS 18/17.
Now you can download FoneTool on your Windows PC and learn how to back up iPhone photos easily.
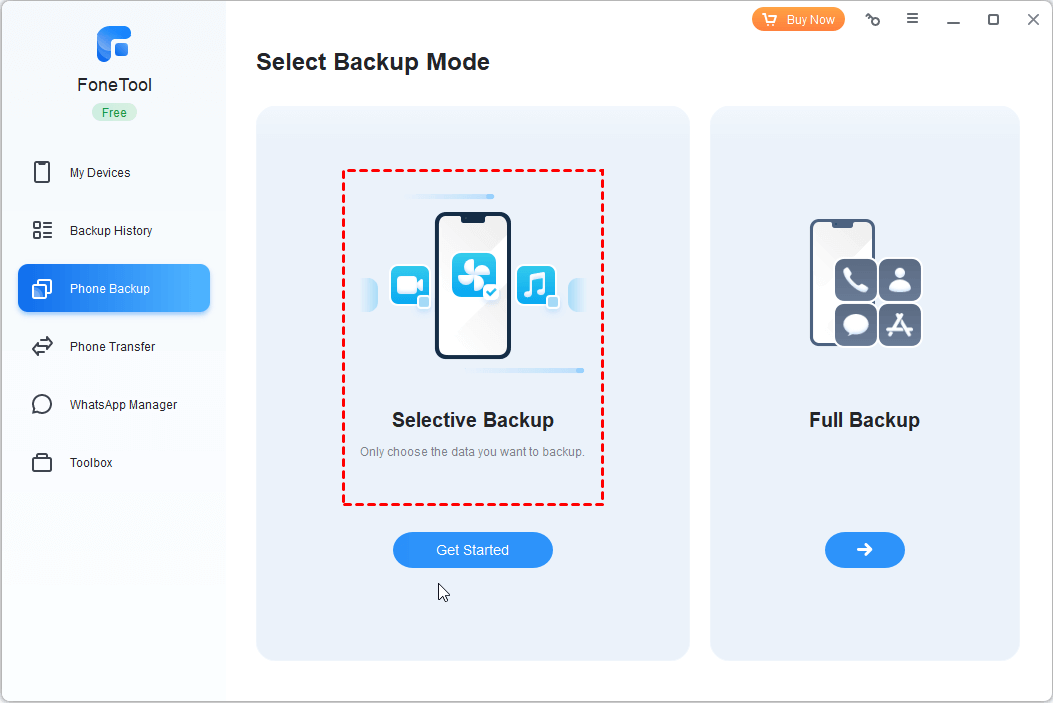
Step 1. Connect your iPhone to the computer with a USB cable > Launch FoneTool on your PC and click Phone Backup > Selective Backup > Get Started.
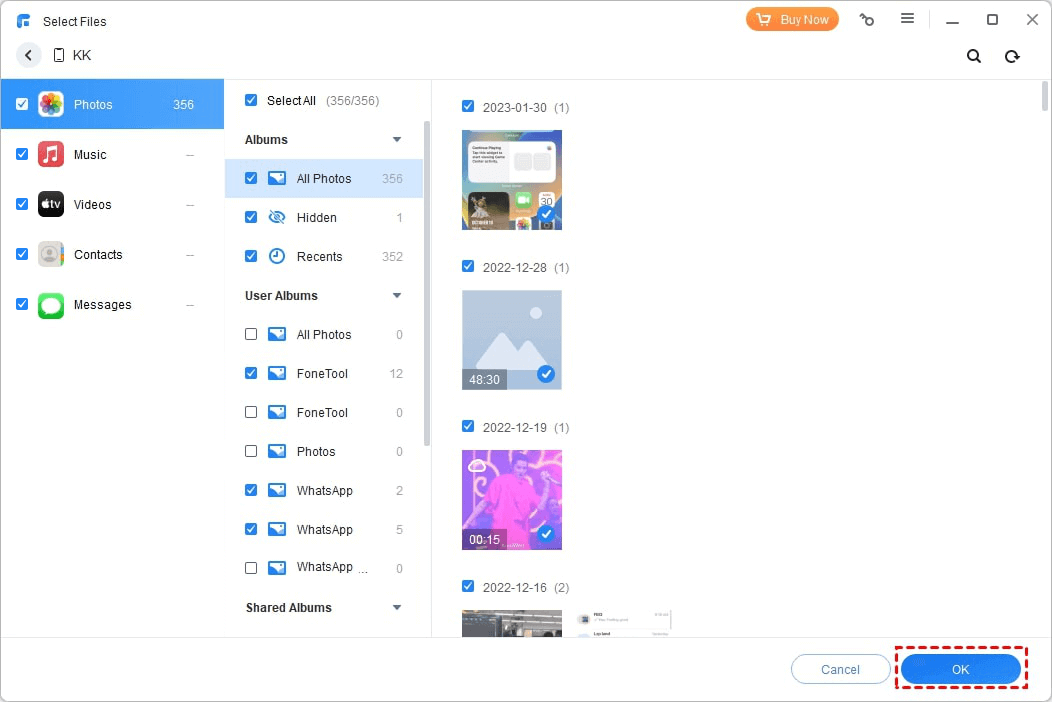
Step 2. Check the Photos icon > If you only need to back up specific photos, you can click on Photos to select them > Then click OK to continue.
Step 3. Click Backup Storage Path to specify a location to save the backup > Click Start Backup to start.
![]()
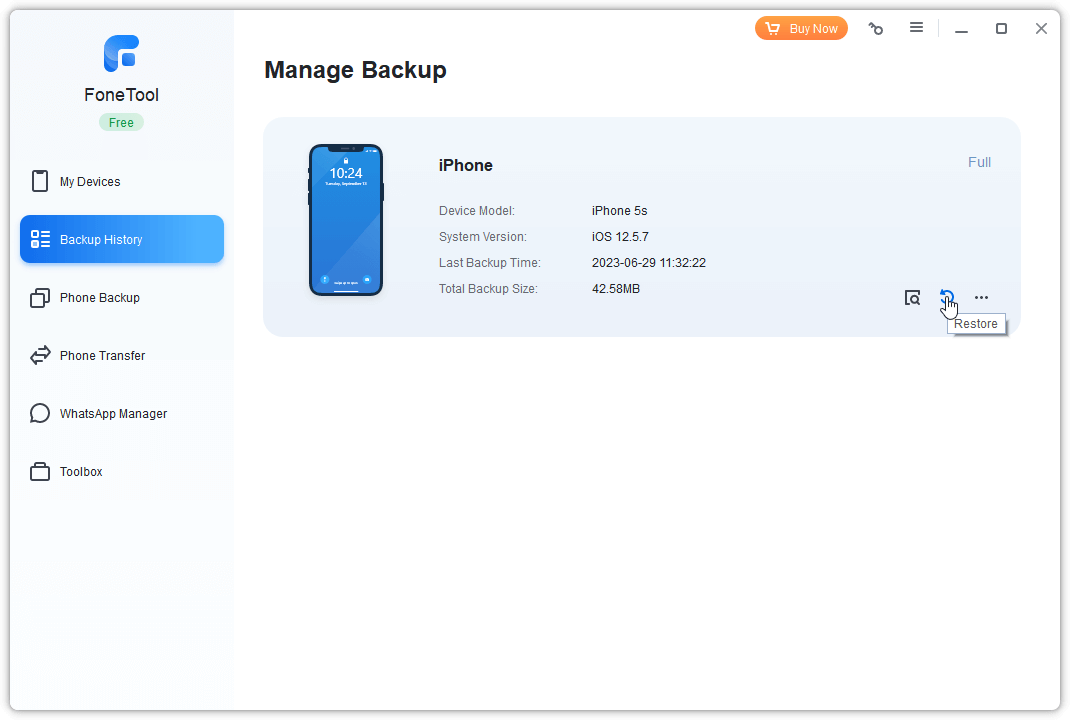
Once the process is complete, you can go to My Backups and click View dot to check if your photos are backed up or click Restore dot to restore them to your iPhone.
Conclusion
Now you can know how to recover photos after factory reset on iPhone or Android device. You can restore your iPhone photos from iTunes, Finder or iCloud backup. Or use FoneTool to make it without backup. And use Google Photos to recover your photos on Android.
If you need to selectively back up iPhone photos on Windows, then FoneTool's phone backup feature can also give you more excellent experience than iTunes/iCloud. With its rich feature, you can also move iTunes music to iPod Touch.
FoneTool - All-in-one iPhone Data Manager
Transfer, backup and manage data on iPhone, iPad and iPod touch in an easy way.
-
 iOS 27 Compatible
 iPhone 17 Supported
Windows 11/10/8/8.1/7
100% Secure

Kathy is an editor of FoneTool, who prefers to help more users address a series of iOS-related problems. She likes traveling and being close to nature makes her relax. She is also keen to engage in social activities and spend much free time with her friends.
Read author info >>